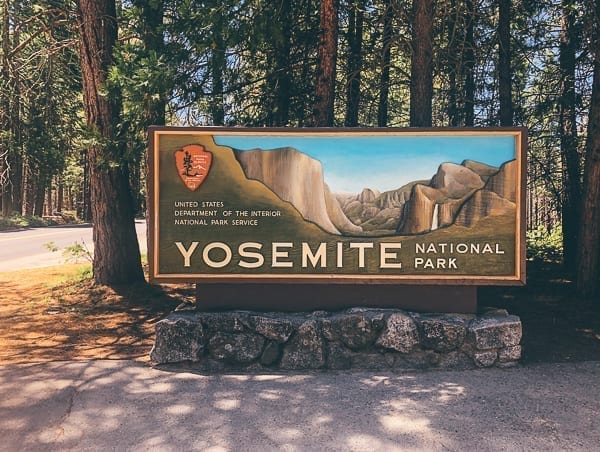
In June, my boyfriend and I spent 3 days in Yosemite National Park, and now we have a brand new Woks of Life camping/travel post for you all!
Yosemite National Park, in California’s Sierra Nevada mountains, is one of the most well-known national parks in the United States, with over 4 million visitors each year.
Yosemite is popular for good reason. From thundering waterfalls and rainbows to beautiful lakes, meadows, granite cliffs, and sequoia trees, Yosemite is a haven for backpackers, nature lovers, rock climbers, and casual tourists from around the world.
Yosemite Memories
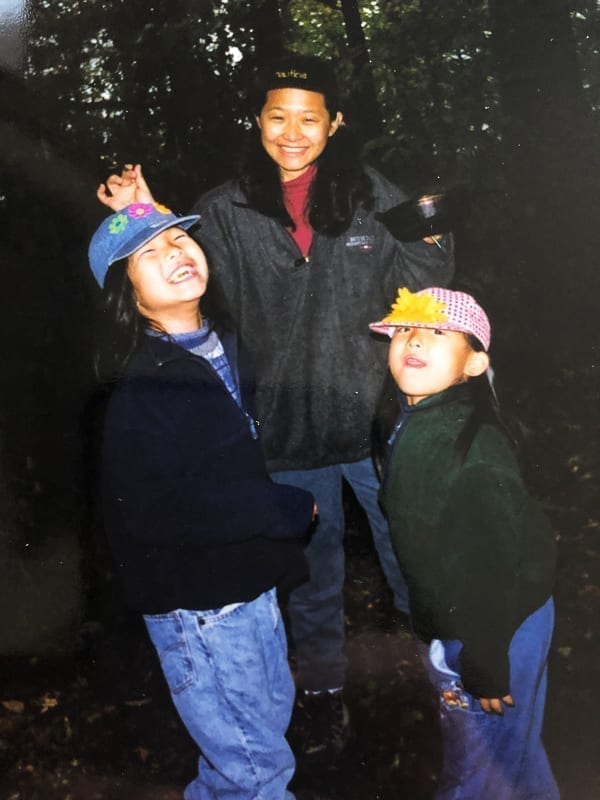
Yosemite also happens to be one of the first national parks my parents took my sister and me to, sparking a love of camping and the outdoors that has never worn off.
(Exhibit A: Woks-documented trips to Joshua Tree, Sequoia, Glacier Bay/Alaska, Bryce Canyon, Capitol Reef, Zion, Grand Canyon, Olympic, Big Bend, and Yellowstone/Grand Teton. The list will get bigger, I expect!)
Exhibit B:
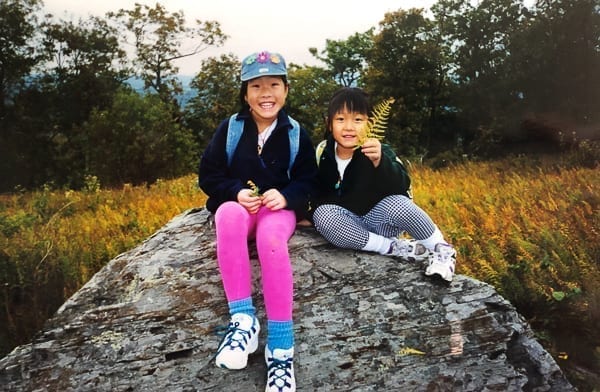
Me and Kaitlin on an early camping trip looking young, dorky, and very happy.We were usually happiest in the evening, having made camp and in the process of making dinner.
I was about 8 or 9 years old on my first visit to Yosemite. I have vague memories of walking through cathedrals of towering redwood and Sequoia trees, wrapping up in fleece pullovers and hats (we went in the fall), and a prized souvenir t-shirt with the park’s key sights printed on it, which I faithfully wore all through elementary school.
20 years, a family RV acquisition, and way too much online-camping-gear-shopping later, we’ve collectively been to many more parks, but I’ve always wanted to go back to Yosemite, particularly in spring and early summer, when the waterfalls are at their peak levels of awesomeness.
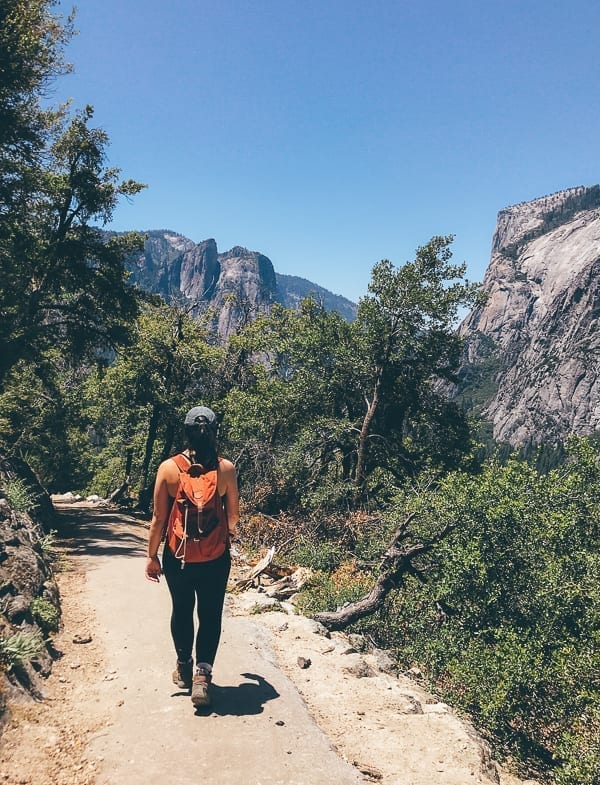
A few weeks ago, in the third week of June, Justin and I went to Yosemite and spent 3 days hiking, camping, and cooking. I’ve come out of the experience with:
Fun photos to share (feel free to scroll past all the writing and just look at the pretty pictures. I won’t be offended.)
A full itinerary for what to do in Yosemite if you have 3 days
Tips on how to avoid the notorious crowds in Yosemite Valley every summer
3 Days in Yosemite: Things to Do
Day 1: A Grand Tour of Yosemite Valley
Yosemite Valley has the highest concentration of the park’s iconic “wow’s” that you’ve probably heard of (Half Dome, El Capitan, and Yosemite Falls, to name a few). For that reason, this 7 square miles of pure majestic scenery is the most congested area of the park, especially during the summer.
That’s why I suggest you do Yosemite Valley sights on Day 1, with a key provision:
Get to Yosemite early. I’m talkin’ like, 6:00 AM early. As early as you can. ROLL OUT OF BED AND CHUG COFFEE LIKE YOU MEAN IT.
OR BETTER YET, SKIP THE COFFEE BECAUSE COFFEE WASTES TIME.
Ahem.
A great way to achieve this is to camp or stay in a hotel/Airbnb close to the park the night before, and head into the park in the early morning hours.
We stayed in an Airbnb in Sonora on the day we flew into San Francisco, woke up at 5 AM, packed the cooler and were in the car within 15 minutes to drive to the park.
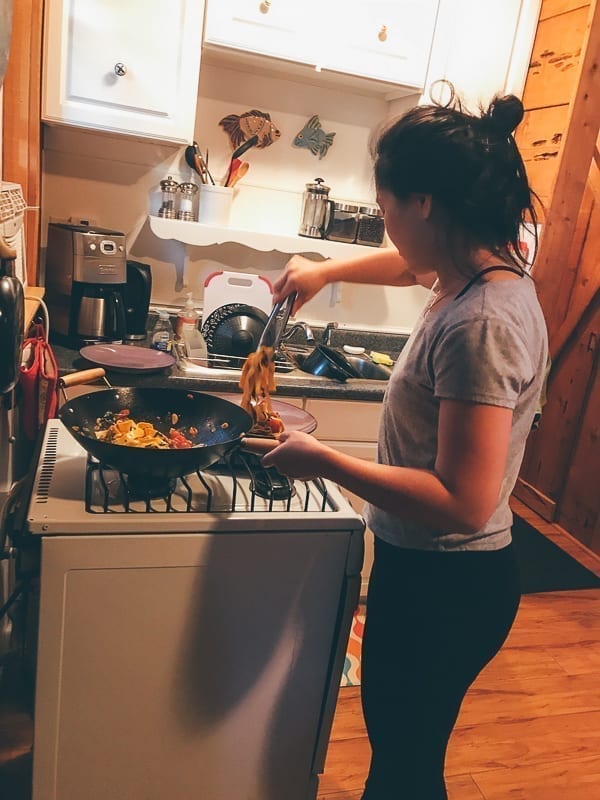
Said Airbnb was adorable. And the perfect place to spend the night after a harried travel day.They even had a wok! Used it to make pappardelle with tomatoes, basil and Italian sausage. ;)
If you were lucky enough to score campground reservations, you may also have been able to camp right in the park on the night before your first full day!
If you’re coming from the Bay Area (easiest major airport to Yosemite is SFO), you’ll probably enter the park through the Big Oak Flat Entrance.
Getting to the park early will prevent you from having to sit in a line of traffic at the entrance, let alone deal with parking headaches and congestion in the valley. Plus, if you only have 3 days in Yosemite, you’ll want to get the most out of your time there!
The road through Yosemite Valley is essentially a one-way loop, with Southside Drive heading east into the valley, and Northside Drive heading west. El Capitan Drive cuts through the loop, allowing you bypass congestion around Yosemite Village to get from Southside Drive to Northside drive (see map below).
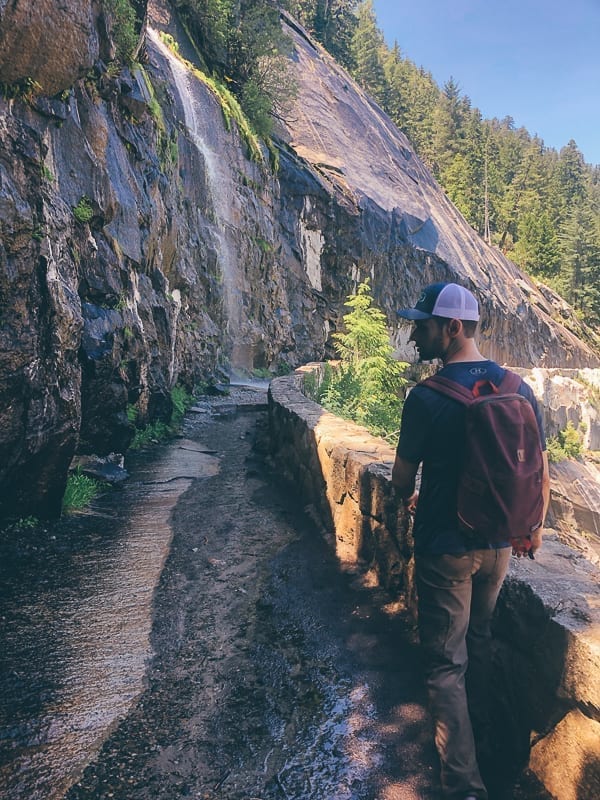
Bridalveil Falls:
About 35 minutes from Big Oak Flat (after much scenic driving), you’ll reach the aptly named Bridalveil Fall, one of the most prominent waterfalls in Yosemite Valley. In spring and early summer, it’ll really be flowing, so you’ll definitely notice it from the road!
There’s a trailhead with a parking lot––park there and take 30 minutes for a 1-mile roundtrip walk to the base of the falls. Wear a waterproof jacket––the mist coming off the falls in spring/early summer is no joke!
Yosemite Falls
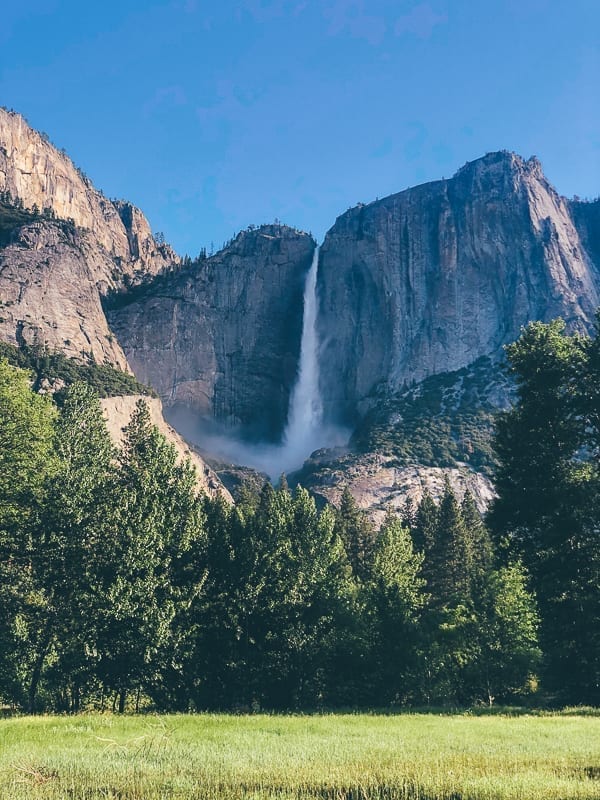
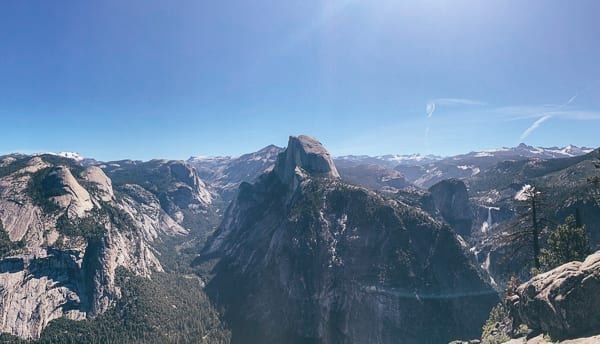
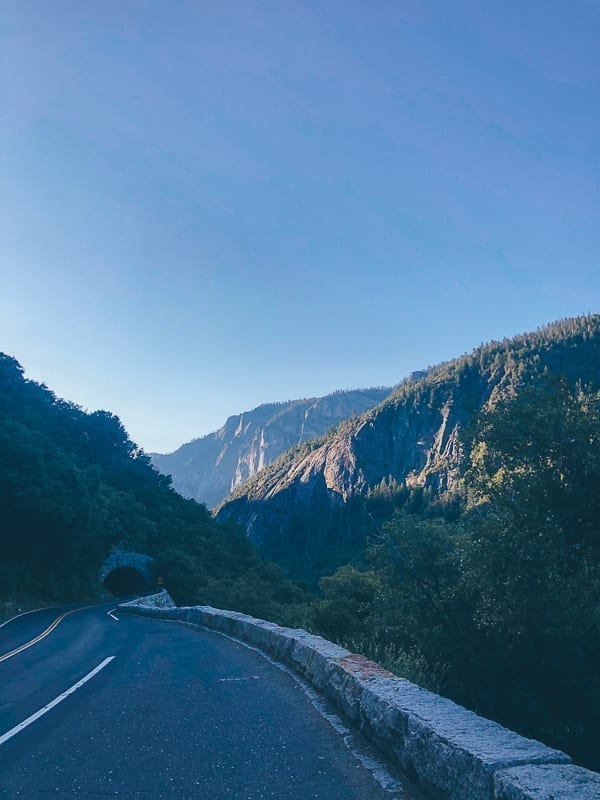
Continue on into the valley, and you’ll soon catch a glimpse of Yosemite Falls, right from the road. It’s nearly 2,500 feet high, the tallest waterfall in North America and nearly twice as tall as the Empire State Building. It’s so big, you can see it from many vantage points in the park, and the water cascading over the rocks sounds like distant thunder.
The featured image of this post? I snapped it right from the road on Southside Drive (OH, btw definitely download a map of the park before going, as you’ll be in the park too early for the rangers with maps to be at the entrance. The official park map and the Yosemite Valley map are both good to have).
Lower Yosemite Falls
To get closer to the falls, continue driving a few minutes. Park in the Yosemite Village parking lot, and walk about 20 minutes to the Lower Yosemite Falls trailhead.
You may also be able to park closer, along Northside drive. If you’re there early enough, there won’t be many cars and it will seem weird to park on the road, but believe me, by 9 to 10 AM, the roads will be clogged with parked cars!
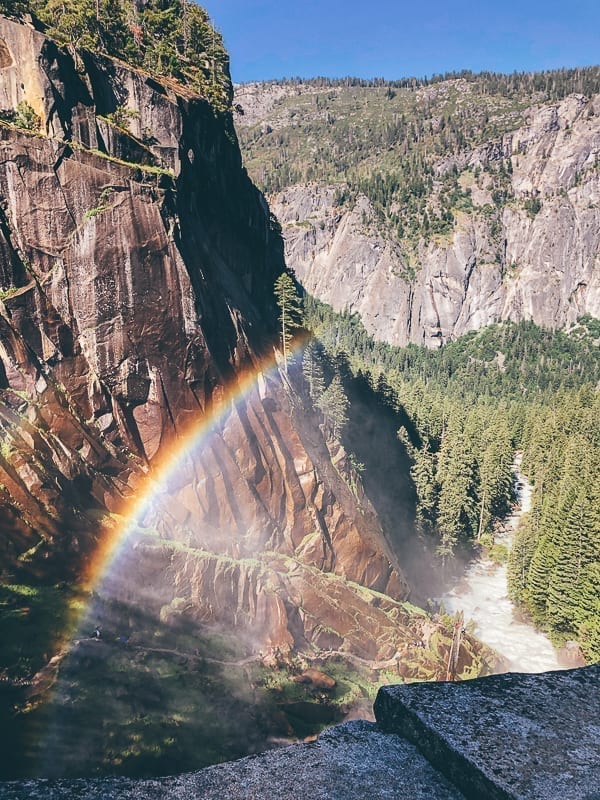
The Lower Yosemite Falls Trail is a short half mile loop, making it one of the biggest bangs for your buck in the park.
You may even catch a rainbow (or two):
Oh, and remember my suggestion about that waterproof jacket!
Getting thoroughly sprayed by Lower Yosemite Falls.Look for Climbers on El Capitan
Continue along Northside Drive and look for climbers on El Capitan.
This 3000 ft. granite monolith was made even MORE famous recently by rock climber Alex Honnold when he climbed it without a rope in less than 4 hours. The insanity of that feat is made more clear when you see the thing in person.
You can get a glimpse of climbers on the mountain right from the road, and many visitors just park their cars and get out binoculars to watch. You’ll need the binoculars––they look tiny up there. There was a helicopter rescue in progress on one of our 3 days in Yosemite, and even the helicopter looked small.
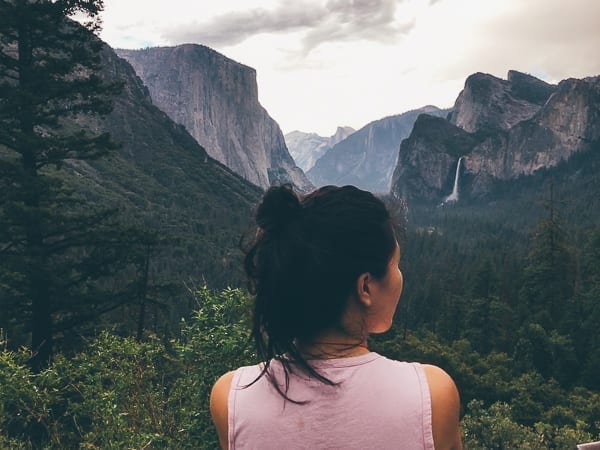
See Tunnel View
Drive to the Tunnel View scenic viewpoint, where you’ll get that most iconic of Yosemite views––El Capitan, Yosemite Falls, and Half Dome in the distance.
This parking lot will be pretty congested by mid to late morning, but it’s a quick stop for most people, so the turnover in the lot will be high. A spot should open up!
If you’d like to do a short hike and enjoy the view without standing elbow-to-elbow with other selfie-stick-brandishing tourists, leave your car at Tunnel View and hike the Artist Point trail. It’s a 2-mile roundtrip hike with 500 feet of elevation gain––not a bad price to pay for that view.
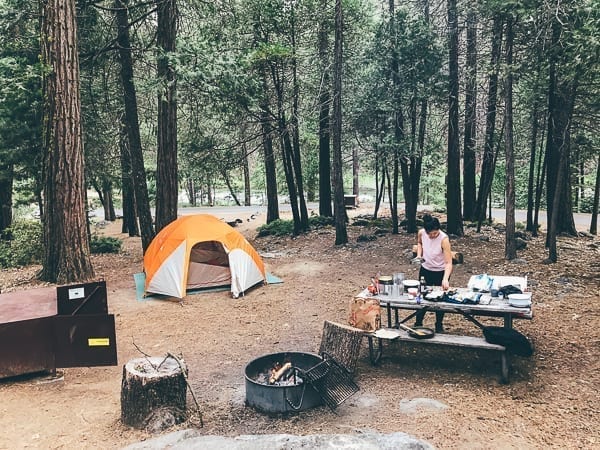
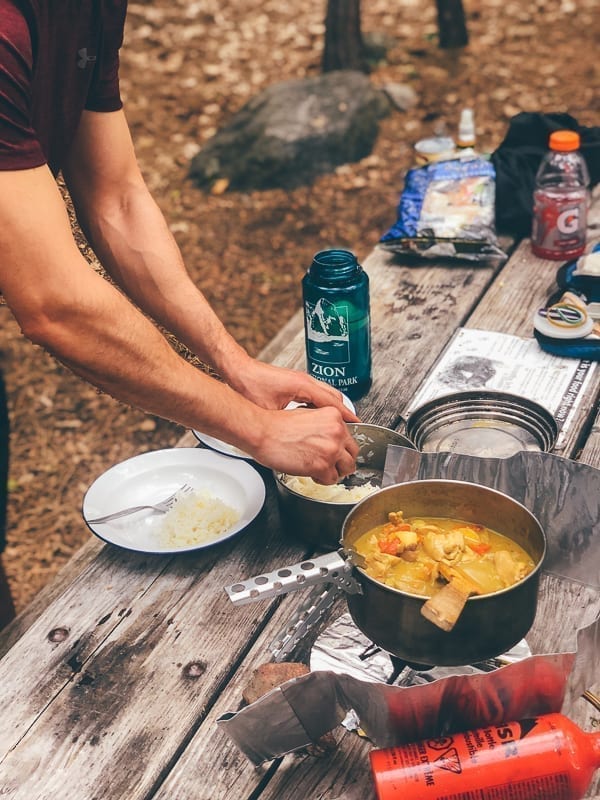
After all that, enjoy an afternoon snack, rest at the Majestic Yosemite Hotel, or head to your campsite for an afternoon of relaxation away from the crowds.
We ended up back in our campground to make a dinner of chicken curry with rice. MMM.
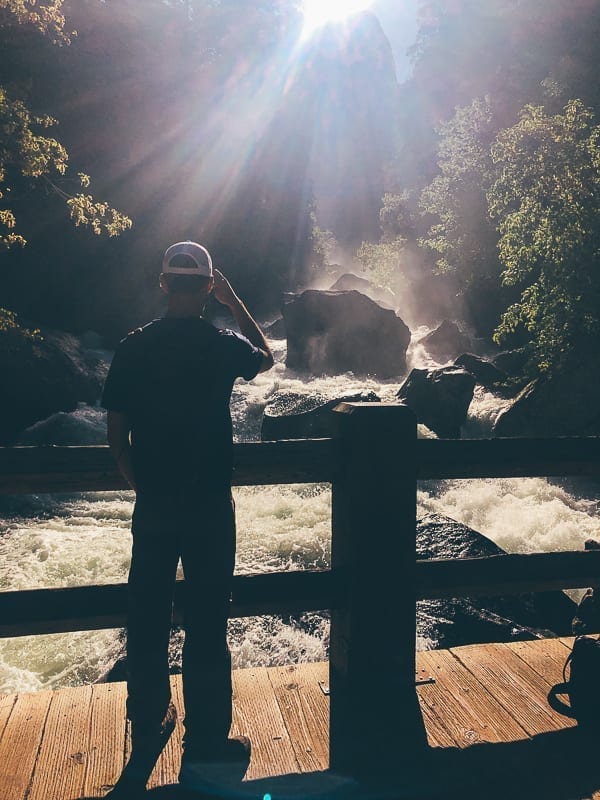
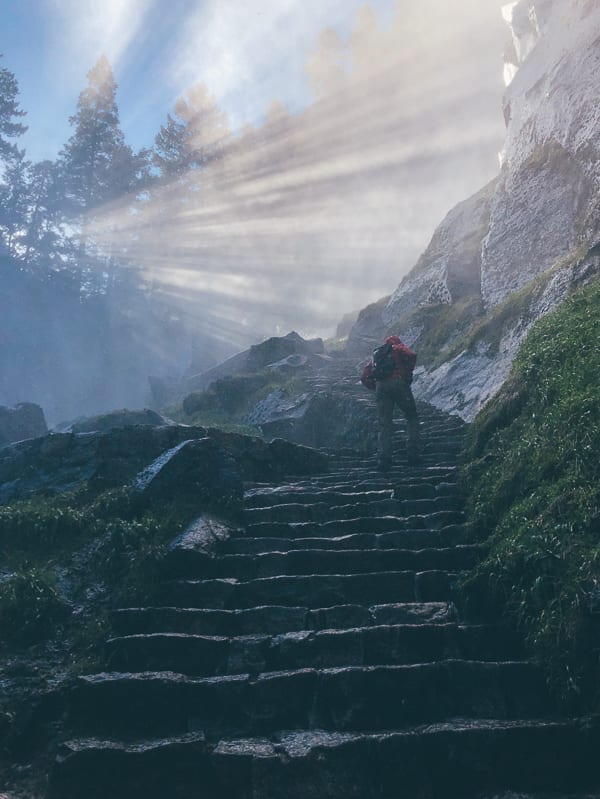
Day 2: The Mist Trail/John Muir Trail
The Mist Trail to Vernal & Nevada Falls is Yosemite’s most popular hike. Again, most popular for a reason. There is so much to see along this hike, making the 7 miles of walking feel like a breeze.
We decided to take the Mist Trail up to Nevada Falls (about 3.3 miles––the red line on the map below), and then take the slightly longer, but less steep John Muir Trail on the way back (about 4 miles––the yellow line, including where the two trails overlap). Total distance: 7.3 miles.
Taking the longer way back is definitely the way to go. Not only do you not have to get soaked by waterfalls twice (believe me, you’ll get soaked on the way up), you also get a change of scenery, and in particular, beautiful views of Nevada Falls and Liberty Cap from the John Muir Trail.
Plus, it was much easier on the knees, a fact that Justin––with his double knee braces––was grateful for.
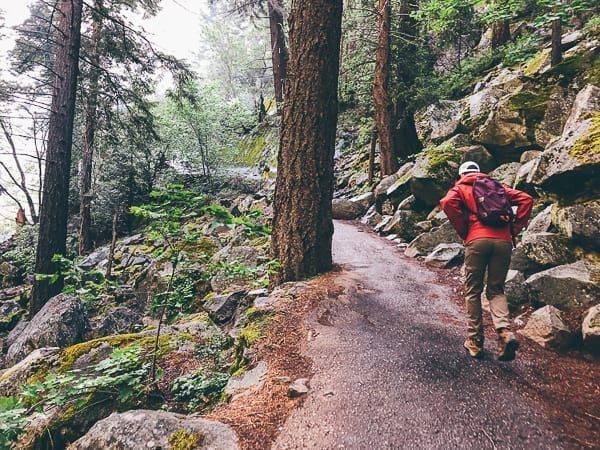
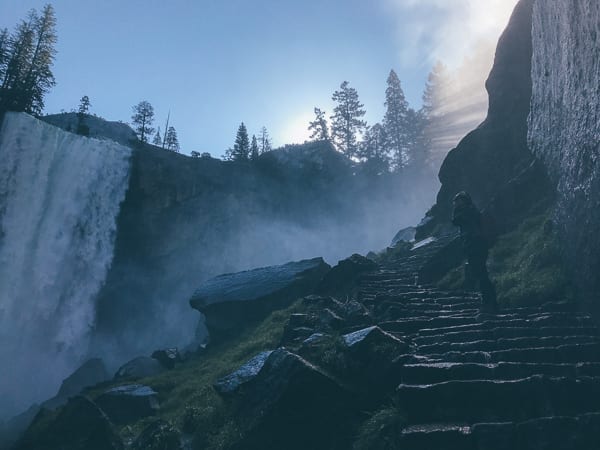
We parked at the trailhead parking lot east of Half Dome Village around 6:45 AM, left our food in a bear box (they have these in all the campgrounds and parking lots, as you are not allowed to leave food and toiletries in your car. Yosemite’s bears are bold and cheeky animals!), and walked through the woods to the Happy Isles Nature Center and bridge, where we made a quick bathroom stop and then hit the trail.
You won’t be the only early risers, and there were definitely people on the trail with us at this hour, but it was nothing compared to the crowds we saw going up when we were on our way back down. Make sure to get up early!
The trail starts at this footbridge. You can see in the photo just how much water is flowing!
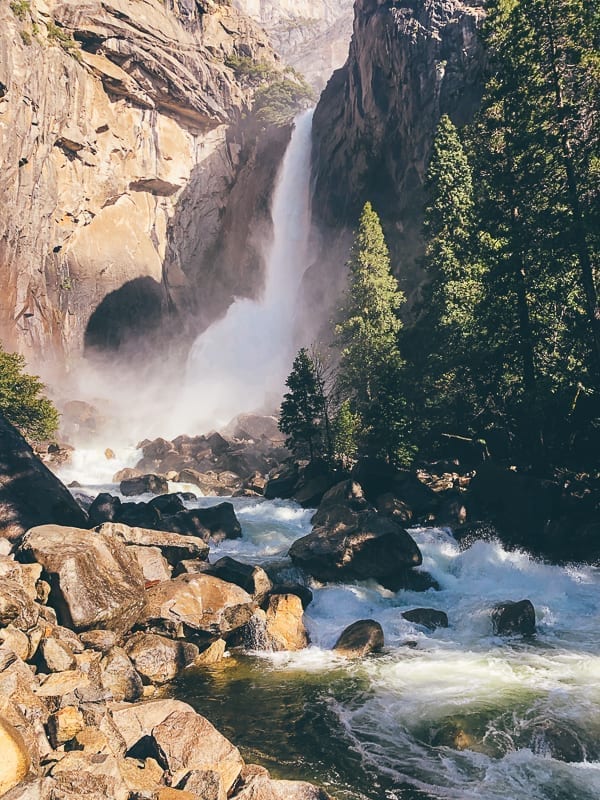
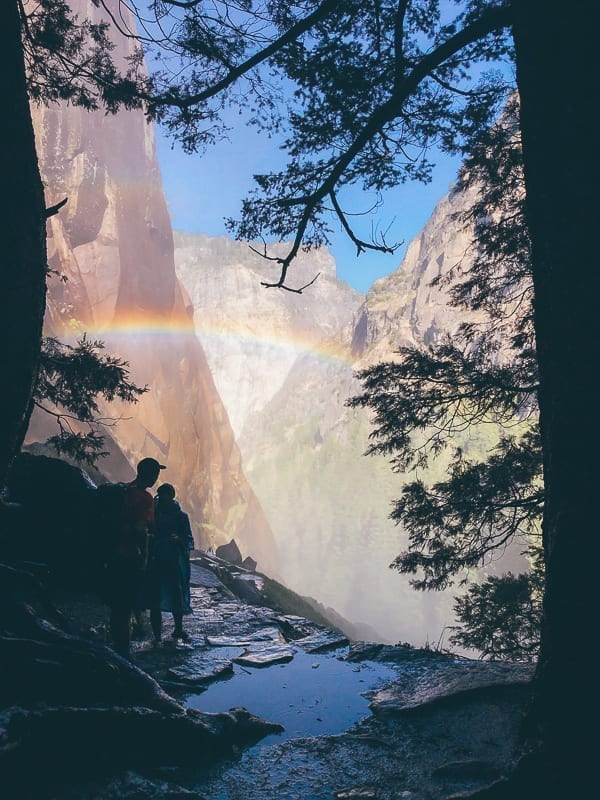
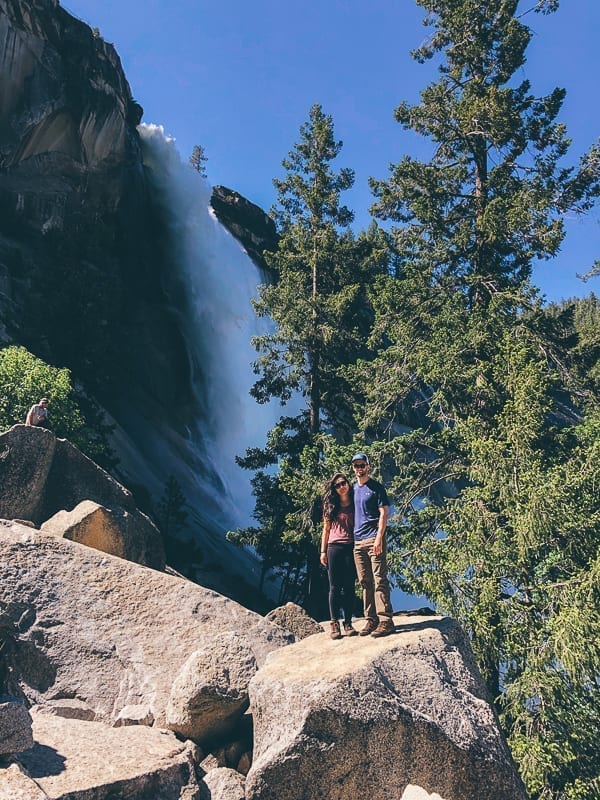
About 1.5 miles in, you’ll reach Vernal Falls.
This is where you’re going to REALLY want that waterproof jacket. Hiking this stretch is like taking an actual shower. A very beautiful, scenic shower.
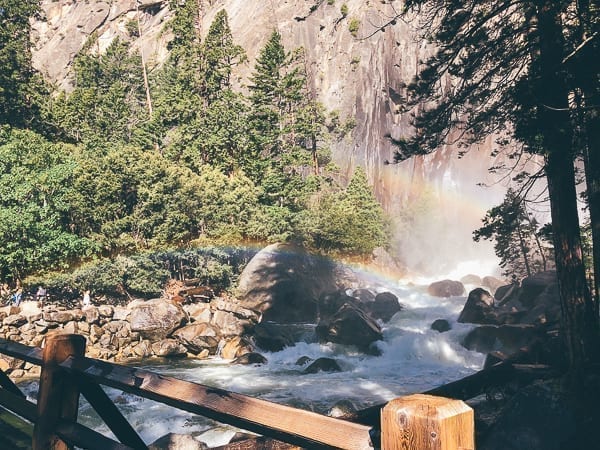
When you’re in the clear, don’t forget to look out for more rainbows!
Luckily, between Vernal and Nevada Falls, there are some nice sunny spots to dry off your jacket, boots, socks, and the non-waterproof leggings you were wearing.
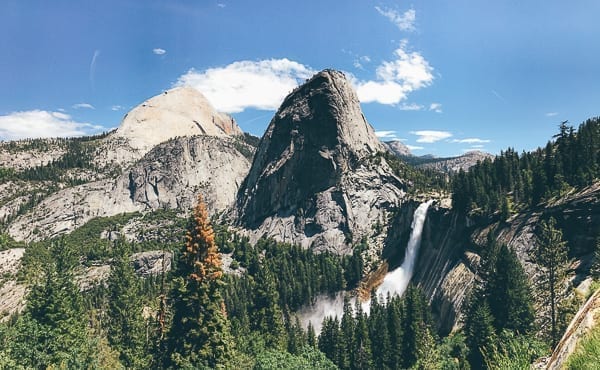
And then, you have another incredible waterfall to look at! Here’s Nevada Fall:
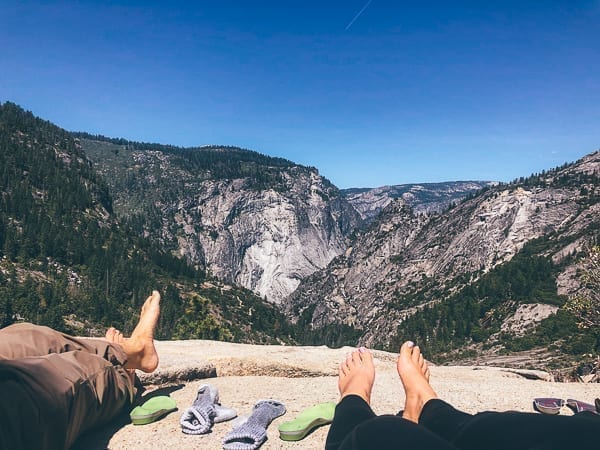
Take a nice rest in the sun at the top:
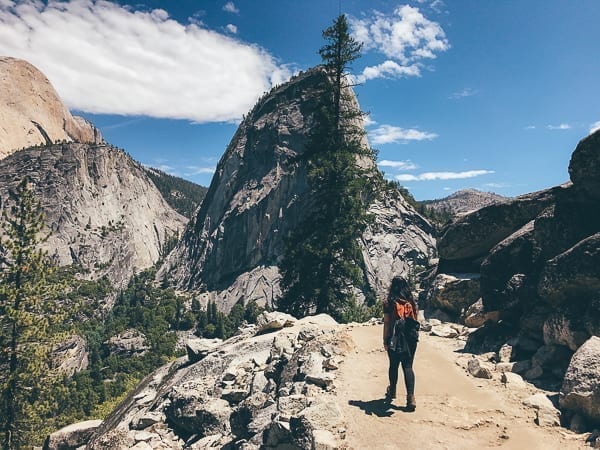
And then take the John Muir Trail back down.
View of Nevada Fall from the John Muir TrailNot to be completely outdone by the Mist Trail, the John Muir Trail has some shower-like cascades of water too. We got minorly re-soaked walking through here.Alternate Routes:
Half Dome: If you’re feeling frisky and up for a major challenge, continue up to Half Dome and climb the infamous cables––this route is 14-16 miles round trip, depending on whether you take the Mist Trail/John Muir Trail up/down. Just know that you’ll need a permit to access the cable section of the route. 300 permits are distributed per day via a lottery system.
Panorama Trail: Hike both the Mist Trail and Glacier Point by combining the two into an 8.5 mile one-way hike. You can park your car in Yosemite Valley and take a bus up to Glacier Point (it’s pricey, at $25/adult, $23 for seniors and $15 for kids). Then hike from Glacier Point down and hike through the Mist Trail to get all the way down into the valley.
4 Mile Trail/Panorama: Fit in yet ANOTHER iconic Yosemite hike––4 Mile Trail, from the valley up to the spectacular views of Glacier Point. Park your car at Yosemite Village and take the El Capitan shuttle bus route to 4 Mile Trail. Then take 4 Mile Trail up to Glacier Point and hike the Panorama Trail back down. Once back down, you can catch a shuttle bus from Happy Isles back to your car at Yosemite Village. Fair warning, though. THIS HIKE IS EXTREMELY STRENUOUS. The 4 Mile Trail up to Glacier Point alone is enough to tire you out. Also note that you can drive up to Glacier Point for that view!
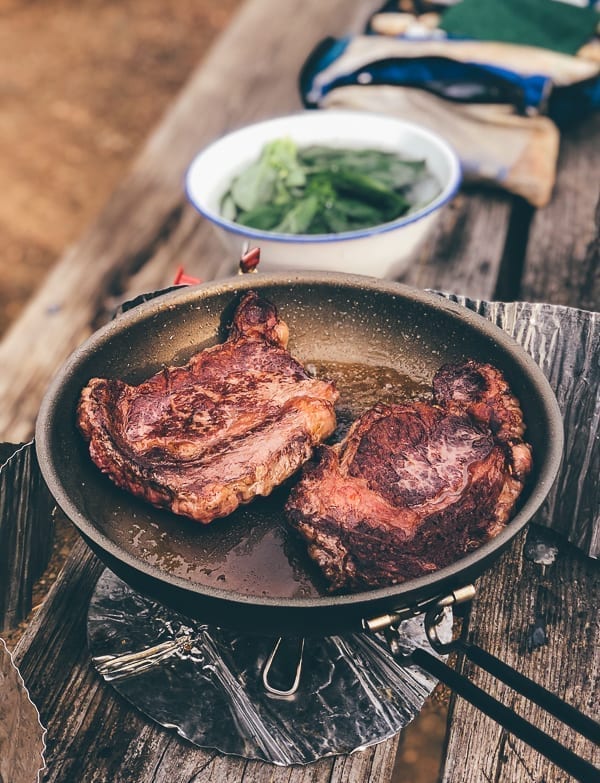
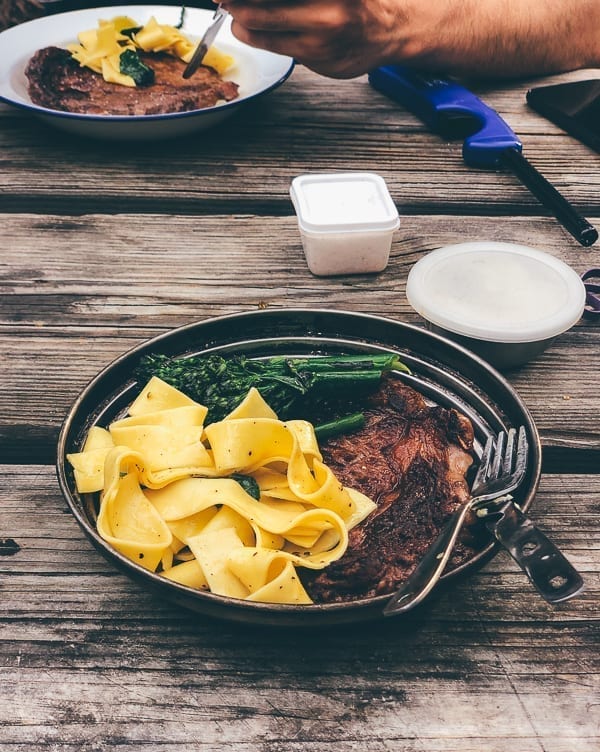
I’m gonna put my food blogger hat back on for a sec…you’re gonna want a hearty dinner on the night of this big hiking day. Something like ribeye, buttered noodles, and broccolini perhaps?
For more on camp cooking, check out our post on how we plan and execute our camping meals.
Day 3: Southern & Eastern Yosemite
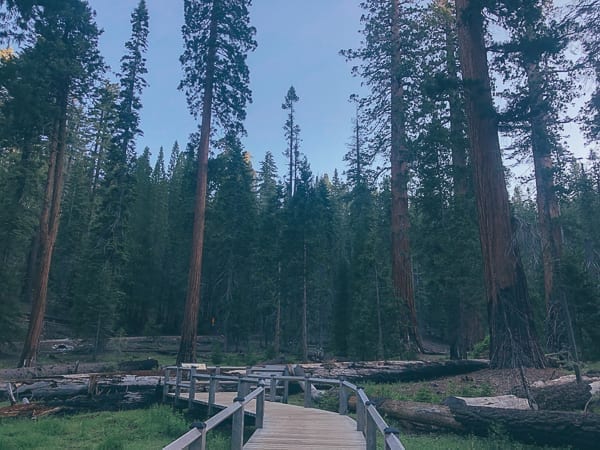
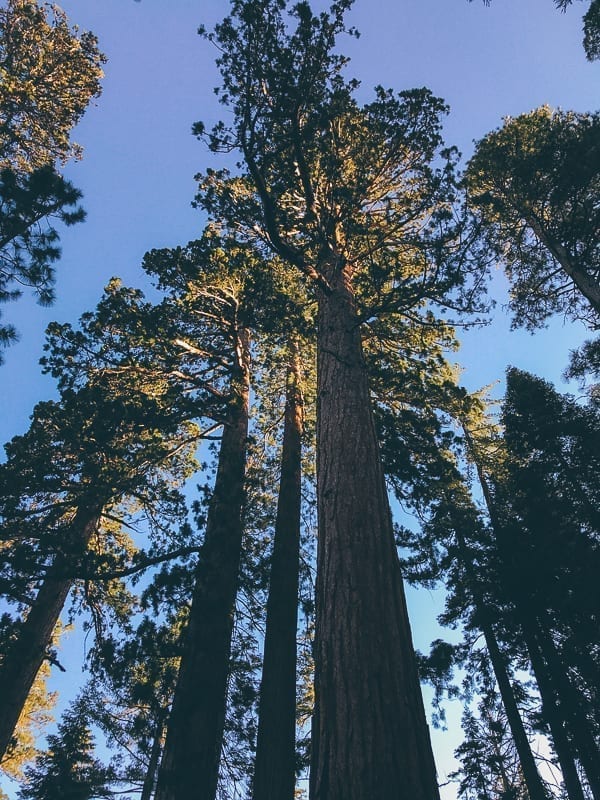
Wander Through Mariposa Grove
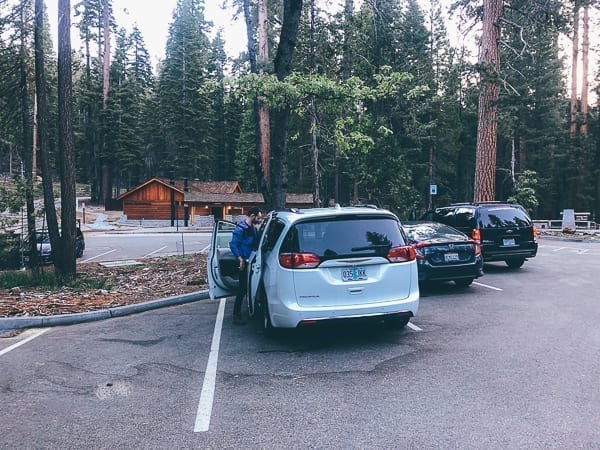
Get to Mariposa Grove in the south section of the park before 7 AM, and you’ll be rewarded with a nice parking spot right at the base of the trees. The parking lot closes at 7:30 AM, and after that, you’ll have to park farther away and catch a shuttle bus to the grove.
Get there early and skip all that hassle! Plus, you’ll have the trees largely to yourselves. Justin and I got to the grove at 6:30, and ours was the third car to pull in.
Side note: Take a gander at our sweet minivan!
The grove was so quiet and peaceful, and it was incredible to feel like we had it all to ourselves that morning.
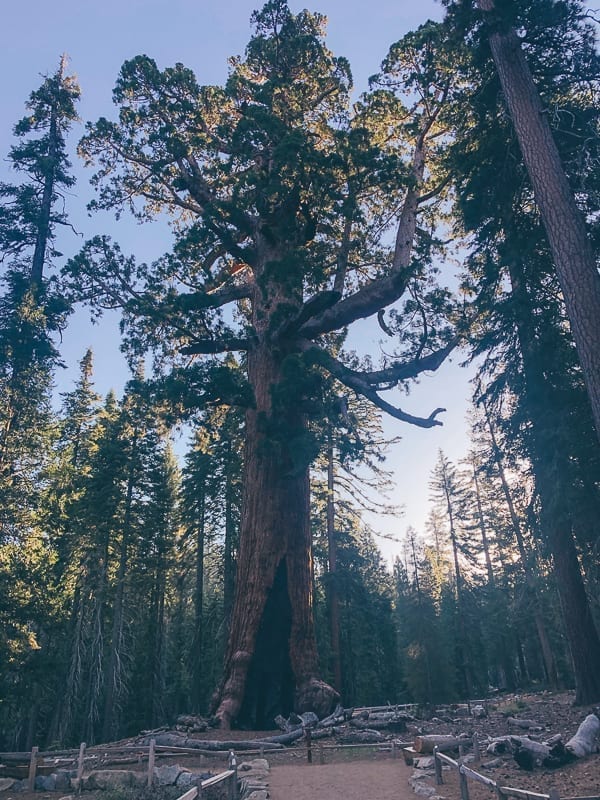
This specimen is known as “The Grizzly Giant.” Estimated at around 2000 years old, its branches are the size of large fully grown trees.Drive to Glacier Point
(Skip if you hiked up here on Day 2!)
From Mariposa Grove, it’s a little over an hour drive to Glacier Point. We left Mariposa Grove around 7:45 AM, and got to Glacier Point around 9 AM. The parking lot was beginning to fill up, but there was still plenty of parking. Around 10 AM, parking starts to get really difficult.
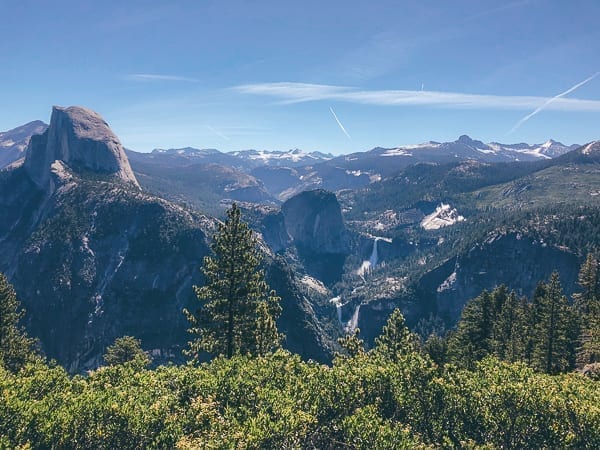
Glacier Point offers another one of those spectacular views of Yosemite Valley, Yosemite Falls, and Half Dome.
If you did the Mist Trail on Day 2, you’ll even recognize Vernal and Nevada Falls, this time, from much farther away.
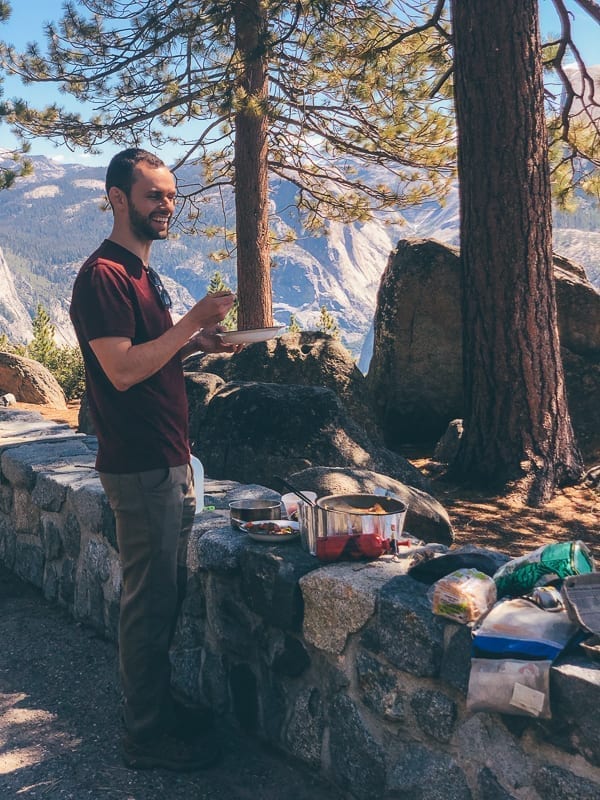
Picnic at Washburn Point
About a mile before Glacier Point, you’ll find Washburn Point. The parking lot is much less crowded, as cars tend to just zoom right by, and those who do stop here generally do so as a quick stop on the way to the “payoff” of Glacier Point, so a spot should open up quickly.
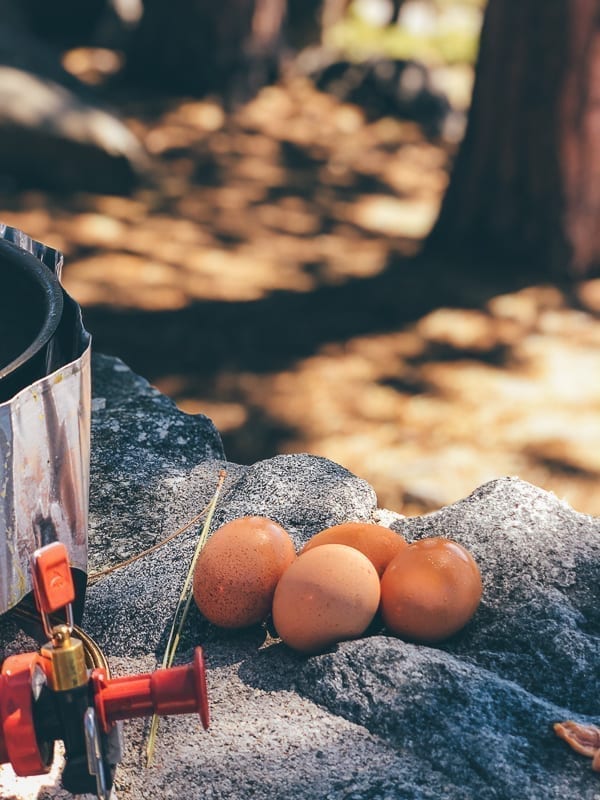
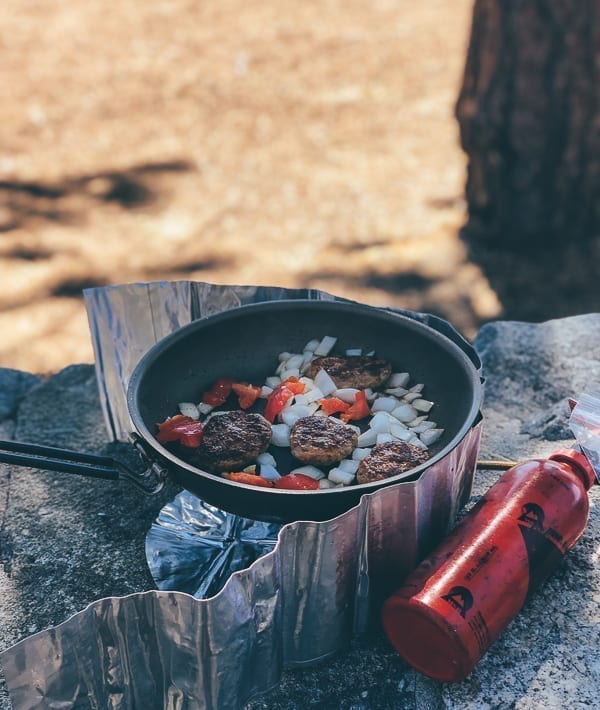
On the way back down from Glacier Point, we stopped here to make and enjoy a picnic breakfast with a pretty incredible view.
I’ve cooked in some very pretty outdoor “kitchens.” This one is up there with the best.Is it still considered a picnic when raw eggs, breakfast sausage, and a gas burner are involved?Take Tioga Pass
Near-record snowfall this year meant that Tioga Pass, a road through the mountains (ranging in elevation from 6,200-10,000 ft) to the eastern side of the park, was still closed while we were there in the third week of June.
But if the road is open (it generally opens in late June), make sure to take the 39-mile scenic drive. The journey really is the destination in this case!
Tenaya Lake & Tuolumne Meadows
Once in the Eastern part of the park, take time to see Tenaya Lake (there’s a pretty 2.5 mile flat hike around the lake) and Tuolumne Meadows (another 2-mile easy hike).
This more remote area of the park will have far fewer people, and will be the perfect place to relax and enjoy the afternoon.
Other Stops if You Have 3 Days in Yosemite & Need More Options:
Rafting in the Merced River: The river was really flowin’ when we visited Yosemite and was closed to all boating, but in July and August, when the river has calmed down, you can rent rafts at the Tour/Activities Desks or Concierge Desks at Yosemite Valley Lodge, Half Dome Village, Yosemite Village, and The Majestic Yosemite Hotel. Rentals end at the end of August.
The Majestic Yosemite Hotel: I’m not one to stay in hotels in the national parks, much preferring our tent. But built in the 1920s, the Majestic Yosemite Hotel is an impressive structure and not a bad place to relax in the afternoon after a morning of hiking.
How to Avoid Crowds In Yosemite
The best way to avoid crowds in Yosemite is to go during off peak times––May (waterfalls are flowing, and you’re there before the summer crowds) and September (still warm temperatures, fewer people).
However, perhaps your schedule doesn’t allow for time off in May, or you’d like to be in Yosemite in that sweet spot of late June/early July when the waterfalls are still flowing and most of the park’s roads, campgrounds, and attractions are open.
If you’re visiting Yosemite during peak summer months but have a low tolerance for navigating crowds of tourists (I must admit, I fall under this category), it’s still possible to see the park without bumping arms with others at all times.
Here’s how:
1. Shift Your Schedule
Plan to shift your schedule 3 to 4 hours earlier than normal. For us on the East Coast, that simply means staying on an East Coast schedule while in California. Wake up at 5 AM, and head to bed around 9 PM (going to sleep early shouldn’t be a problem with a wake-up time like that).
Early birds really do get the worm in Yosemite, and many know it. As we were packing up the tent at 5:15, many others were already awake making breakfast.
But waking up early means that you’ll be able to get where you need to go in the park without traffic, get a parking spot at your destination, and get on the trail before the crowds do.
2. Get Out of The Valley
Yosemite Valley is by far the most crowded area of the park, which is why I suggest doing all of those sites early in the morning on the same day.
After that, you can freely explore other sections of the park, like Glacier Point Road, Tioga Pass and the eastern side of the park, and Southern Yosemite (Mariposa Grove). Just make sure to do so early!
3. Stock Up On Supplies Outside of Yosemite
If you stock up on supplies before you enter the park, you won’t have to venture into Yosemite Village for the restaurants and the store. These tend to be some of the most crowded areas of the park!
Parking can be difficult, and the parking lot is actually pretty far from the heart of Yosemite Village, not making it a very convenient stop anyway.
4. Avoid the Visitor Center Until Later In the Day
I usually like to make a park’s Visitor Center my first stop on any national parks trip––I can get a map, talk to the park rangers and get the information we need to plan our days.
However, Yosemite’s Visitor Center doesn’t open until 9 AM, and waiting until that time to start your day is way too late! By the time you’re done at the Visitor Center, the major sights in the park will be filled with people.
Maps and information are readily available online. You won’t have Wi-fi or a data signal in most of the park, so download these maps as well as an offline map of the park area in Google Maps before you get there. If you’d still like to go to the park Visitor Center, try later in the afternoon.
5. Make Camping Reservations Early
Reservable campgrounds in Yosemite are booked months in advance. Try to reserve sites as early as possible. If you’re unable to book a site in the park, look for reservable campgrounds just outside of Yosemite.
There are a number of first come, first-served campgrounds in the park as well, but if you’re going for these sites, you’ll have to do so early in the morning, which may cut into your “early bird gets the worm” time.
These campgrounds also were not open in the third week of June this year, which is another thing to note! They were set to open the following week.
Yosemite Resources:
Yosemite NPS.gov site: Here you can check on road closures, first-come, first-served campground opening dates, Visitor Center hours, etc.
Recreation.gov: Use recreation.gov to make camping reservations online. Their phone line is also super helpful––you’ll talk to a real person and hold times have been short in my experience.
Yosemitehikes.com: I LOVE this website. It has detailed ratings, descriptions, and instructions for getting to all of Yosemite’s hikes. As you can tell from the number of times I’ve already linked to it in this article, I made extensive use of it while planning our trip.
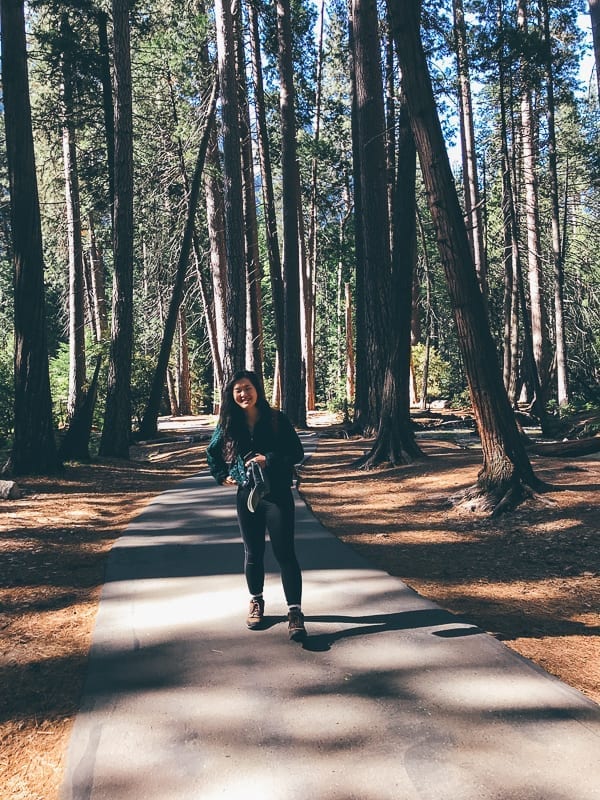
This photo of me backing away into a lovely forest of trees signals the end of this post!
For more from our trip to Yosemite, follow us on Instagram @thewoksoflife and check out our Yosemite story highlight.
Do you have Yosemite memories of your own or tips and suggestions to share? Let us know in the comments below!
Sarah is the older daughter/sister in The Woks of Life family. Creator of quick and easy recipes for harried home cooks and official Woks of Life photographer, she grew up on episodes of Ready Set Cook and Good Eats. She loves the outdoors (and of course, *cooking* outside), and her obsession with food continues to this day.
Subscribe
25 Comments
Newest
OldestMost Voted
Inline Feedbacks
View all comments
Welcome!
We’re Sarah, Kaitlin, Judy, and Bill– a family of four cooks sharing our home-cooked and restaurant-style recipes.
“I am proud to say that your genealogy has been the sole tutorial for my Asian-inspired culinary adventures for years; probably since you began. Time and again, my worldwide web pursuits for solid recipes that I know my family will eat has landed me back here.”

 Getting to the park early will prevent you from having to sit in a line of traffic at the entrance, let alone deal with parking headaches and congestion in the valley. Plus, if you only have 3 days in Yosemite, you’ll want to get the most out of your time there!
 The road through Yosemite Valley is essentially a one-way loop, with Southside Drive heading east into the valley, and Northside Drive heading west. El Capitan Drive cuts through the loop, allowing you bypass congestion around Yosemite Village to get from Southside Drive to Northside drive (see map below).
 Bridalveil Falls:
About 35 minutes from Big Oak Flat (after much scenic driving), you’ll reach the aptly named Bridalveil Fall, one of the most prominent waterfalls in Yosemite Valley. In spring and early summer, it’ll really be flowing, so you’ll definitely notice it from the road!
There’s a trailhead with a parking lot––park there and take 30 minutes for a 1-mile roundtrip walk to the base of the falls. Wear a waterproof jacket––the mist coming off the falls in spring/early summer is no joke!
Yosemite Falls
Continue on into the valley, and you’ll soon catch a glimpse of Yosemite Falls, right from the road. It’s nearly 2,500 feet high, the tallest waterfall in North America and nearly twice as tall as the Empire State Building. It’s so big, you can see it from many vantage points in the park, and the water cascading over the rocks sounds like distant thunder.
The featured image of this post? I snapped it right from the road on Southside Drive (OH, btw definitely download a map of the park before going, as you’ll be in the park too early for the rangers with maps to be at the entrance. The official park map and the Yosemite Valley map are both good to have).
Lower Yosemite Falls
To get closer to the falls, continue driving a few minutes. Park in the Yosemite Village parking lot, and walk about 20 minutes to the Lower Yosemite Falls trailhead.
You may also be able to park closer, along Northside drive. If you’re there early enough, there won’t be many cars and it will seem weird to park on the road, but believe me, by 9 to 10 AM, the roads will be clogged with parked cars!
The Lower Yosemite Falls Trail is a short half mile loop, making it one of the biggest bangs for your buck in the park.
Bridalveil Falls:
About 35 minutes from Big Oak Flat (after much scenic driving), you’ll reach the aptly named Bridalveil Fall, one of the most prominent waterfalls in Yosemite Valley. In spring and early summer, it’ll really be flowing, so you’ll definitely notice it from the road!
There’s a trailhead with a parking lot––park there and take 30 minutes for a 1-mile roundtrip walk to the base of the falls. Wear a waterproof jacket––the mist coming off the falls in spring/early summer is no joke!
Yosemite Falls
Continue on into the valley, and you’ll soon catch a glimpse of Yosemite Falls, right from the road. It’s nearly 2,500 feet high, the tallest waterfall in North America and nearly twice as tall as the Empire State Building. It’s so big, you can see it from many vantage points in the park, and the water cascading over the rocks sounds like distant thunder.
The featured image of this post? I snapped it right from the road on Southside Drive (OH, btw definitely download a map of the park before going, as you’ll be in the park too early for the rangers with maps to be at the entrance. The official park map and the Yosemite Valley map are both good to have).
Lower Yosemite Falls
To get closer to the falls, continue driving a few minutes. Park in the Yosemite Village parking lot, and walk about 20 minutes to the Lower Yosemite Falls trailhead.
You may also be able to park closer, along Northside drive. If you’re there early enough, there won’t be many cars and it will seem weird to park on the road, but believe me, by 9 to 10 AM, the roads will be clogged with parked cars!
The Lower Yosemite Falls Trail is a short half mile loop, making it one of the biggest bangs for your buck in the park.
 You may even catch a rainbow (or two):
 Oh, and remember my suggestion about that waterproof jacket!

 After all that, enjoy an afternoon snack, rest at the Majestic Yosemite Hotel, or head to your campsite for an afternoon of relaxation away from the crowds.
We ended up back in our campground to make a dinner of chicken curry with rice. MMM.
After all that, enjoy an afternoon snack, rest at the Majestic Yosemite Hotel, or head to your campsite for an afternoon of relaxation away from the crowds.
We ended up back in our campground to make a dinner of chicken curry with rice. MMM.
 Taking the longer way back is definitely the way to go. Not only do you not have to get soaked by waterfalls twice (believe me, you’ll get soaked on the way up), you also get a change of scenery, and in particular, beautiful views of Nevada Falls and Liberty Cap from the John Muir Trail.
Plus, it was much easier on the knees, a fact that Justin––with his double knee braces––was grateful for.
We parked at the trailhead parking lot east of Half Dome Village around 6:45 AM, left our food in a bear box (they have these in all the campgrounds and parking lots, as you are not allowed to leave food and toiletries in your car. Yosemite’s bears are bold and cheeky animals!), and walked through the woods to the Happy Isles Nature Center and bridge, where we made a quick bathroom stop and then hit the trail.
Taking the longer way back is definitely the way to go. Not only do you not have to get soaked by waterfalls twice (believe me, you’ll get soaked on the way up), you also get a change of scenery, and in particular, beautiful views of Nevada Falls and Liberty Cap from the John Muir Trail.
Plus, it was much easier on the knees, a fact that Justin––with his double knee braces––was grateful for.
We parked at the trailhead parking lot east of Half Dome Village around 6:45 AM, left our food in a bear box (they have these in all the campgrounds and parking lots, as you are not allowed to leave food and toiletries in your car. Yosemite’s bears are bold and cheeky animals!), and walked through the woods to the Happy Isles Nature Center and bridge, where we made a quick bathroom stop and then hit the trail.
 You won’t be the only early risers, and there were definitely people on the trail with us at this hour, but it was nothing compared to the crowds we saw going up when we were on our way back down. Make sure to get up early!
The trail starts at this footbridge. You can see in the photo just how much water is flowing!
You won’t be the only early risers, and there were definitely people on the trail with us at this hour, but it was nothing compared to the crowds we saw going up when we were on our way back down. Make sure to get up early!
The trail starts at this footbridge. You can see in the photo just how much water is flowing!
 About 1.5 miles in, you’ll reach Vernal Falls.
 This is where you’re going to REALLY want that waterproof jacket. Hiking this stretch is like taking an actual shower. A very beautiful, scenic shower.
 When you’re in the clear, don’t forget to look out for more rainbows!
 Luckily, between Vernal and Nevada Falls, there are some nice sunny spots to dry off your jacket, boots, socks, and the non-waterproof leggings you were wearing.
 And then, you have another incredible waterfall to look at! Here’s Nevada Fall:
 Take a nice rest in the sun at the top:
 And then take the John Muir Trail back down.
 For more on camp cooking, check out our post on how we plan and execute our camping meals.
 If you did the Mist Trail on Day 2, you’ll even recognize Vernal and Nevada Falls, this time, from much farther away.
 Picnic at Washburn Point
About a mile before Glacier Point, you’ll find Washburn Point. The parking lot is much less crowded, as cars tend to just zoom right by, and those who do stop here generally do so as a quick stop on the way to the “payoff” of Glacier Point, so a spot should open up quickly.
On the way back down from Glacier Point, we stopped here to make and enjoy a picnic breakfast with a pretty incredible view.
Picnic at Washburn Point
About a mile before Glacier Point, you’ll find Washburn Point. The parking lot is much less crowded, as cars tend to just zoom right by, and those who do stop here generally do so as a quick stop on the way to the “payoff” of Glacier Point, so a spot should open up quickly.
On the way back down from Glacier Point, we stopped here to make and enjoy a picnic breakfast with a pretty incredible view.


 Take Tioga Pass
Near-record snowfall this year meant that Tioga Pass, a road through the mountains (ranging in elevation from 6,200-10,000 ft) to the eastern side of the park, was still closed while we were there in the third week of June.
But if the road is open (it generally opens in late June), make sure to take the 39-mile scenic drive. The journey really is the destination in this case!
Tenaya Lake & Tuolumne Meadows
Once in the Eastern part of the park, take time to see Tenaya Lake (there’s a pretty 2.5 mile flat hike around the lake) and Tuolumne Meadows (another 2-mile easy hike).
This more remote area of the park will have far fewer people, and will be the perfect place to relax and enjoy the afternoon.
Take Tioga Pass
Near-record snowfall this year meant that Tioga Pass, a road through the mountains (ranging in elevation from 6,200-10,000 ft) to the eastern side of the park, was still closed while we were there in the third week of June.
But if the road is open (it generally opens in late June), make sure to take the 39-mile scenic drive. The journey really is the destination in this case!
Tenaya Lake & Tuolumne Meadows
Once in the Eastern part of the park, take time to see Tenaya Lake (there’s a pretty 2.5 mile flat hike around the lake) and Tuolumne Meadows (another 2-mile easy hike).
This more remote area of the park will have far fewer people, and will be the perfect place to relax and enjoy the afternoon.