Recipe Instructions
Start by combining the dry ingredients in a large mixing bowl. Whisk together the flour, sugar, baking powder, salt, and spices. Then cut in the cold butter until the mixture resembles coarse crumbs. Then stir in the chocolate.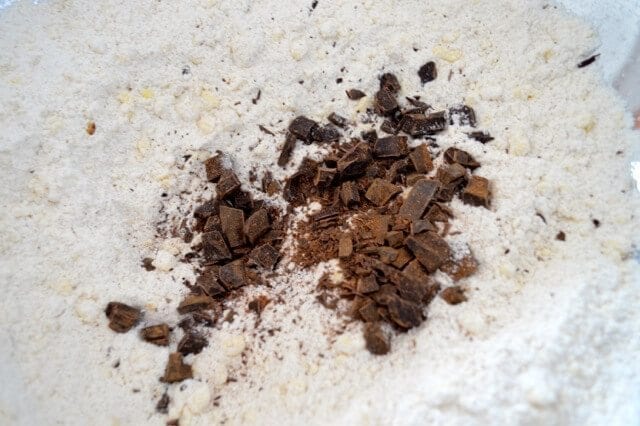 In a smaller bowl, whisk together the pumpkin puree, eggs, vanilla, and yogurt. With vigor! You want to make sure it’s pretty well-combined.
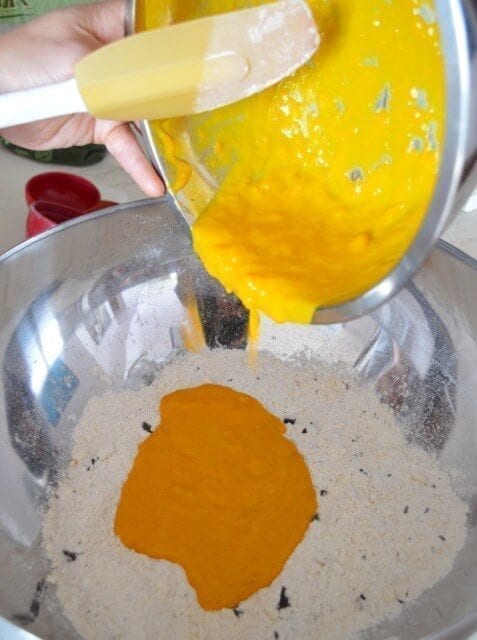
 Then add the mixture to the dry ingredients. Don’t mind a bit of pumpkin lumpage.
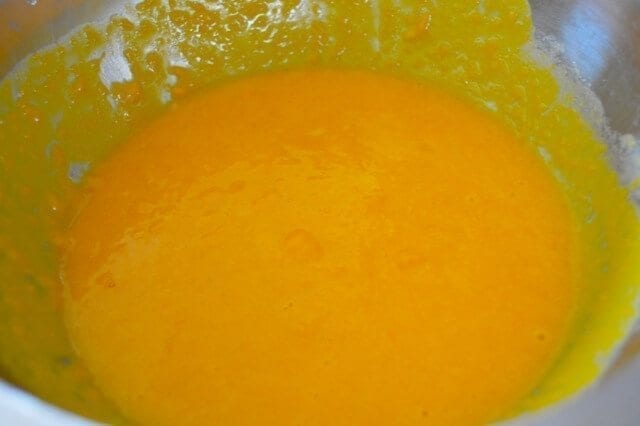
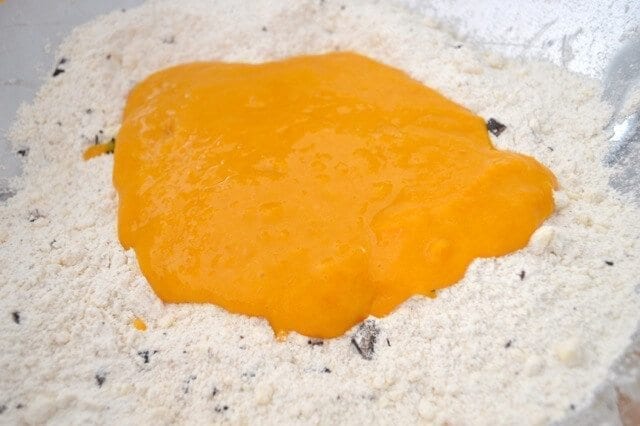
 Take a moment to admire the bright orange hue of your batter.
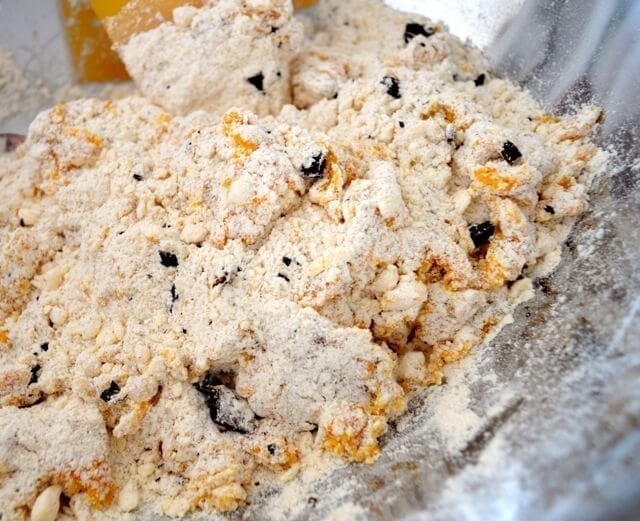
 And…without further ado, fold everything together carefully without overworking the dough.
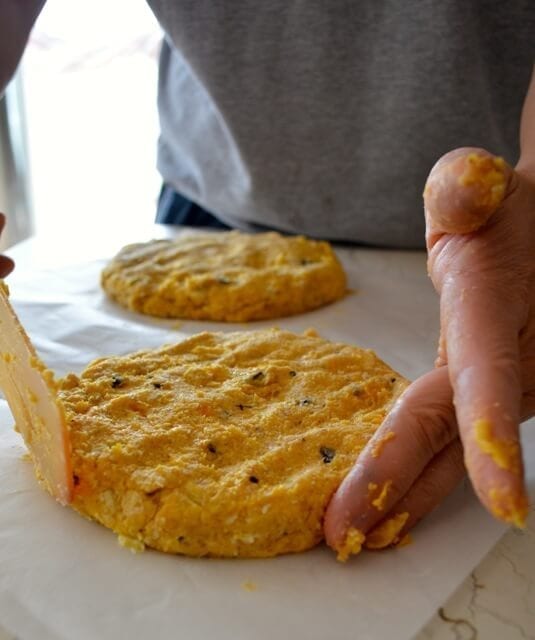
 Then take out a baking sheet and line it with some good ol’ parchment paper. Divide the dough into two pieces…
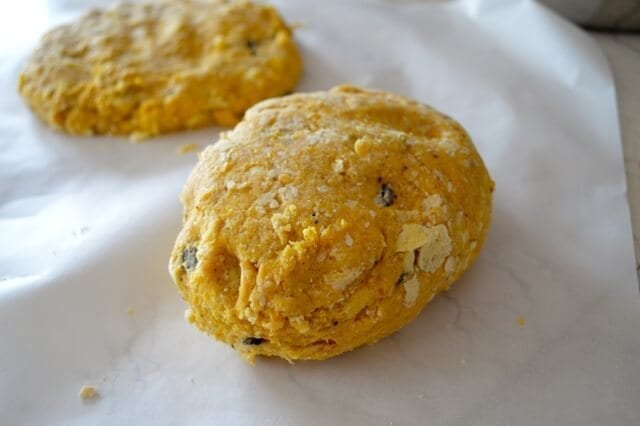 And shape them into flat, round disks. We used to make our scones into these little lump things…kind of like what I would imagine a “rock cake” is like. But shaping them into disks and cutting them somehow yields a flakier scone. So don’t skip this one.
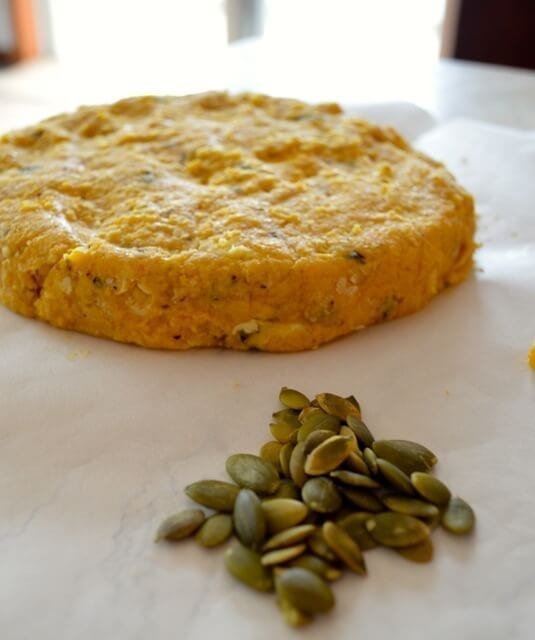
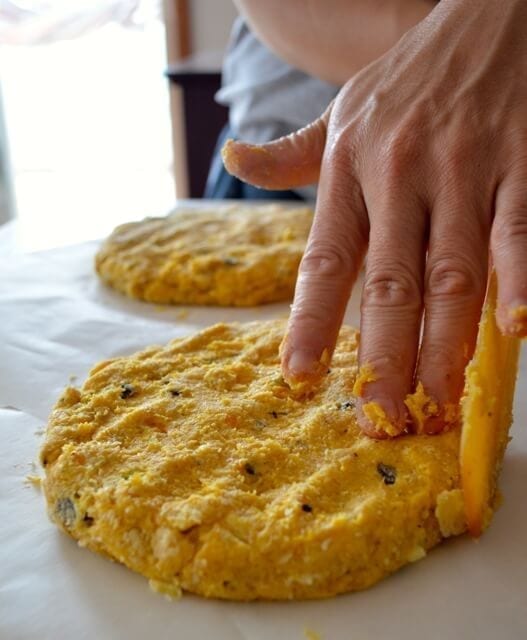 They should be about 6 inches in diameter and 3/4 inch thick.
 Ready your pumpkin seeds. You’re looking for already shelled, raw seeds. They’ll toast as the scones bake.
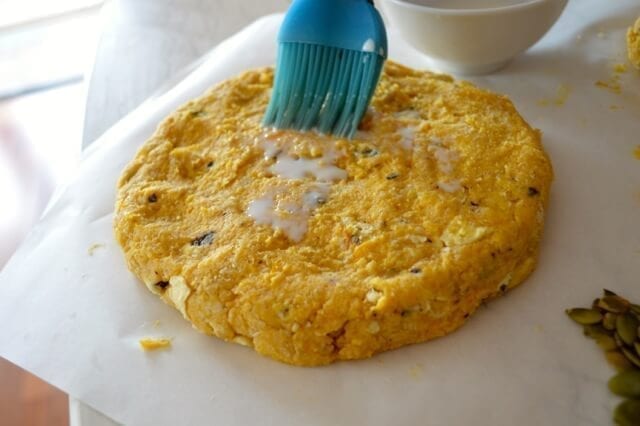
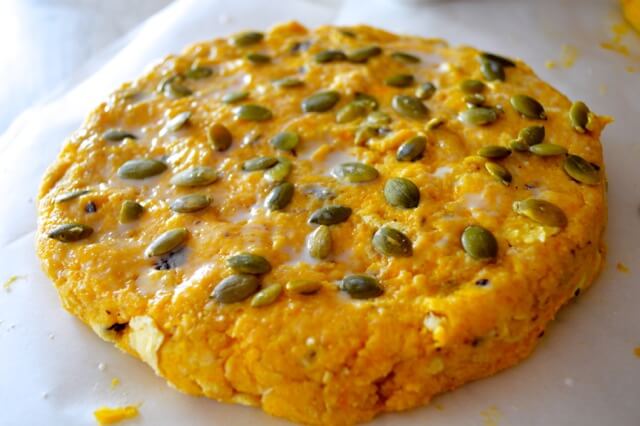
 Brush the dough circles liberally with some milk…whole, skim, 2 %, full fat heavy cream…it don’t matta’.
 And dot with pumpkin seeds…
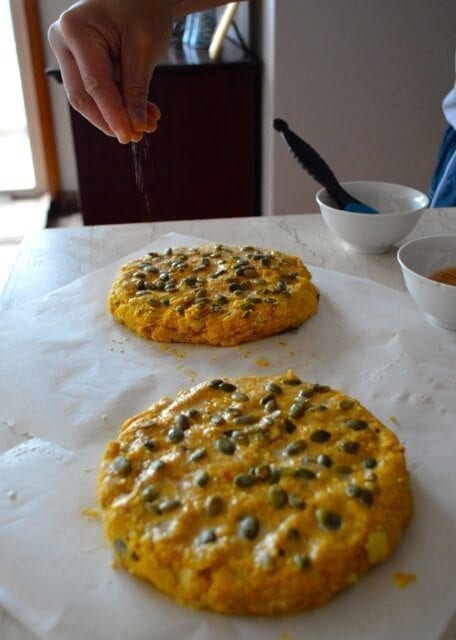
 …and sprinkle on some cinnamon sugar. Which is just sugar…mixed with cinnamon. Not to insult your intelligence or anything. But when I first figured that out, I was kind of surprised that it wasn’t more complicated than that. Just like the first time I made my own brown sugar by mixing regular sugar and molasses? It blew my mind. I tell ya. All this prepackaged stuff is making us dumber. Or maybe it’s just…me.
…………..
…Cinnamon sugar!
…and sprinkle on some cinnamon sugar. Which is just sugar…mixed with cinnamon. Not to insult your intelligence or anything. But when I first figured that out, I was kind of surprised that it wasn’t more complicated than that. Just like the first time I made my own brown sugar by mixing regular sugar and molasses? It blew my mind. I tell ya. All this prepackaged stuff is making us dumber. Or maybe it’s just…me.
…………..
…Cinnamon sugar!
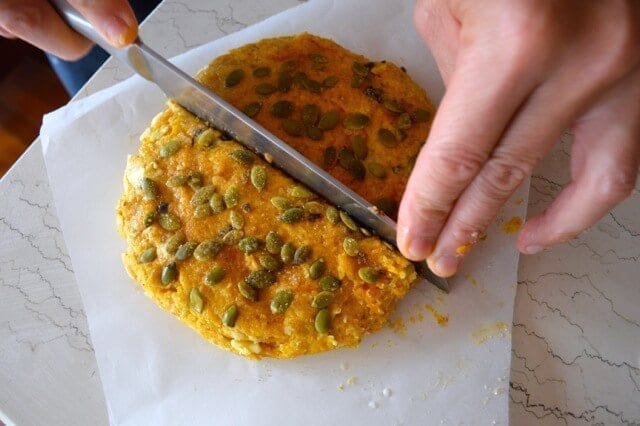
 Once you’ve dotted and sprinkled, cut each circle into 6 wedges.
 Then pull them apart, so they’re about ¾ inch away from each other. We need to give ’em some room to groove.
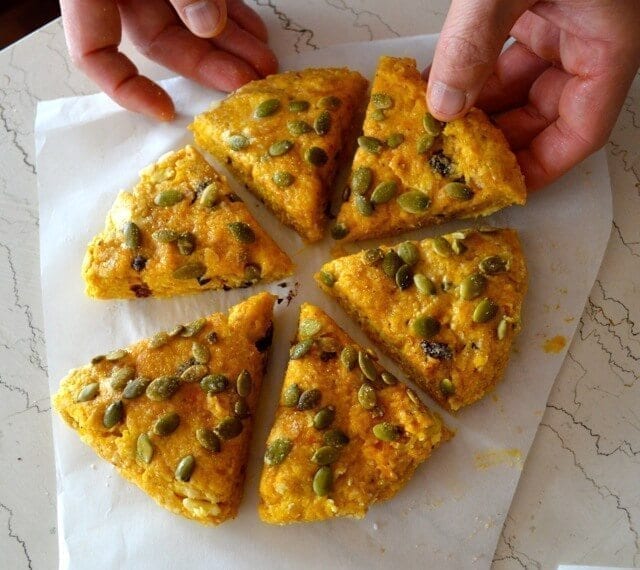 But they should still be able to fit on one sheet pan.
 Put the scones in a freezer for 45 minutes. According to the good folks at King Arthur, this gives the scones a better rise.
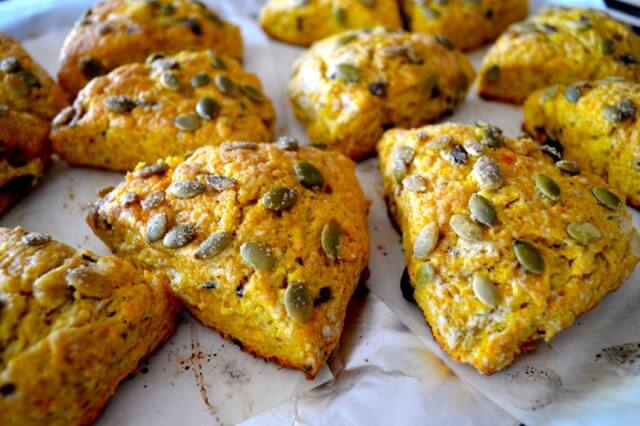
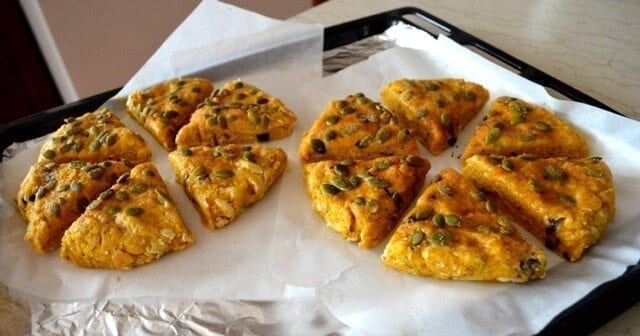
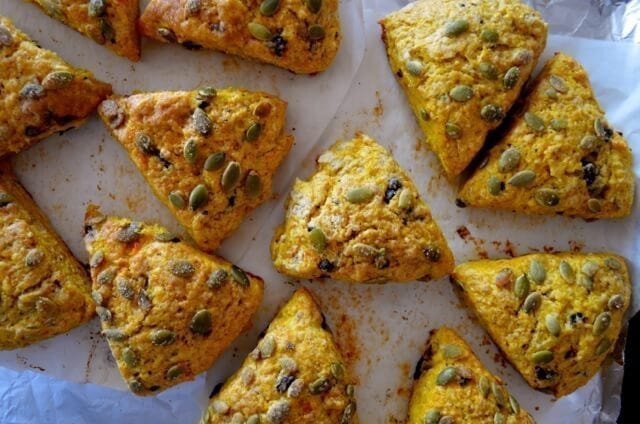
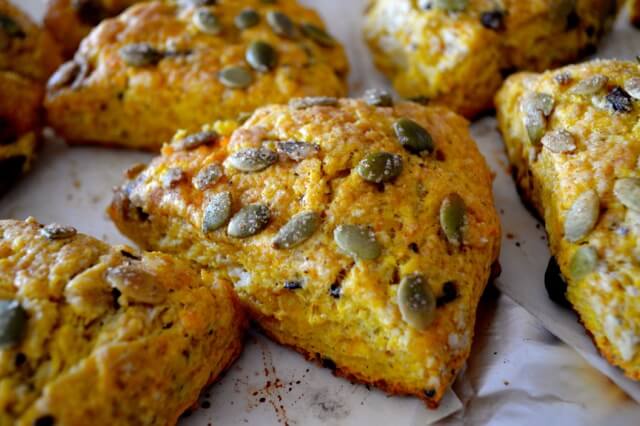
 Preheat the oven to 425 degrees, and bake them scones for 20-25 minutes, or until they’re golden brown, the pumpkin seeds are toasty, the chocolate is melty, and the cinnamon sugar is crunchy. It’s fall-tastic, pumpkin-a-licious goodness.
 Enjoy!
Here’s the printable version:
Enjoy!
Here’s the printable version:
Recipe

Dark Chocolate Pumpkin Scones
These chocolate pumpkin scones are the perfect fall season treat, with lots of spiced pumpkin flavor and chunks of chocolate in every bite.
Serves: 12
Ingredients
- 2 3/4 cups flour
- 1/3 cup sugar
- 4 teaspoons baking powder
- 3/4 teaspoon salt
- 3/4 teaspoon cinnamon
- 1/4 teaspoon ground ginger
- 1/4 teaspoon ground nutmeg
- 1/4 teaspoon ground allspice
- 1/2 cup cold butter (1 stick)
- 1/2-1 cup chopped dark chocolate (depending on your chocolate-level tolerance)
- 1 cup pumpkin puree
- 2 medium eggs
- 1 teaspoon vanilla
- 1/3 cup yogurt
- 3 tablespoons milk
- 1/4 cup pumpkin seeds
- 2 tablespoons cinnamon sugar
Instructions
- Combine flour, sugar, baking powder, salt and spices in a large mixing bowl. Cut in the butter with a pastry cutter until the mixture resembles coarse crumbs. Stir in the chocolate.
- In a small bowl, whisk together the pumpkin, eggs, vanilla, and yogurt. Fold carefully into the dry mix without overworking the dough.
- Take out a baking sheet and line with parchment paper. Divide the dough into 2 equal pieces and shape them into flat, round disks, about 6 inches in diameter. Brush them with milk and sprinkle with pumpkin seeds and cinnamon sugar. Cut each circle into 6 wedges and pull them apart, so they’re about ¾ inch away from each other. Put the scones in the freezer for 45 minutes.
- Preheat the oven to 425 degrees. Bake for 20-25 minutes, or until golden brown.
Nutrition Facts
Calories: 276kcal (14%) Carbohydrates: 37g (12%) Protein: 6g (12%) Fat: 12g (18%) Saturated Fat: 8g (40%) Cholesterol: 49mg (16%) Sodium: 239mg (10%) Potassium: 291mg (8%) Fiber: 2g (8%) Sugar: 11g (12%) Vitamin A: 3466IU (69%) Vitamin C: 1mg (1%) Calcium: 110mg (11%) Iron: 2mg (11%)