Today, our family’s tried-and-true, much-loved milk bread recipe gets the Cinnamon Roll treatment. These incredibly fluffy Cinnamon Rolls are the stuff of Goldilocks’s dreams.
That is, they have just the right amount of cinnamon, frosting, and of course, the most tender, fluffy, pull-apart texture. They also stay soft and tender much longer than most cinnamon roll doughs.
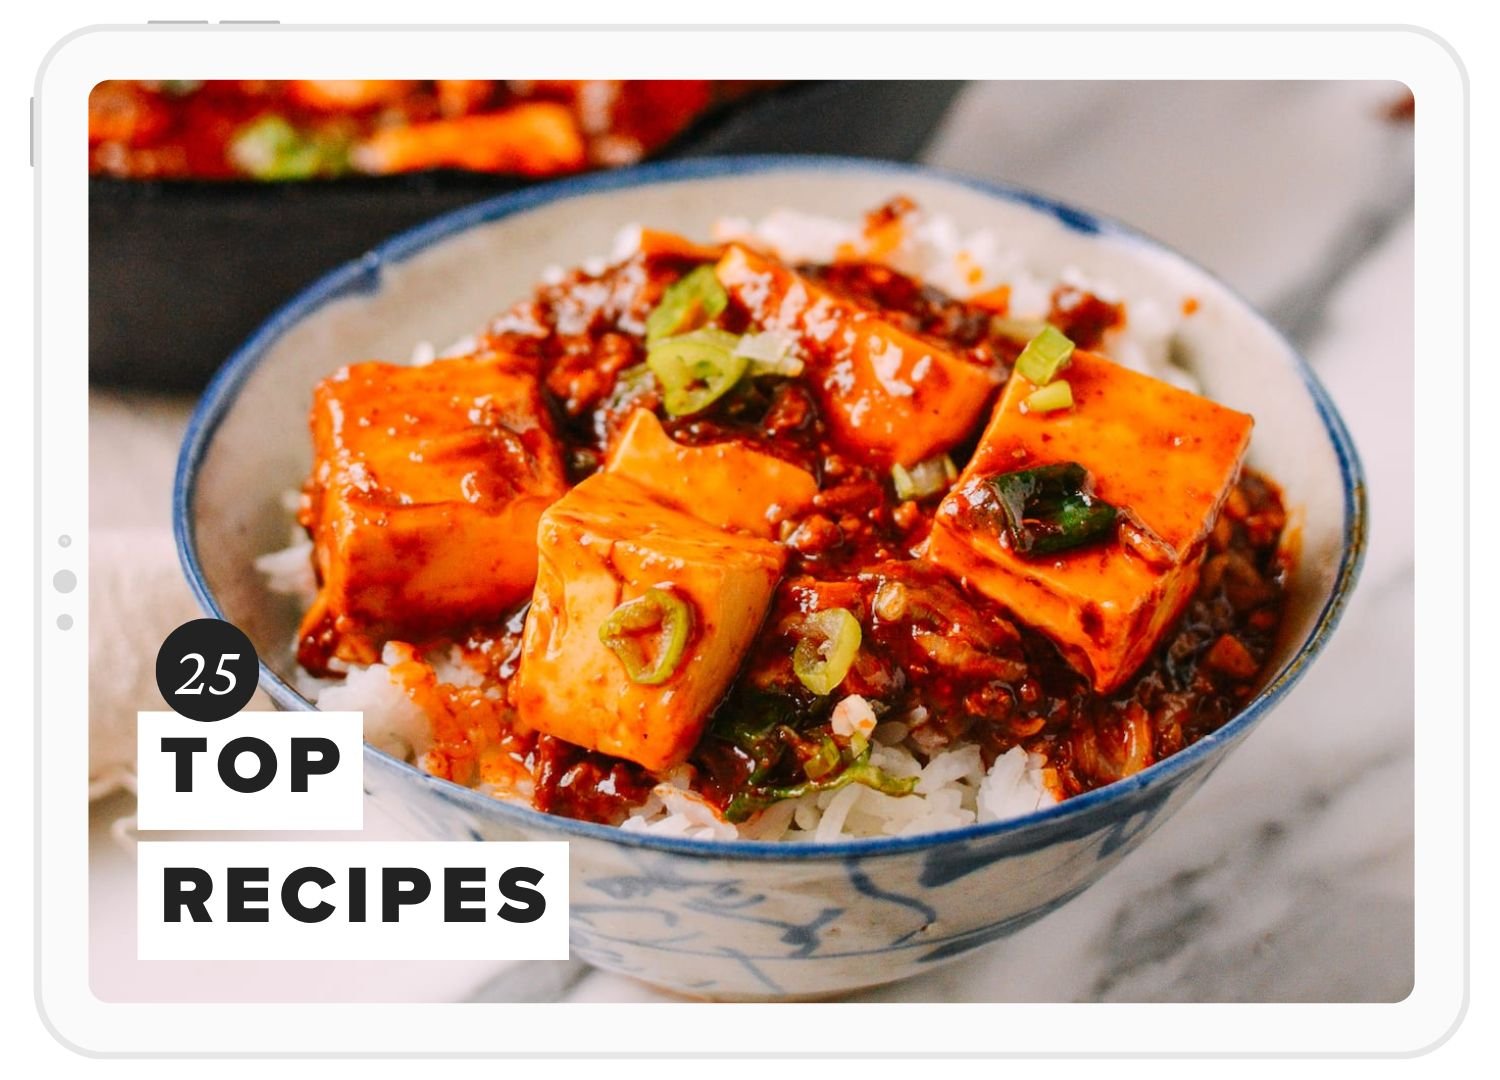
The Fluffiest Cinnamon Rolls
The perfect cinnamon roll is an elusive thing. So elusive that I had given up hope on the whole concept, relegating it to memories of being 10 years old, buying Cinnabon at the mall with $48 (my life’s savings) in my flower purse, a Sam Goody CD purchase, and one too many Claire’s surprise bags in tow. If you know, you know.
All too often, cinnamon rolls are way too sweet, dry, and downright tough. The next day, it tastes like you’re eating the stale end of a loaf of bread that’s been drowned in sugary frosting and dropped in sand. It’s a dessert that requires so much effort—a truly touching gesture of TLC—and yet…never has a dessert inspired so much jadedness!
That said, these Cinnamon Rolls have rekindled my love for Cinnamon Rolls.
They are FLUFFY.
They are TENDER.
They’re super CINNAMON-Y (but not tooo cinnamon-y).
Biting into one right out of the oven had me—and our family of sugar skeptics—positively giddy.
We’ve said it before, but whenever we post a non-Chinese, non-sequitur recipe like this, PAY ATTENTION. Because we’re doing it for our family’s posterity, and not for anyone else.
And that’s how you know it’s good.
Why cinnamon rolls, and why now?
Some foods are seasonal favorites, but I feel like I missed the memo on Cinnamon Rolls. Suddenly I’m seeing them e v e r y w h e r e.
Is the Cinnamon Roll the dessert of January doldrums? The official forget-about-my-New-Year’s-diet dessert? Or is it just our collective perpetual need for comfort food given everything going on?
Whatever it is, I am fully supportive. After seeing so many Cinnamon Rolls popping up around the internet, I was driven to the kitchen to do some experimenting!
Ditch the Tangzhong
Naturally, my subliminally-Cinnamon-Roll-obsessed brain turned to my mom’s milk bread recipe. My mother (and her cousin, who tipped her off to it) deserves an award for this recipe.
It’s the base of all our Chinese bakery favorites, and there’s NO TANGZHONG (a cooked paste of flour and milk/water used by Asian bakers to soften breads) required.
As a certified Lazy Cook, it’s things like this that really count. No stove, no whisking.
Mix & Match
Most cinnamon roll recipes make 9 to 12, but this recipe makes a whopping 16 rolls, which is really awesome, because if you’re gonna take the time for any kind of bread, you want to be left with a *substantial* quantity, right?
But the really great thing about this recipe is that you can either make 16 delicious cinnamon rolls, or you can halve or even quarter the dough to make some of our other Chinese bakery favorites!
It’s all too easy to use half the dough for cinnamon rolls, and use the remainder to throw together some hot dog buns. Or you could put together some ham and cheese buns or bacon & scallion bread. Sky’s the limit!
If you want to make a smaller batch of pineapple buns, say, all you need is the handy slider in our recipe card (just click on the # of servings) to proportionally generate reduced ingredients measurements. Easy peasy!
Fluffy Cinnamon Rolls: Recipe Instructions
(Keep reading for step-by-step instructions and photos; scroll down to the printable recipe card for the full ingredients list.)
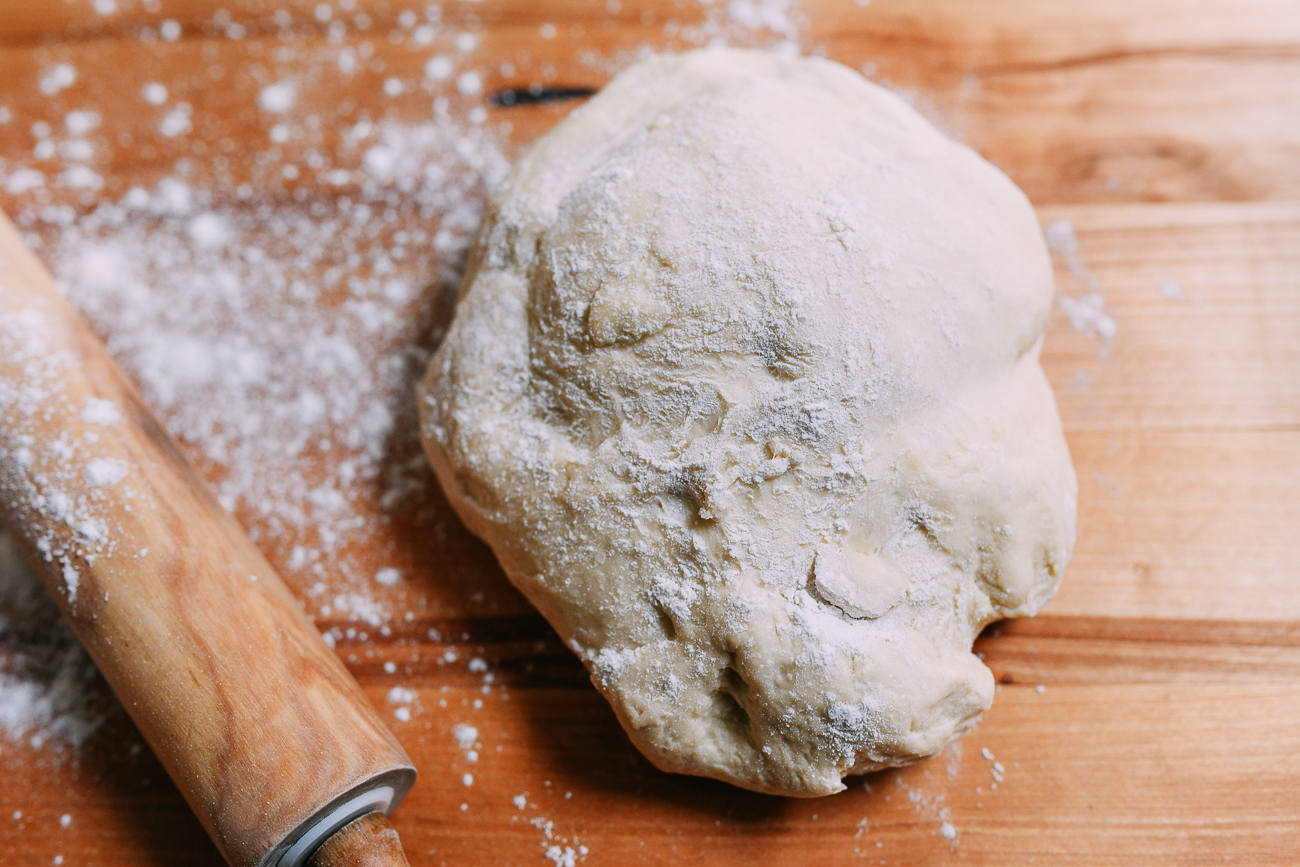
Start by making the dough.
In the bowl of a stand mixer fitted with a dough hook attachment, add these ingredients in the following order: room temperature heavy cream, milk, and egg, followed by the sugar, cake flour, bread flour, active dry yeast, and salt. There is no need to activate the yeast beforehand.

SUB ALL-Purpose Flour
If you don’t have cake flour and bread flour, we have tested this recipe using ONLY all-purpose flour, and have found that it works well. Feel free to use 4 cups / 570g AP flour instead of the 1/2 cup cake flour and 3 1/2 cups bread flour.
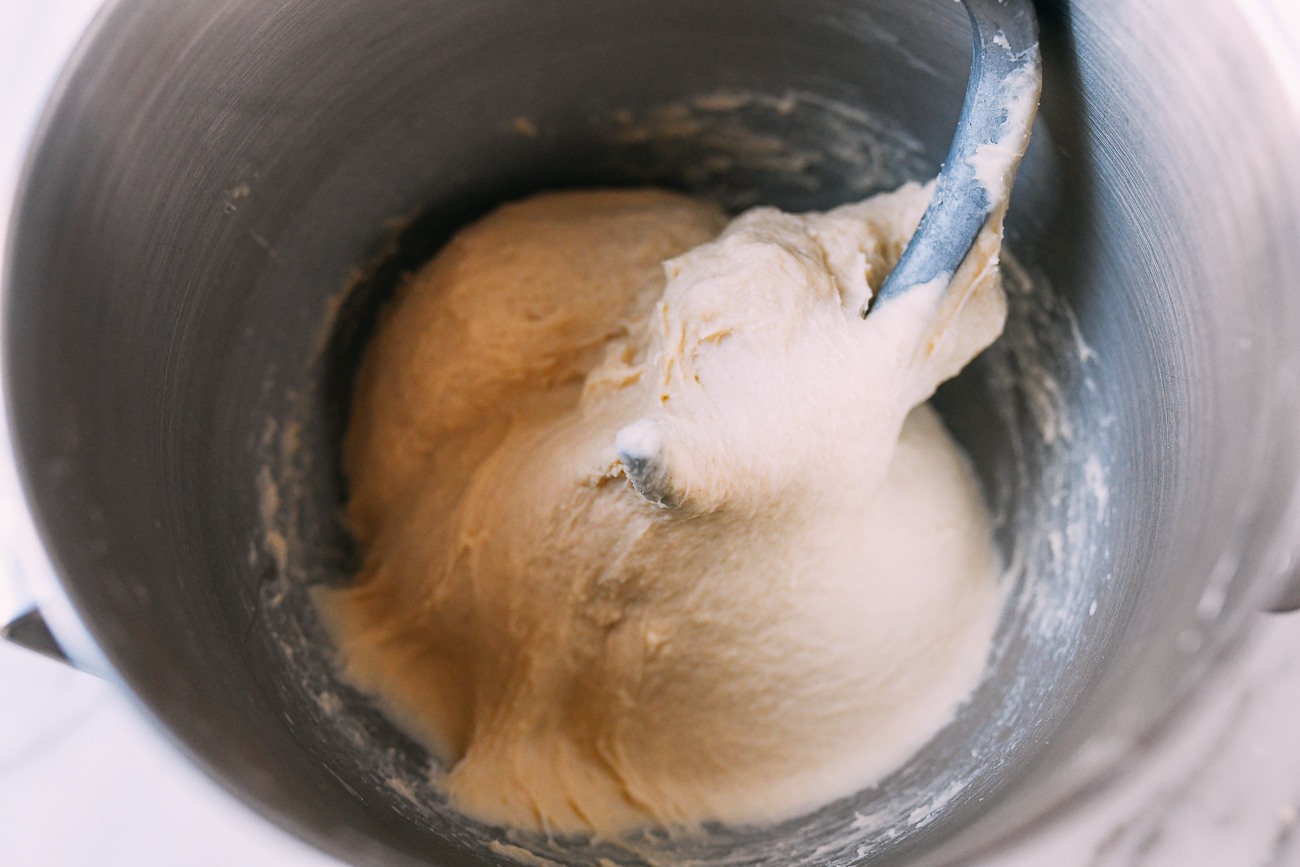
Turn on the mixer to the lowest setting, and let it go for 15 minutes, occasionally stopping the mixer to push the dough together.
If you’re in a humid climate and the dough is too sticky, feel free to add a little more flour 1 tablespoon at a time until it comes together. It should be sticking to the bottom of the bowl, but not the sides.
If you don’t have a mixer and would like to knead by hand, extend the kneading time by 5-10 minutes.
Cover the bowl with a damp towel and place in a warm spot for 1-2 hours, or until it has doubled in size. (We proof our dough in a closed microwave with a mug of just boiled water next to it.)
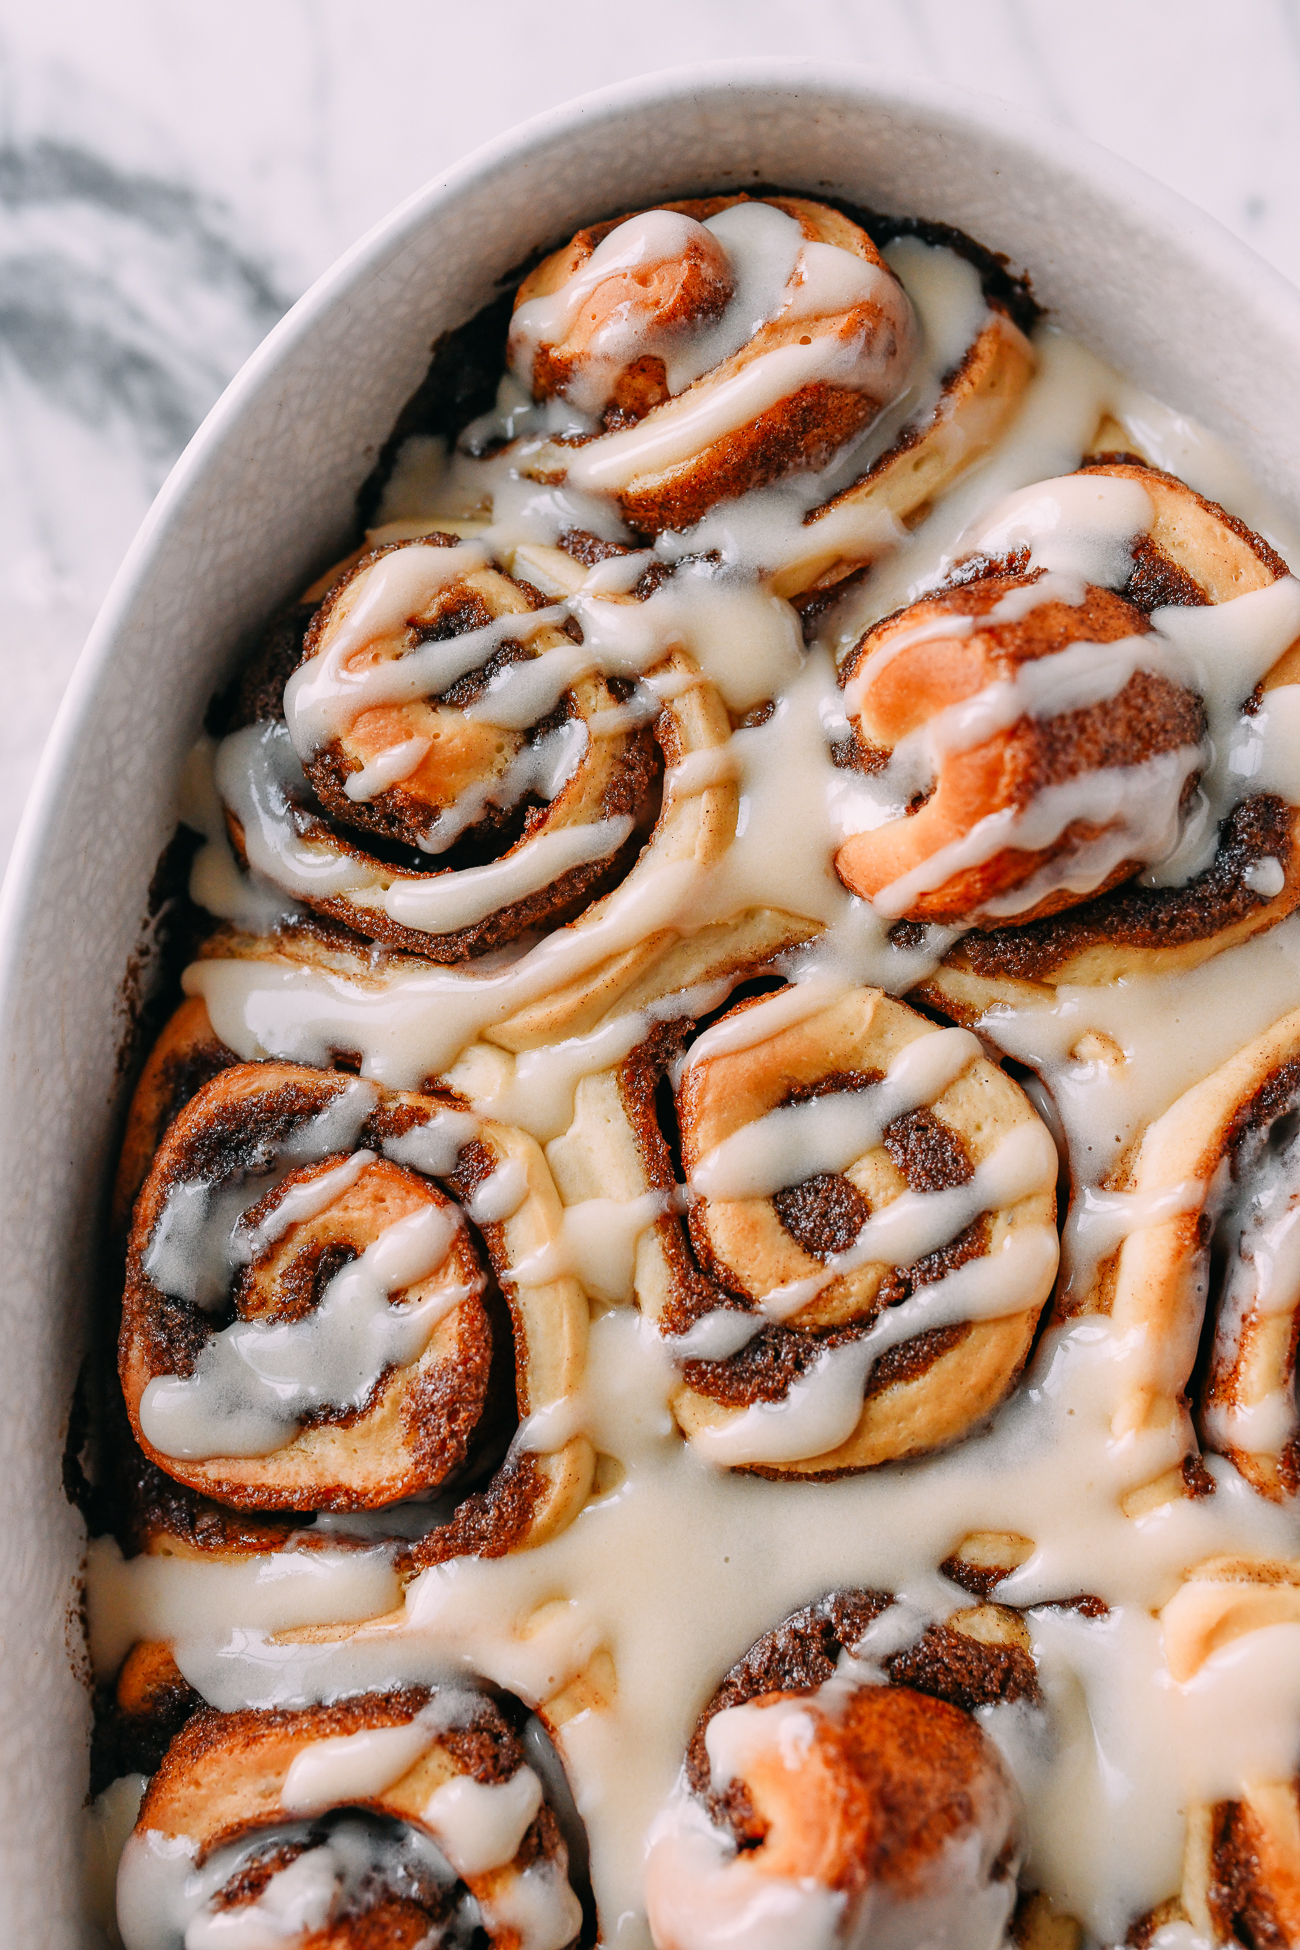
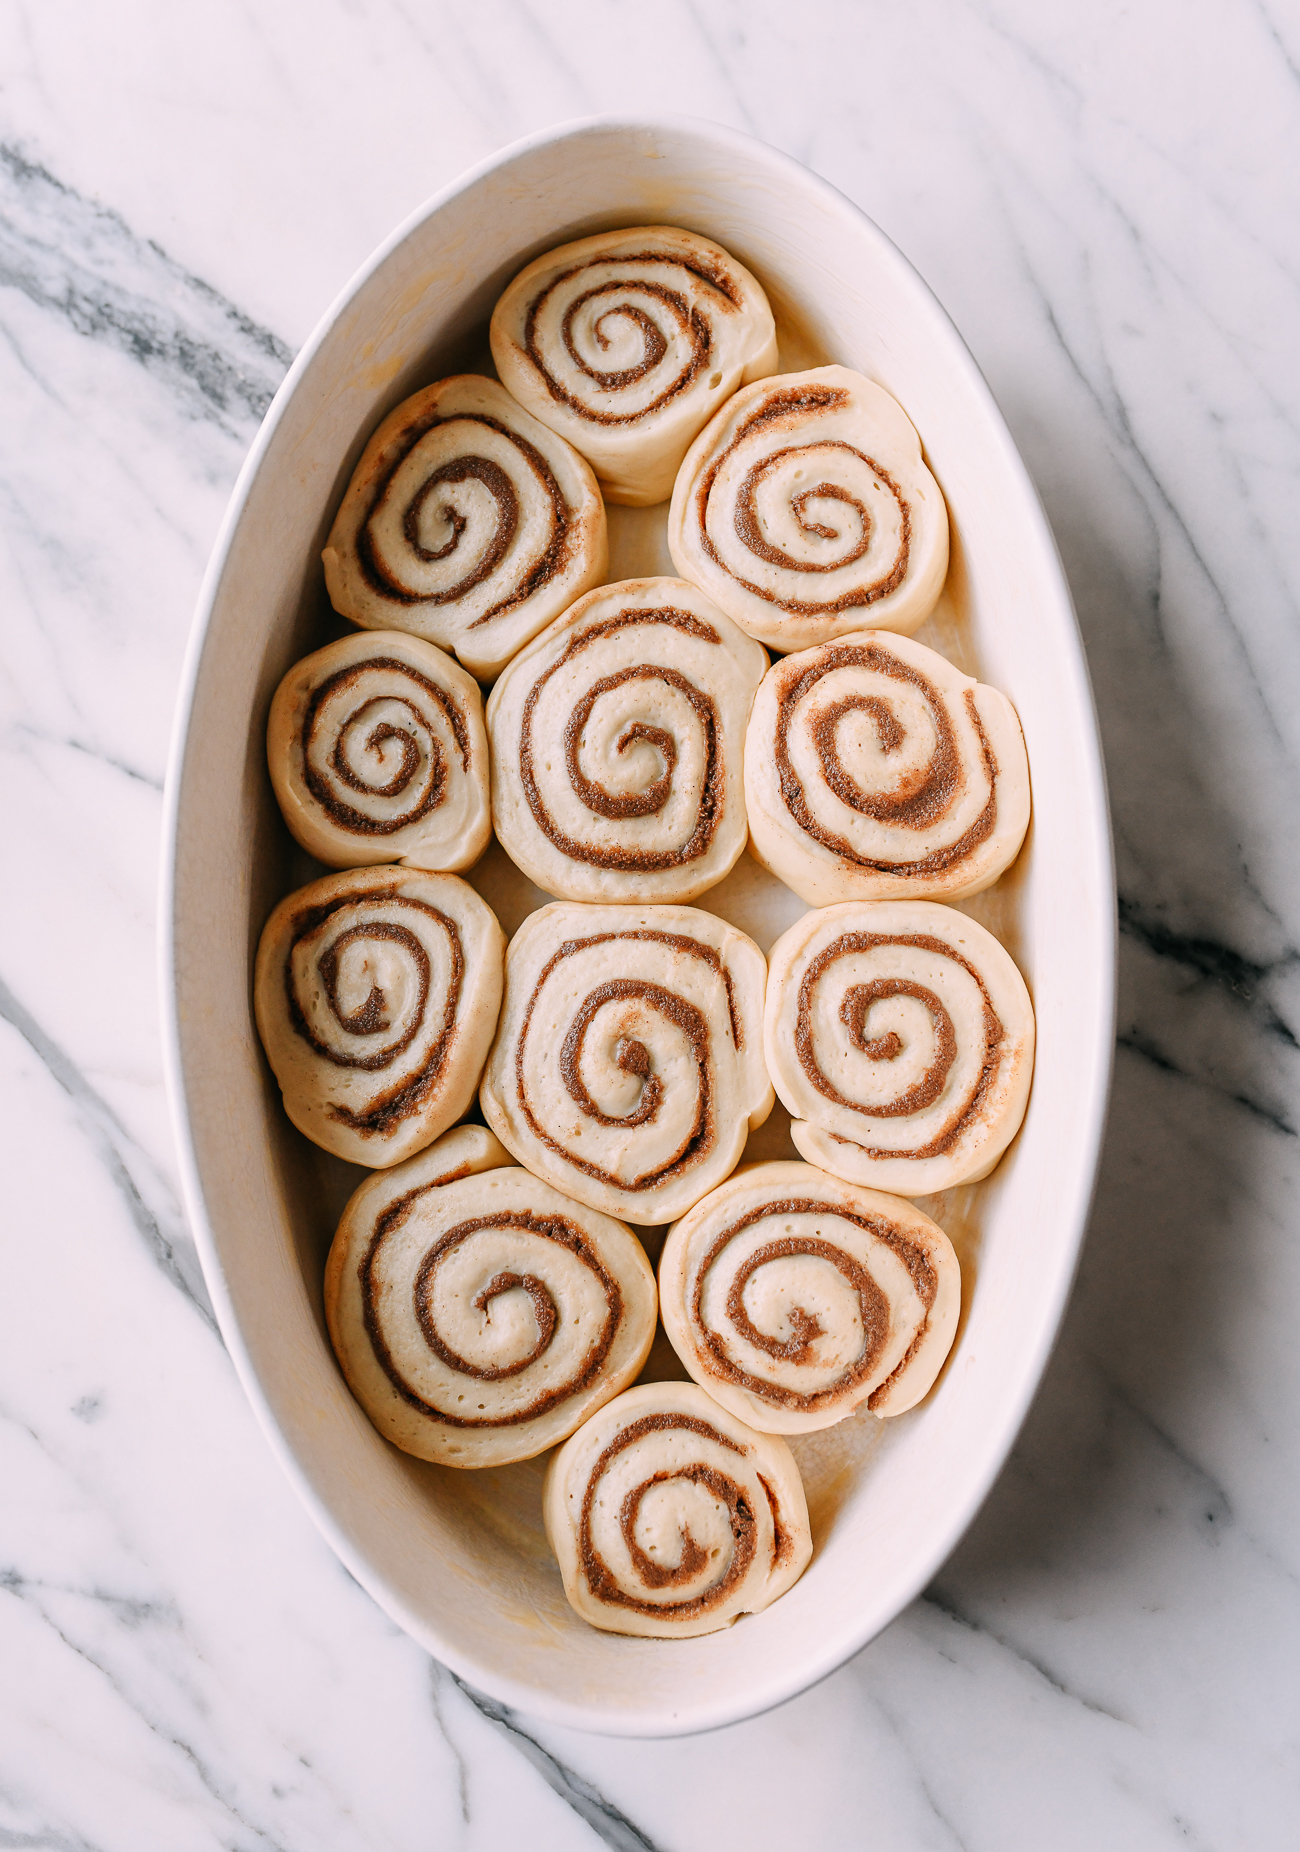
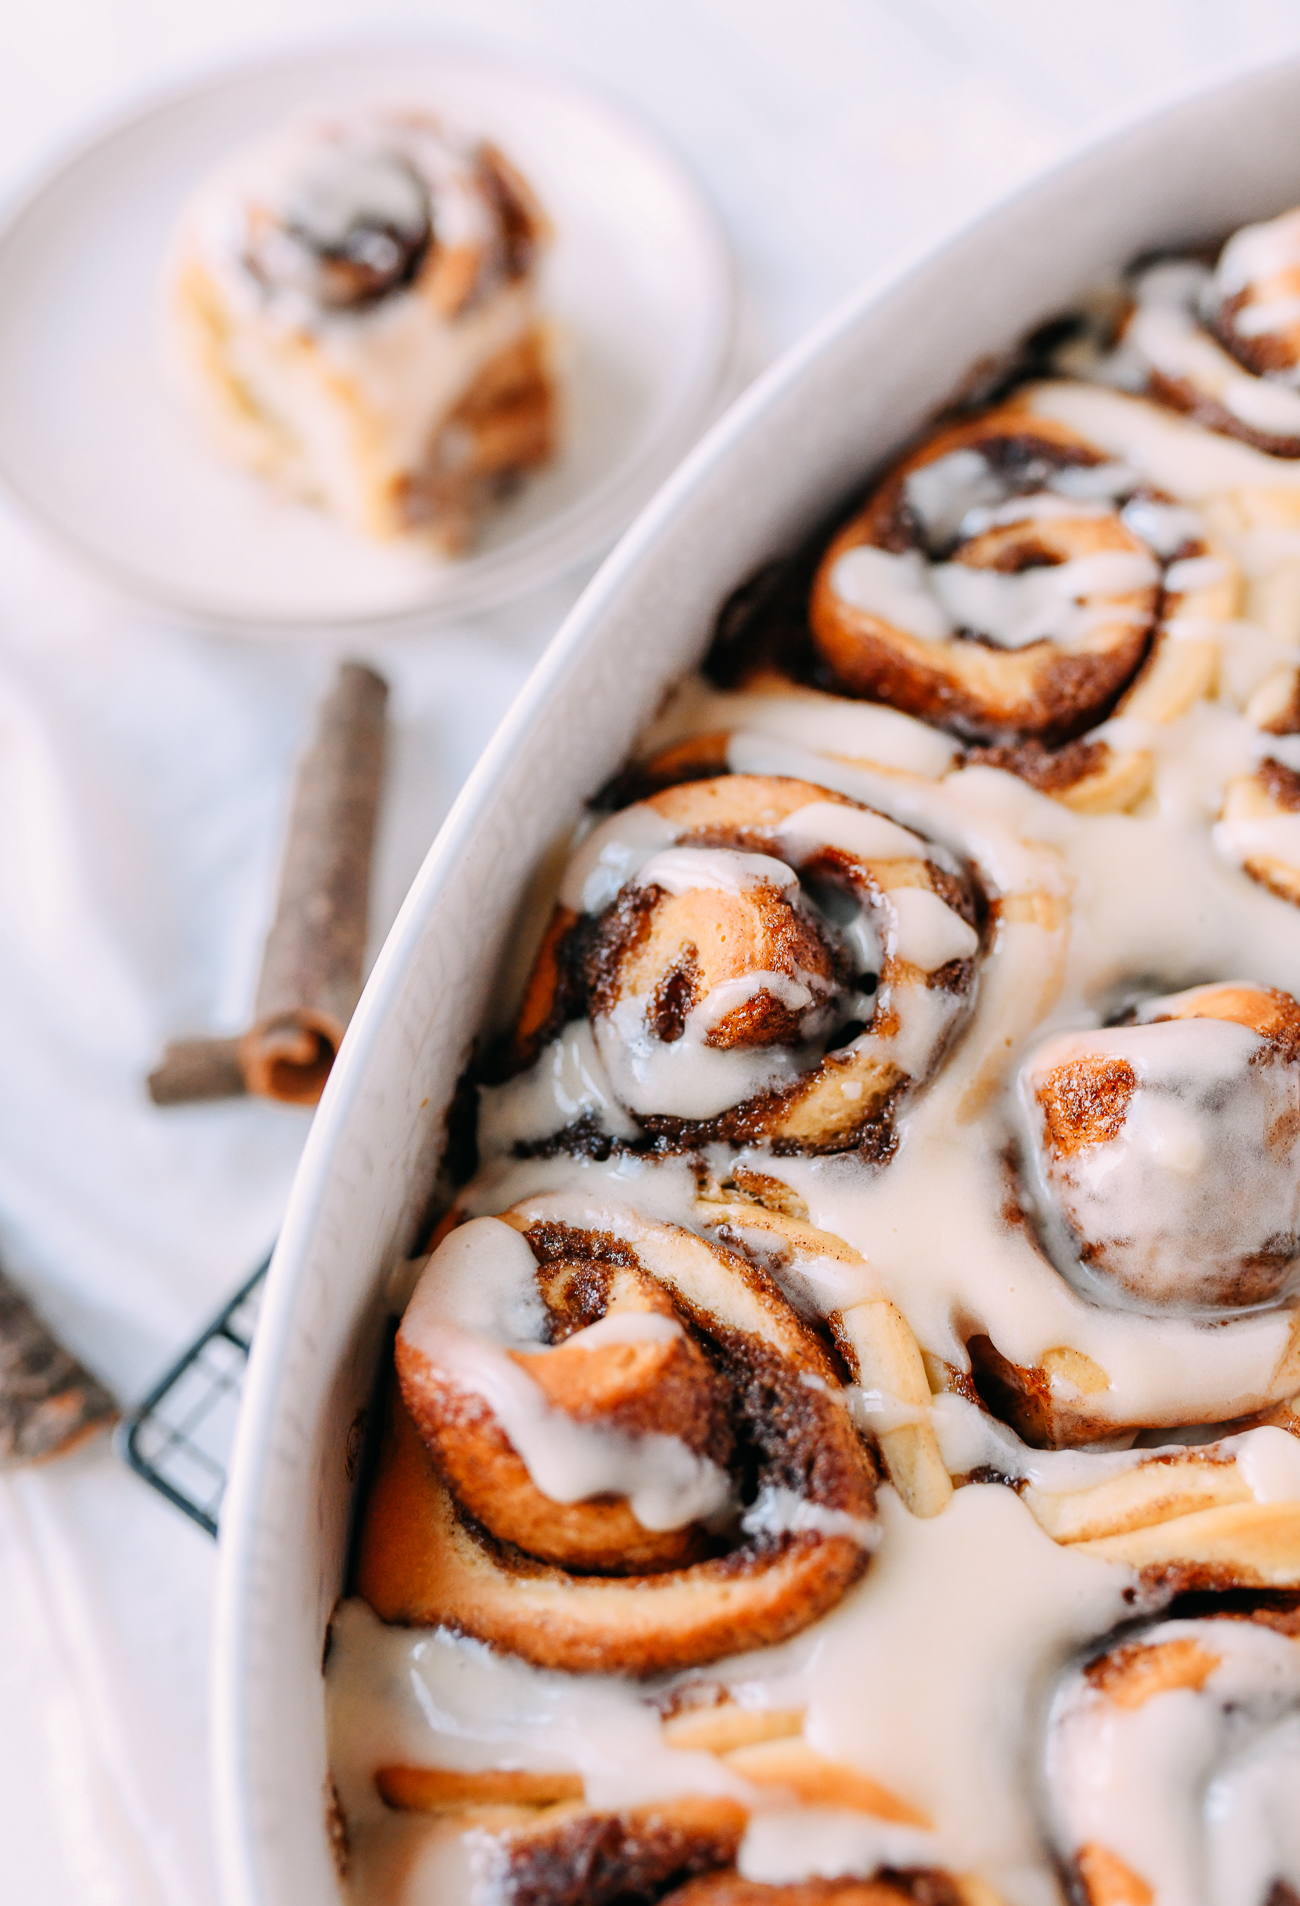
In the meantime, grease two baking vessels on all sides with butter. We fit 12 rolls in a large oval casserole dish, and 4 into a smaller overflow casserole dish. You can also use two 9-inch cake pans.
Keep in mind that these expand quite a bit. You want to ensure they have enough room to expand, but not so much room that they won’t end up hugging each other in the pan once baked.
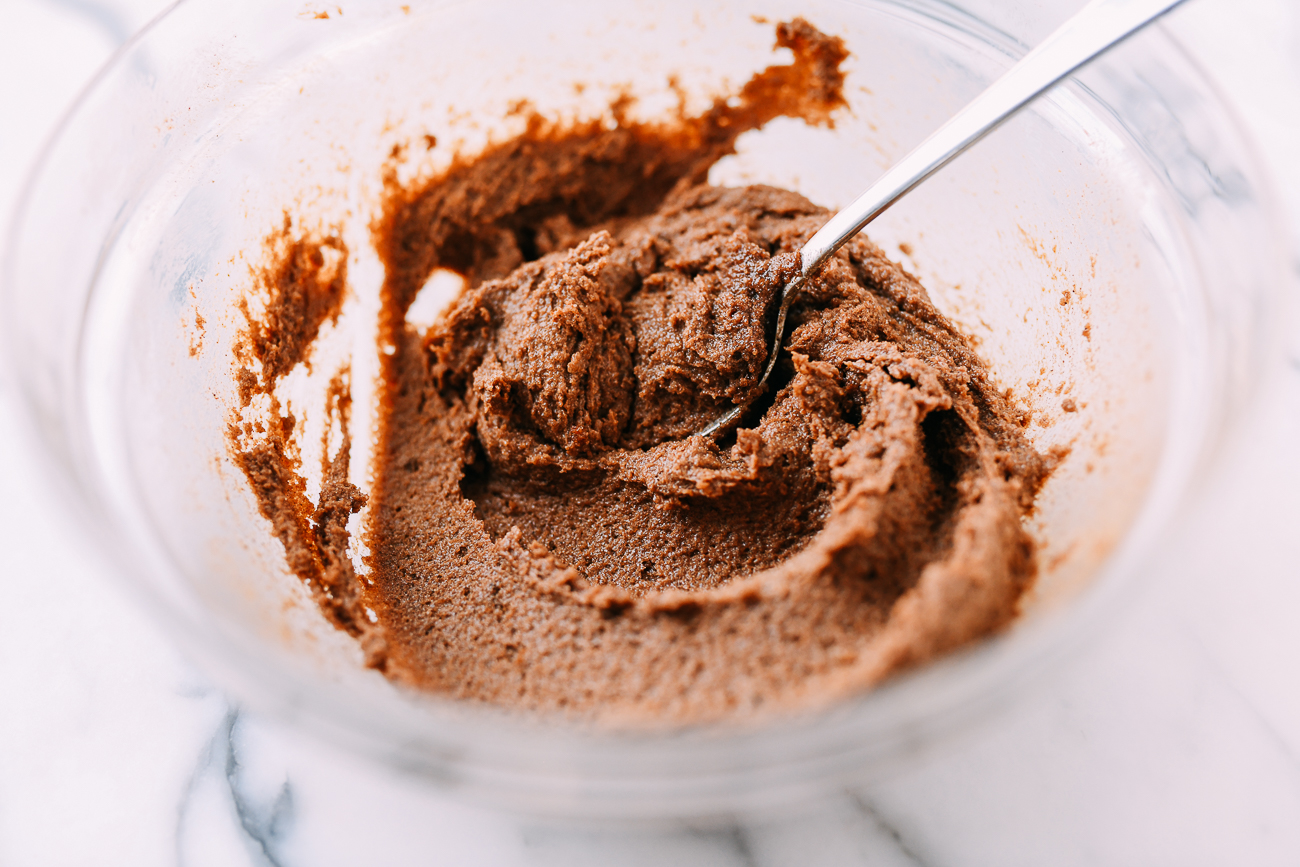
Next, mix the cinnamon sugar filling. In a medium bowl, combine the brown sugar, cinnamon, butter, and salt. If you need to, microwave the butter for 15-20 seconds to make it easier to stir (It should still be mostly solid. Don’t try to melt it entirely.)
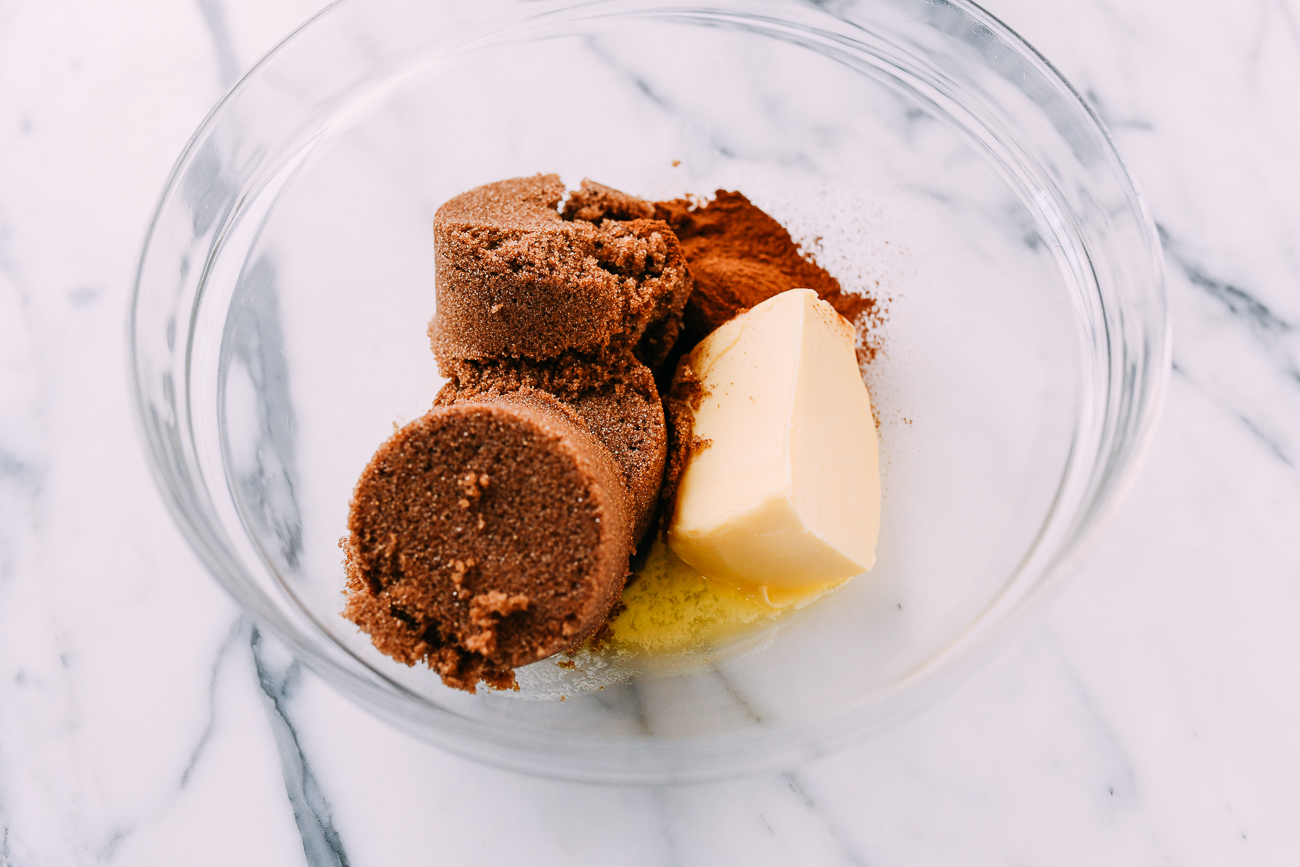
It will look like a brown paste.
After the dough has doubled in size, put it back in the mixer, and stir for another 5 minutes to get rid of any air bubbles.
Now you’re ready to assemble the cinnamon rolls.
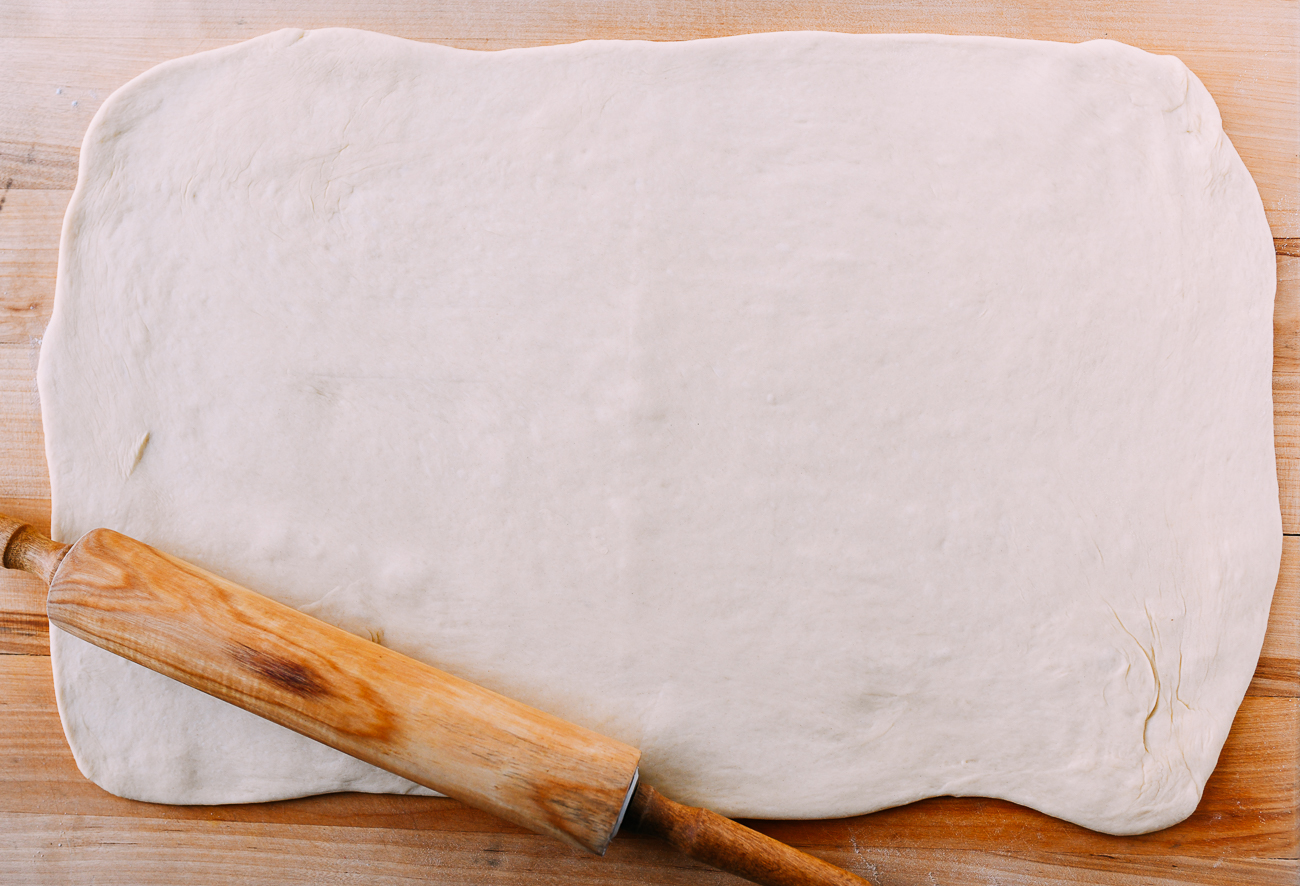
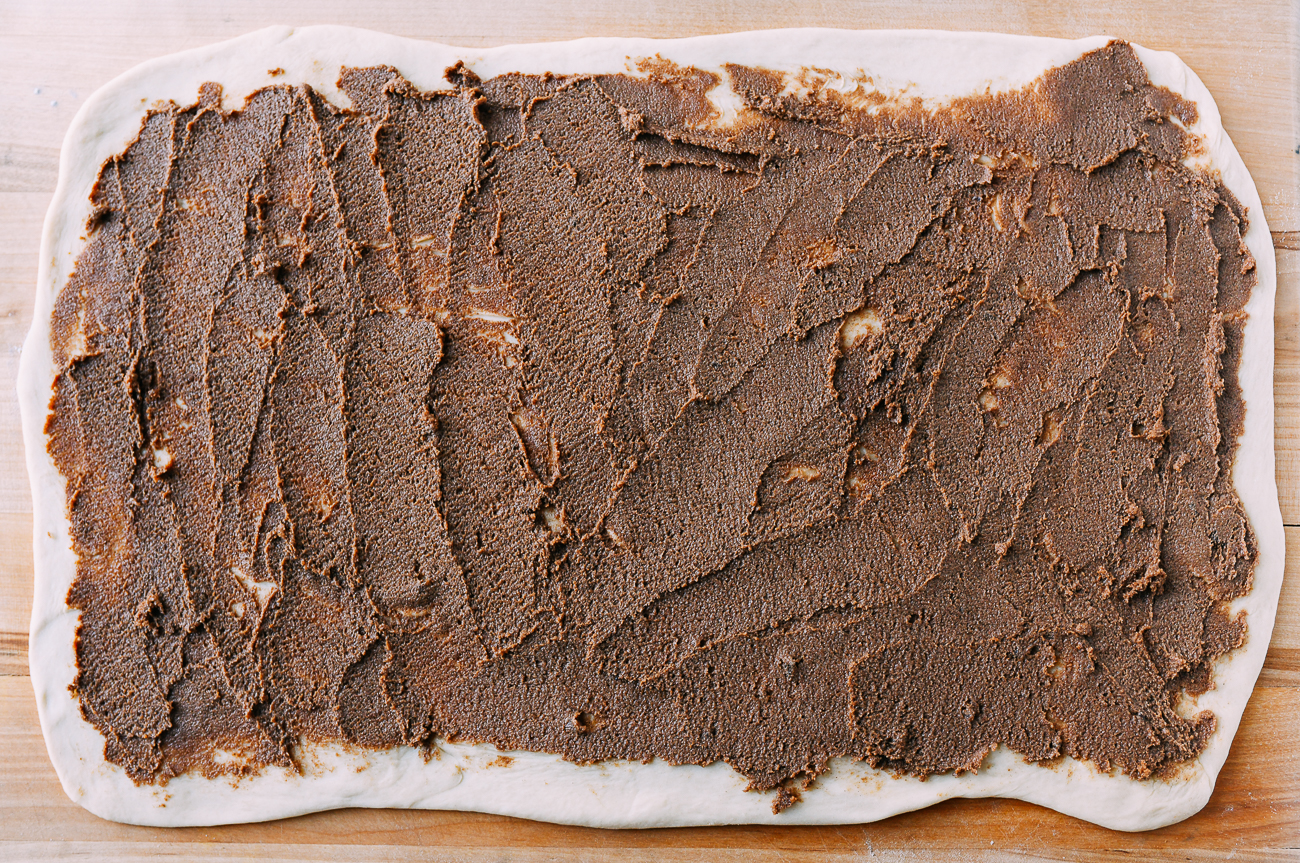
Roll the dough out into a 12×24 inch (30x60cm) rectangle, at about ¼-inch thickness.
Dollop the cinnamon roll filling across the surface of the dough.
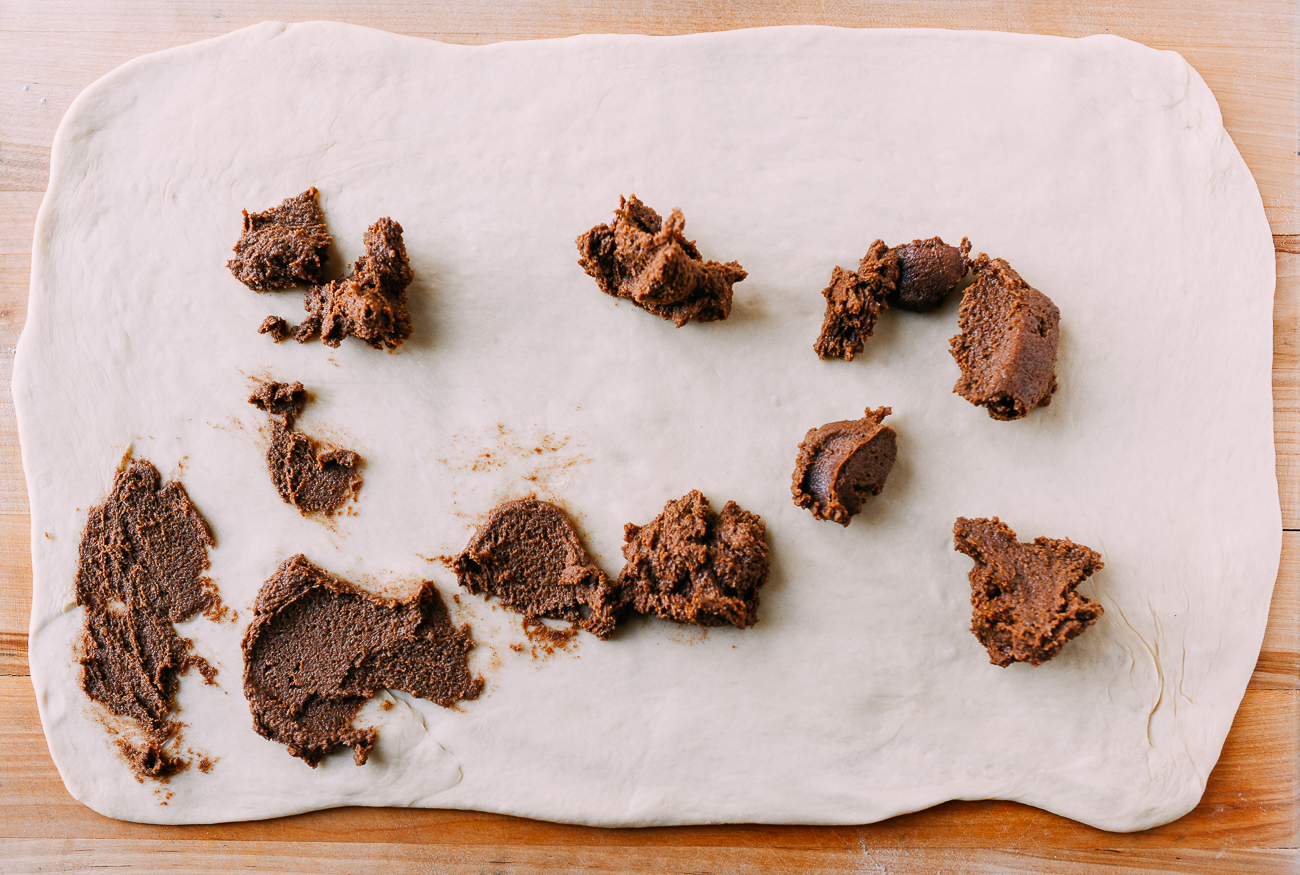
Using a butter knife (or an offset spatula, if you’re fancy), spread the cinnamon filling evenly over the dough leaving about a ½-inch of border on the sides.
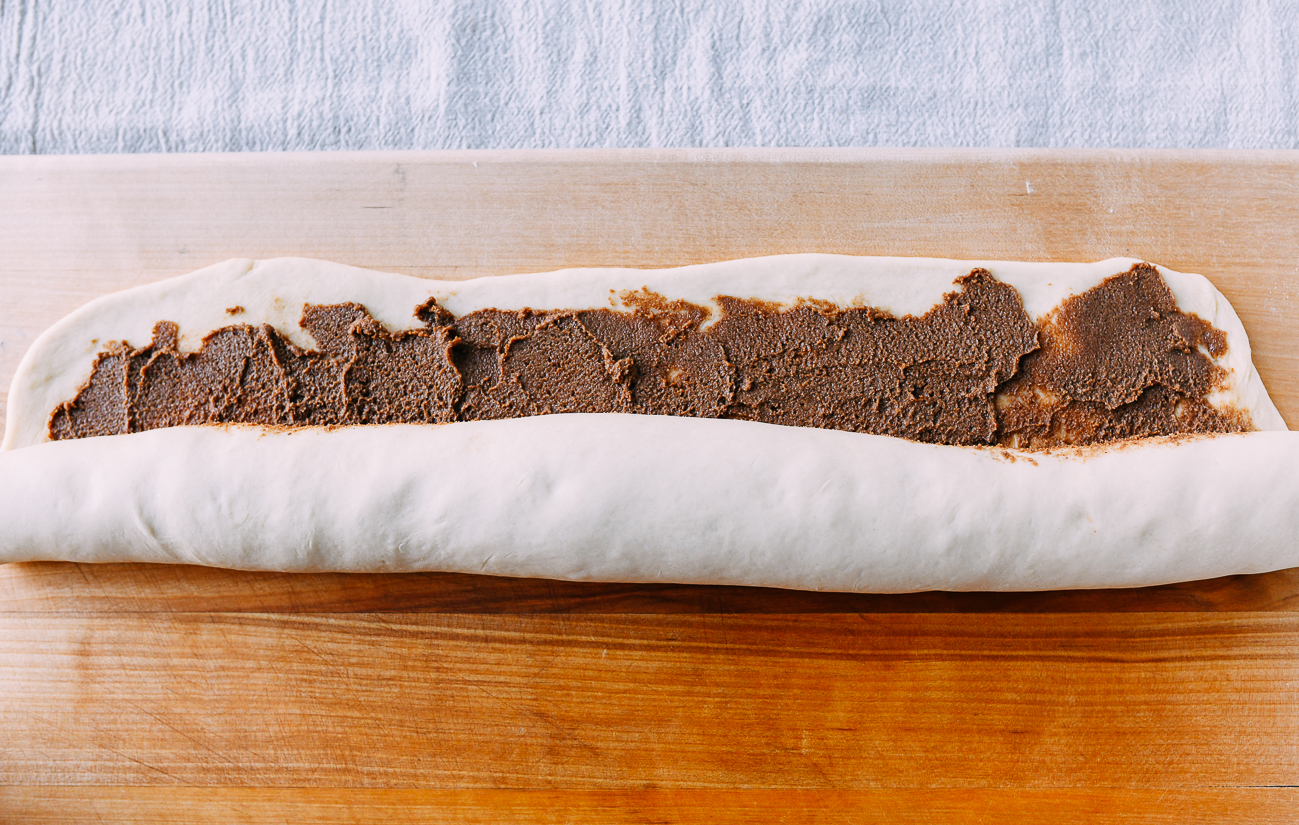
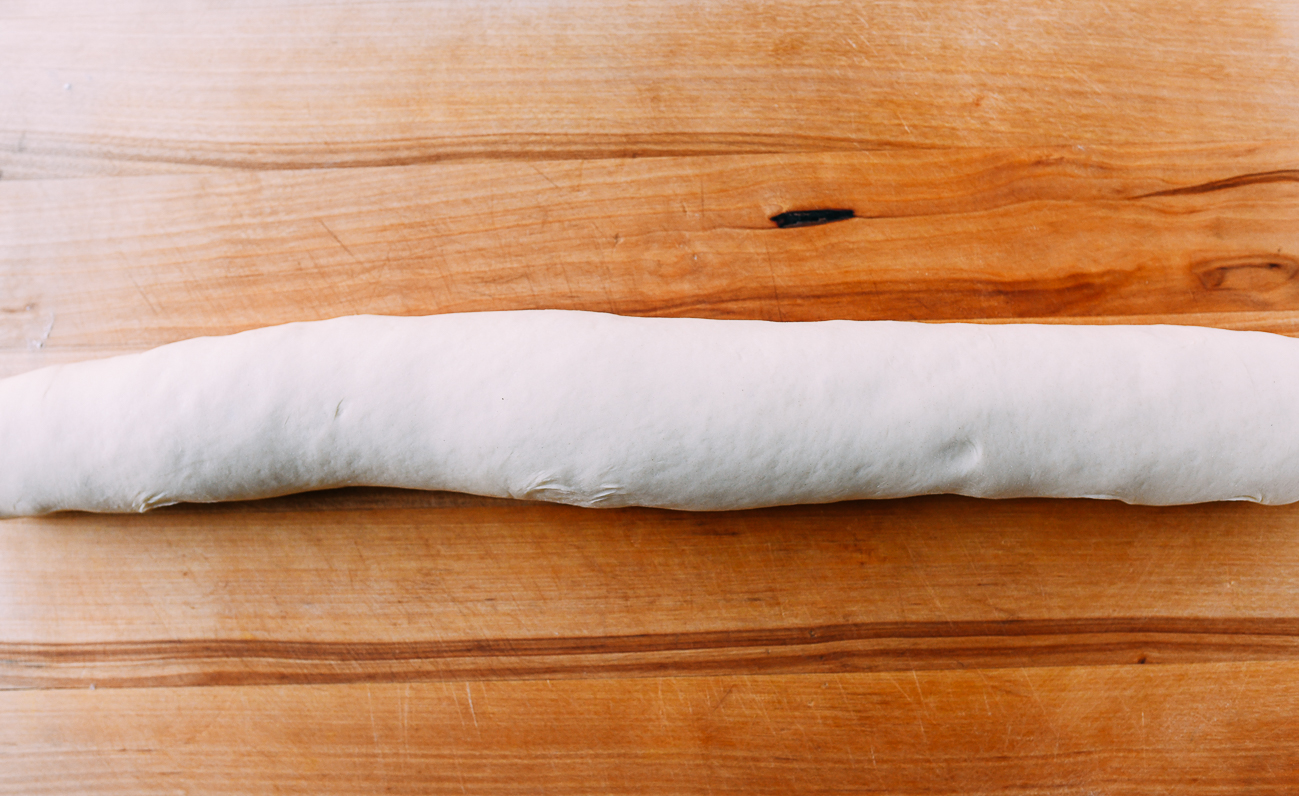
Roll it tightly into a big cigar…
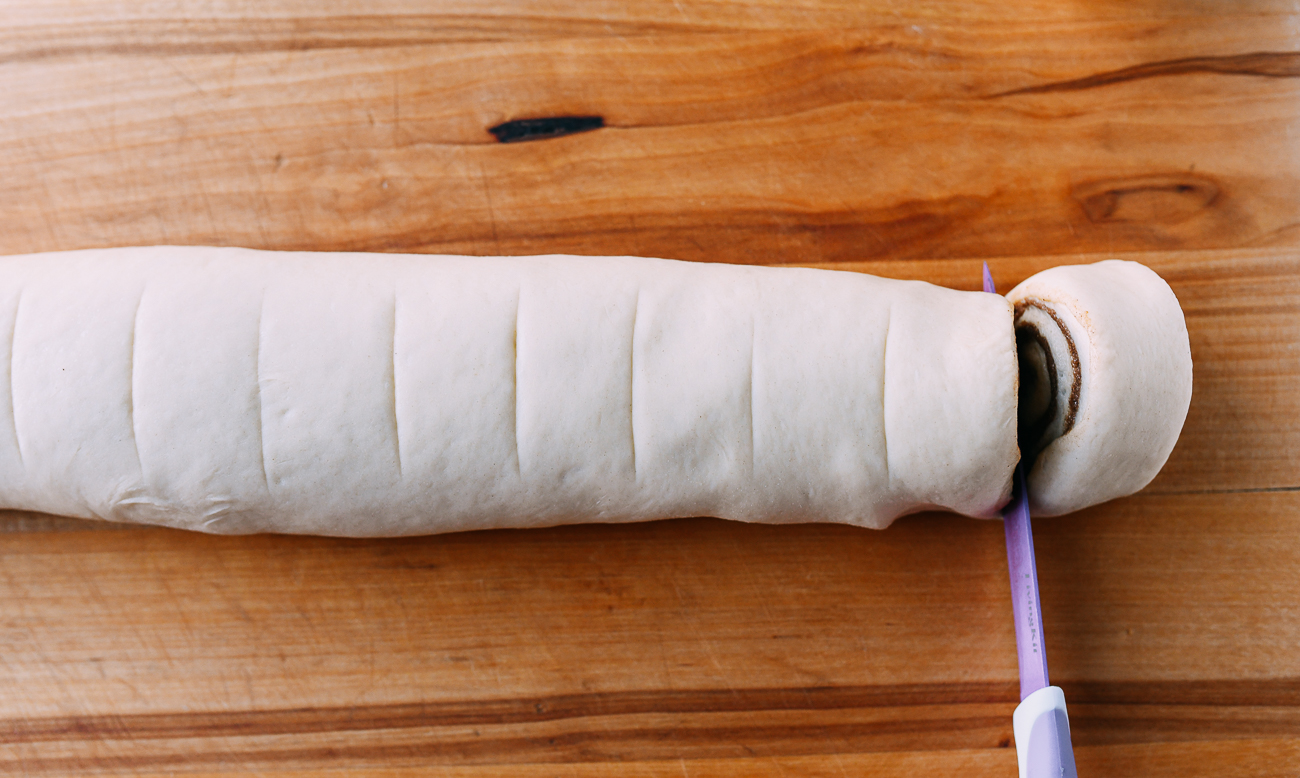
…And cut it into 16 equal pieces. (It helps to score it first in half, then in fourths, and so on).
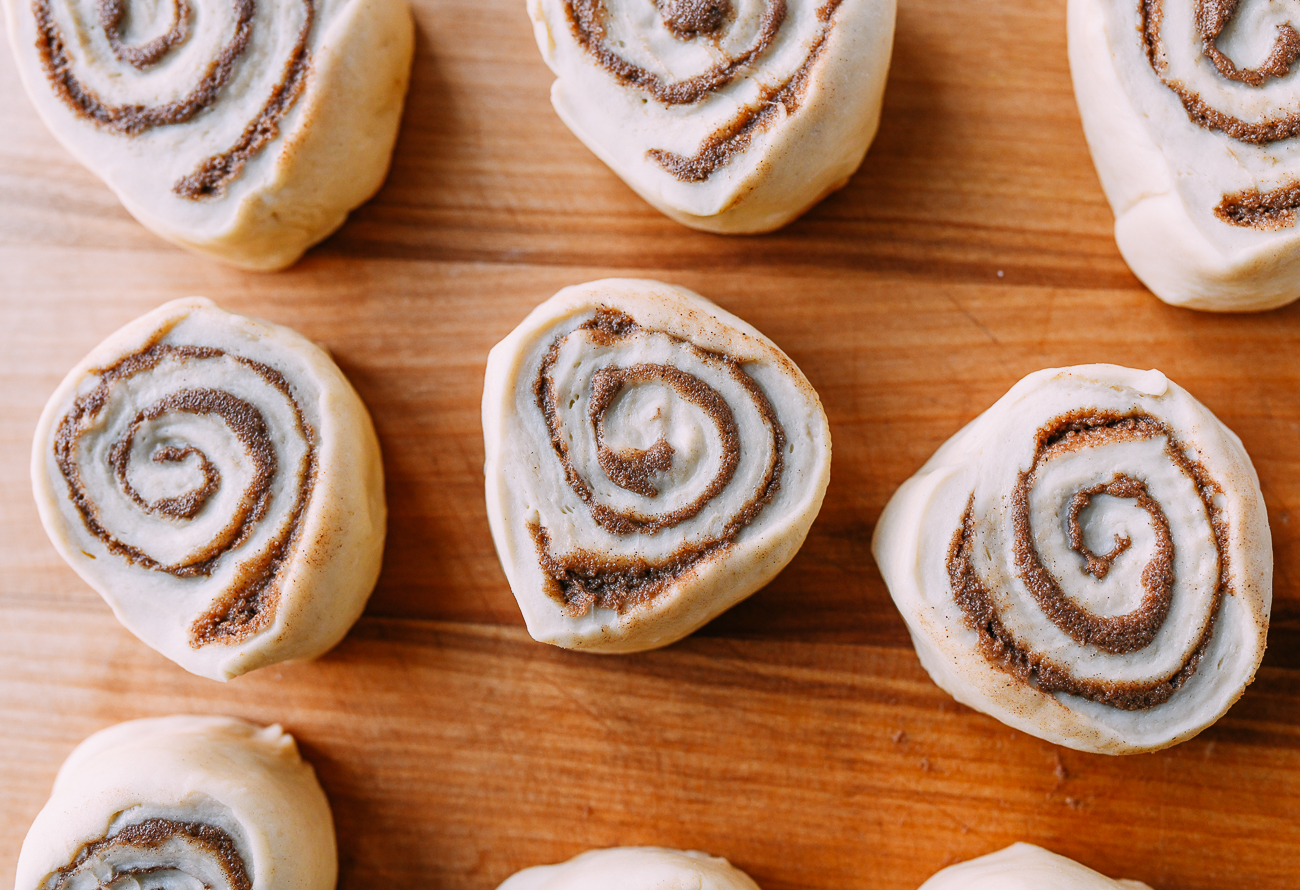
Arrange the buns in the buttered baking pans (when it comes to the end pieces, place them cut side up) with about 1/2 to 3/4 inch between each bun. Proof for another 30-40 minutes.
This was what our rolls looked like after proofing:
15 minutes into the last round of proofing, arrange a rack in the middle of the oven, and preheat to 350°F/175°C. After proofing the buns, bake for 20-25 minutes. Ours baked in 25 minutes.
If you know your oven runs hot, proceed accordingly. The center buns will look a little pale relative to the ones on the edges, but don’t be tempted to bake them longer!
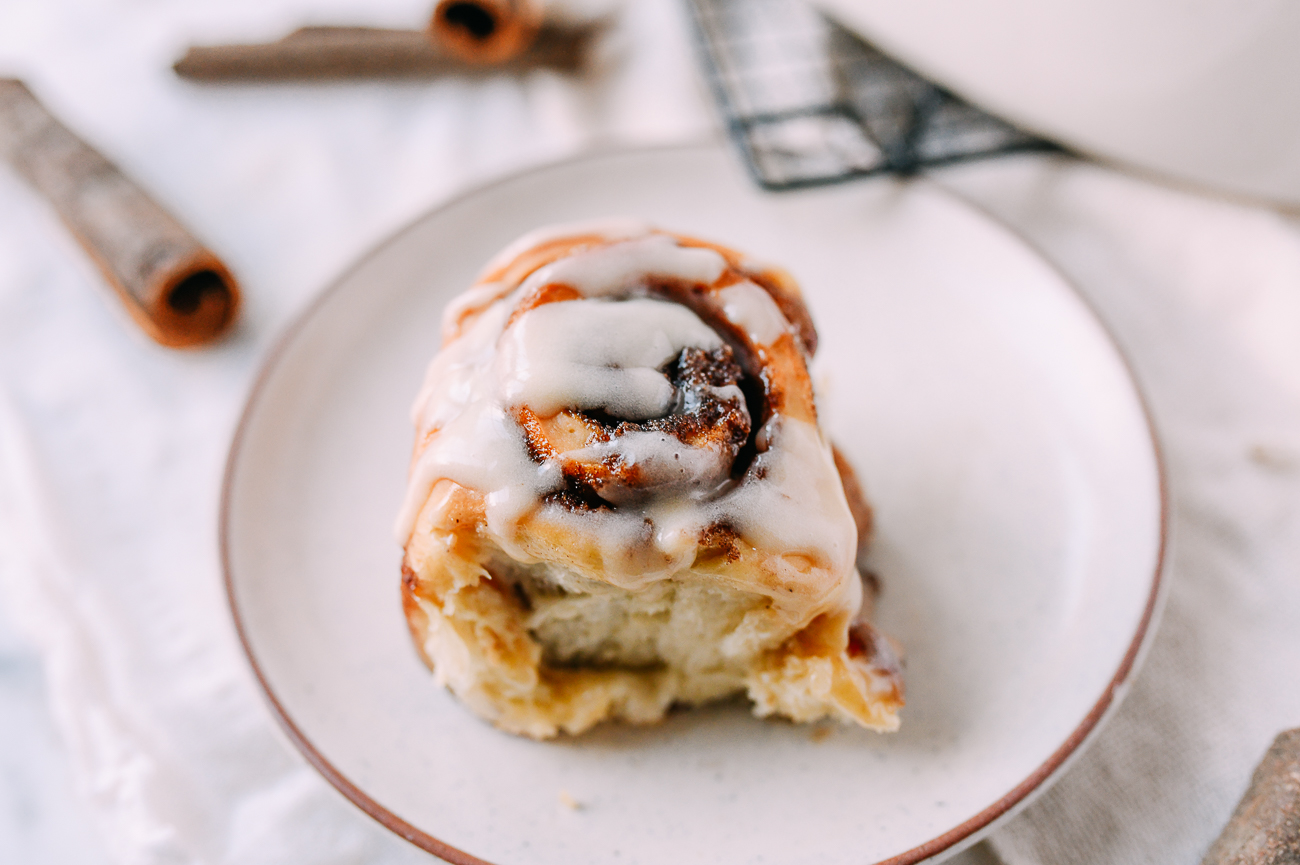
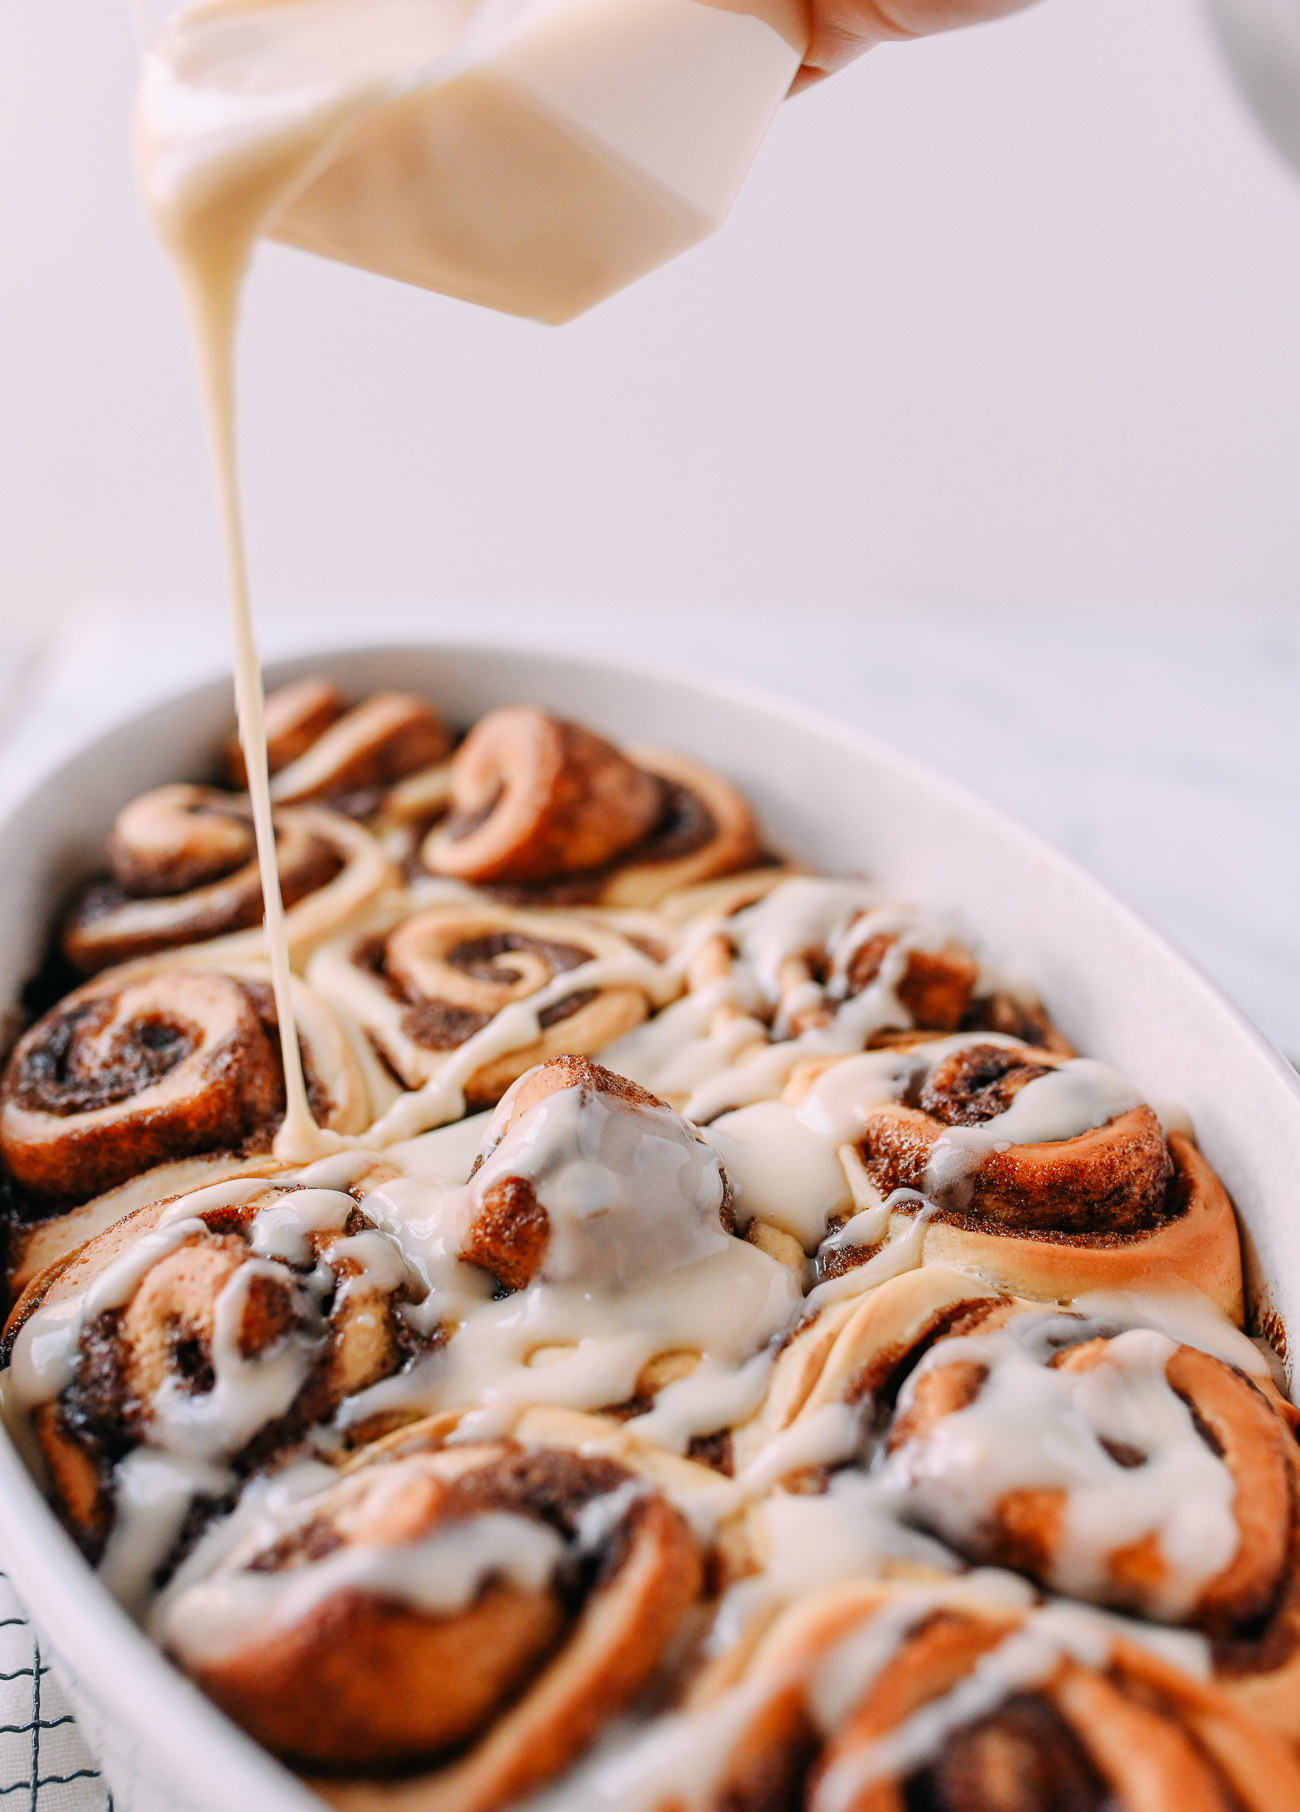
While the buns are baking, make the cream cheese icing. Whip the cream cheese and butter until fluffy and pale yellow. Add the vanilla extract and powdered sugar. For super thick icing, omit the milk. For a thinner, pourable consistency (as shown), add the milk.
Optional Tip!
A tip from our aunt, a Cinnabon-fan! To get the icing to taste more like Cinnabon, add 1/4 tsp lemon extract.
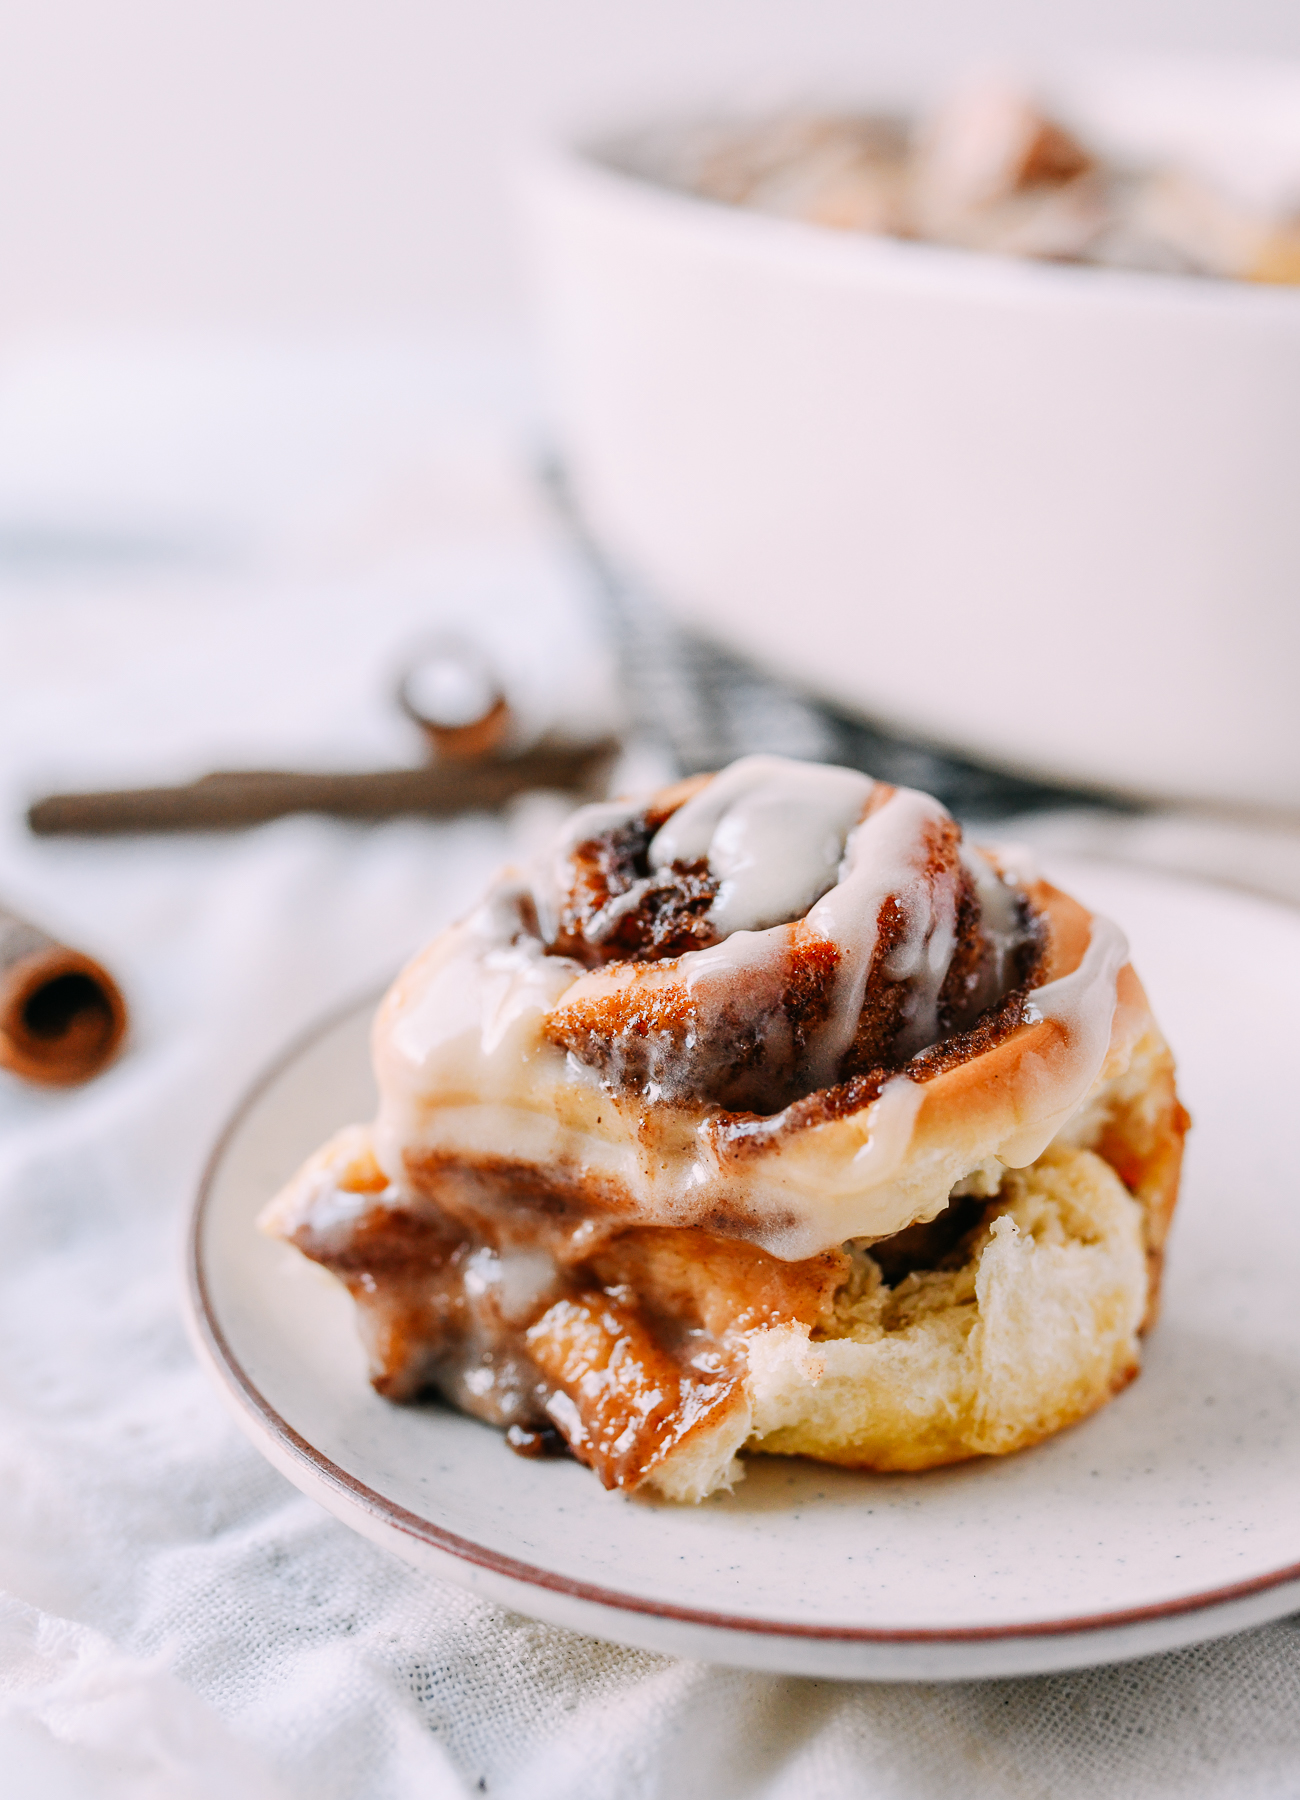
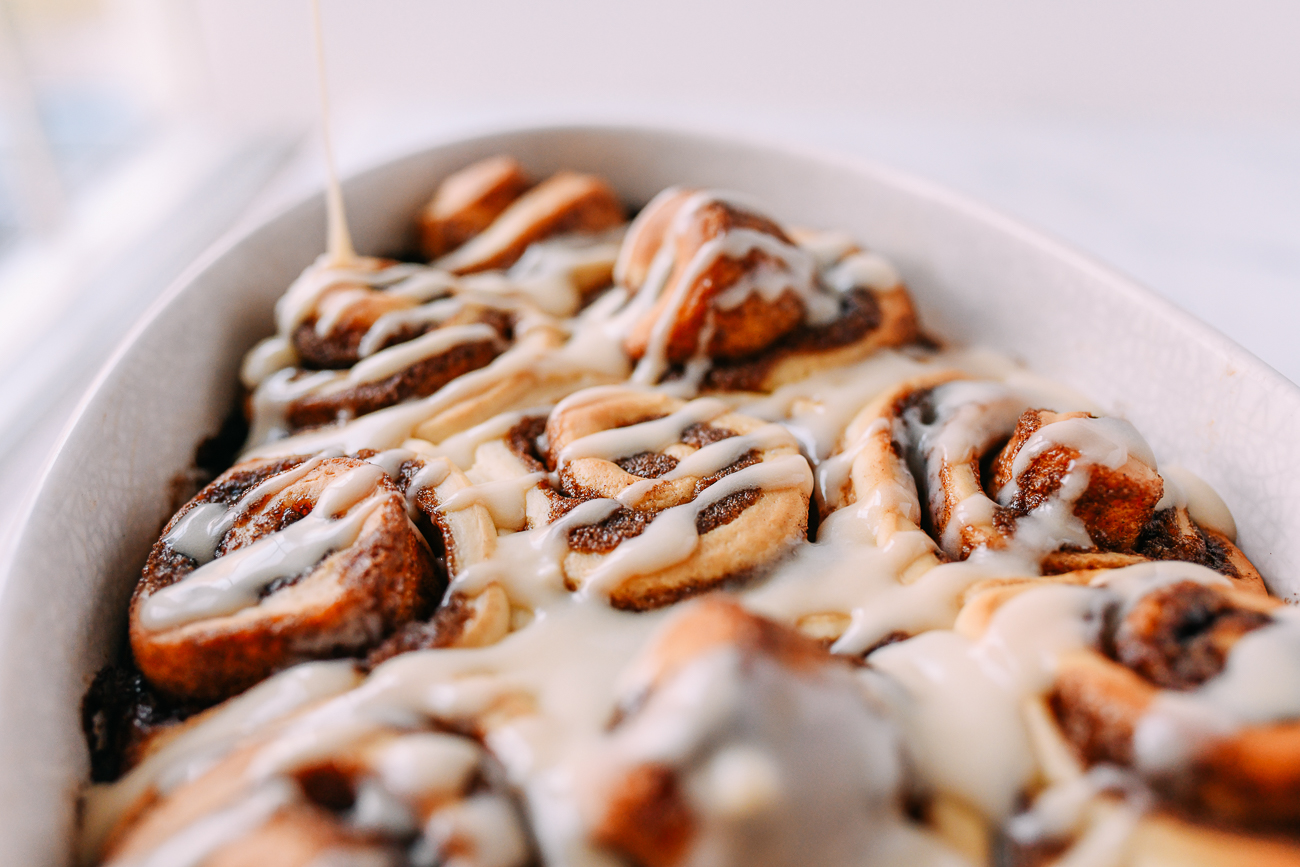
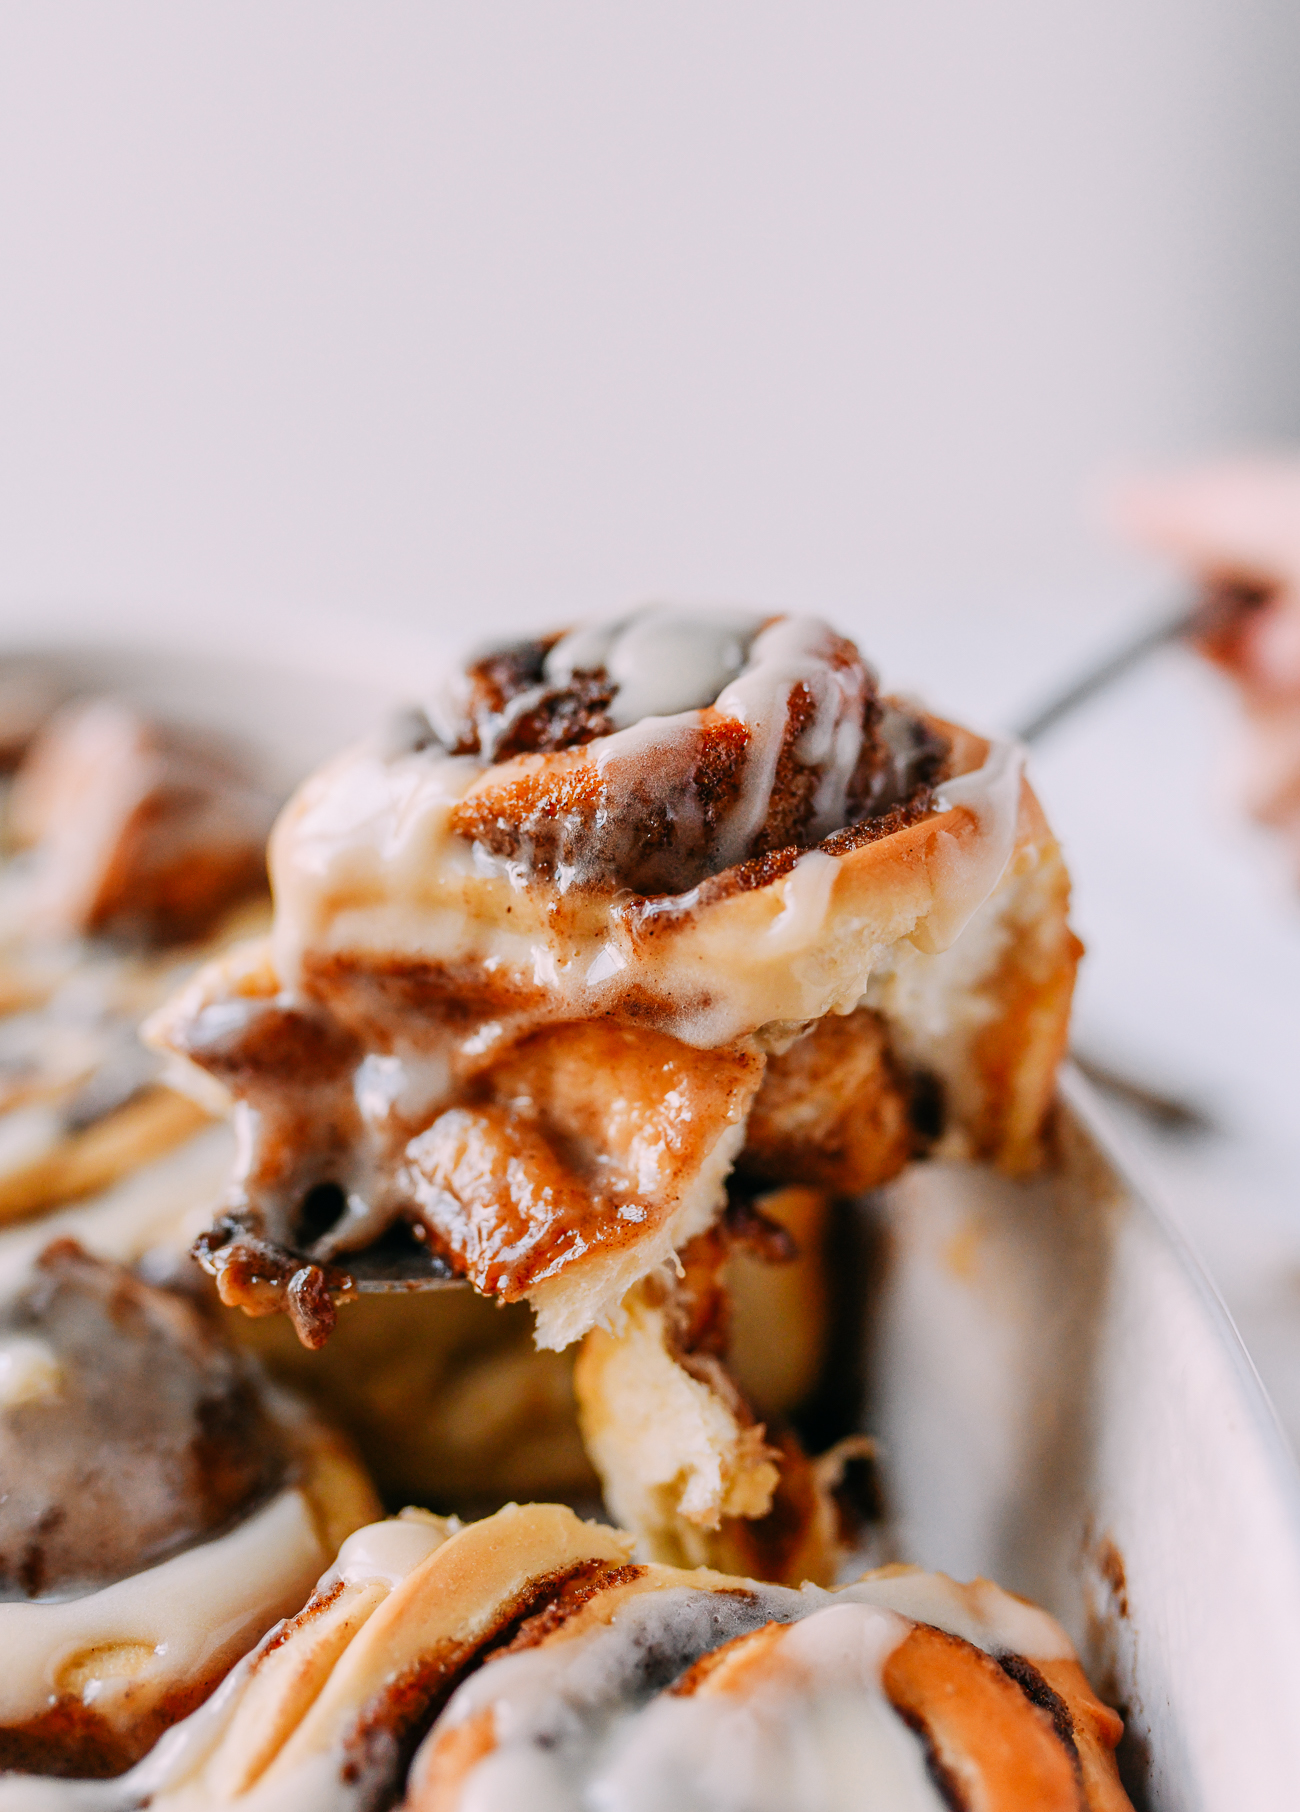
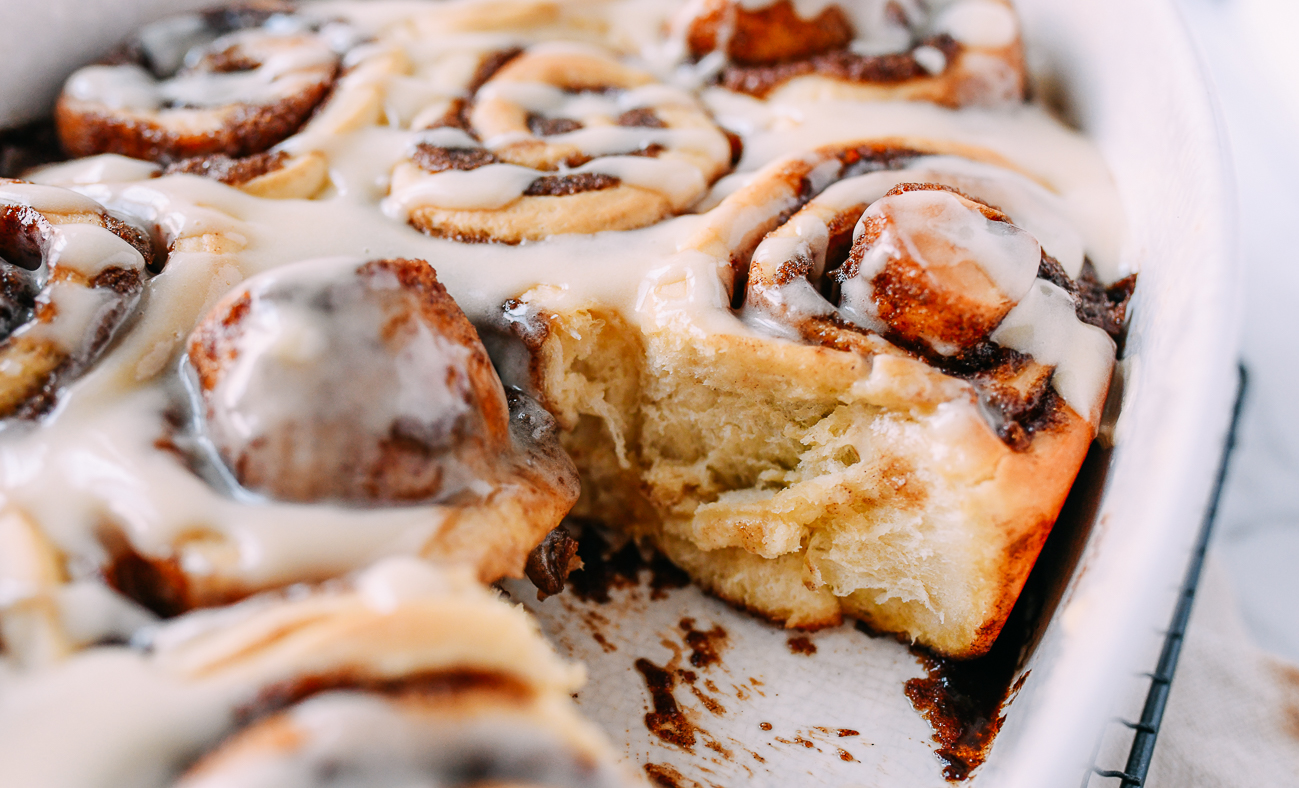
When the buns are done baking, remove from the oven. Drizzle icing evenly over the buns as desired.
Serve these immediately!!! They’re best fresh out of the oven. The next day, they can be warmed up in the microwave for about 20-30 seconds to make them warm and as tender as they were fresh out of the oven.
Make-Ahead Tip!
You can assemble the dough in advance, and after the first knead, cover it tightly and refrigerate overnight. The next day, let the dough come back up to room temperature, and proceed with step 4 in the recipe card below.
Looking for more authentic recipes? Subscribe to our email list and be sure to follow us on Pinterest, Facebook, Instagram, and Youtube!
Recipe

Fluffy Cinnamon Rolls
Ingredients
For the dough:
- 2/3 cup heavy cream (at room temperature)
- 1 cup milk (1%, 2%, or whole, at room temperature)
- 1 large egg (at room temperature)
- 1/3 cup sugar
- 1/2 cup cake flour (tap measuring cup to avoid air pockets)
- 3 1/2 cups bread flour (tap measuring cup to avoid air pockets)
- 1 tablespoon active dry yeast
- 1 1/2 teaspoons salt
For the filling:
- 2/3 cup dark brown sugar (or light brown sugar, lightly packed)
- 1 1/2 tablespoons ground cinnamon
- 1/2 cup unsalted butter (softened at room temperature)
- 1/8 teaspoon salt
For the icing (Makes 2 cups of icing. We used 1 cup, because we prefer ours less sweet. Those who like their cinnamon rolls drowning should make the full recipe! )
- 5 ounces cream cheese (at room temperature)
- 3 tablespoons salted butter (at room temperature)
- 2 teaspoons vanilla extract
- 1 1/2 cups powdered sugar (AKA icing sugar)
- 3 1/2 tablespoons whole milk (optional)
Instructions
- In the bowl of a stand mixer fitted with a dough hook attachment, add these ingredients in the following order: room temperature heavy cream, milk, and egg, followed by the sugar, cake flour, bread flour, active dry yeast, and salt. There is no need to activate the yeast beforehand.
- Turn on the mixer to the lowest setting, and let it go for 15 minutes, occasionally stopping the mixer to push the dough together. If you’re in a humid climate and the dough is too sticky, feel free to add a little more flour 1 tablespoon at a time until it comes together. It should be sticking to the bottom of the bowl, but not the sides. If you don’t have a mixer and would like to knead by hand, extend the kneading time by 5-10 minutes.
- Cover the bowl with a damp towel and place in a warm spot for 1-2 hours, or until it has doubled in size. (We proof our dough in a closed microwave with a mug of just boiled water next to it.)
- In the meantime, grease two baking vessels on all sides with butter. We fit 12 rolls in a large oval casserole dish, and 4 into a smaller overflow casserole dish. You can also use two 9-inch cake pans. Keep in mind that these expand quite a bit. You want to ensure they have enough room to expand, but not so much room that they won’t end up hugging each other in the pan once baked.
- Next, mix the cinnamon sugar filling. In a medium bowl, combine the brown sugar, cinnamon, butter, and salt until it’s a brown paste. If you need to, microwave the butter for 15-20 seconds to make it easier to stir.
- After the dough has doubled in size, put it back in the mixer, and stir for another 5 minutes to get rid of any air bubbles.
- Roll the dough out into a 12×24 inch (30x60cm) rectangle, at about ¼-inch thickness. Using a butter knife, spread the brown sugar filling evenly over the dough leaving about a ½-inch of border on the sides. Roll it tightly into a big cigar, and cut it into 16 equal pieces. (It helps to score it first in half, then in fourths, and so on).
- Arrange the buns in the buttered baking pans (when it comes to the end pieces, place them cut side up) with about ¾-inch between each bun. Proof for another 30-40 minutes.
- 15 minutes into the last round of proofing, arrange a rack in the middle of the oven, and preheat to 350°F/175°C. After proofing the buns, bake for 20-25 minutes. Ours baked in 25 minutes. If you know your oven runs hot, proceed accordingly. The center buns will look a little pale relative to the ones on the edges, but don’t be tempted to bake them longer!
- While the buns are baking, make the cream cheese icing. Whip the cream cheese and butter until fluffy and pale yellow. Add the vanilla extract and powdered sugar. For super thick icing, omit the milk. For a thinner, pourable consistency, add the milk.
- When the buns are done baking, remove from the oven. Drizzle icing evenly over the buns as desired. Serve warm!