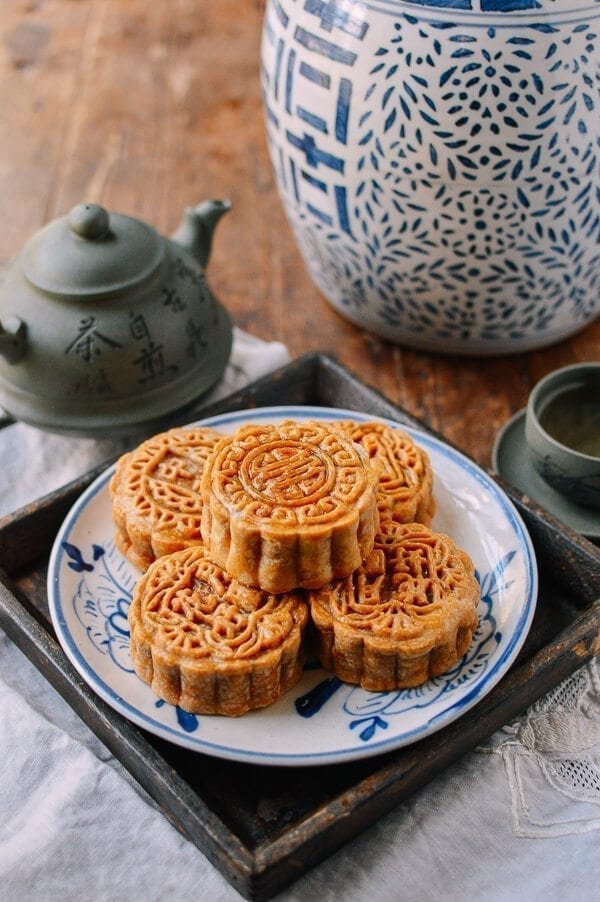
Making Mooncakes: Fresher & More Economical!
Ham and Nut Mooncakes originate from Guangdong (广东). I’ve noticed that Cantonese mooncakes can be more costly, with this mooncake recipe calling for ham and nuts (which can be quite expensive), and some other recipes even calling for dried scallops (SUPER expensive). But it doesn’t matter what these raw materials cost. You’ll still come out ahead of store-bought prices. I was stopped in my tracks this year when I saw mooncake prices in the store. $50+ for a box of four! These days, you can also buy your Mooncakes on Amazon!A Savory Mooncake
This traditional Ham and Nut Mooncake recipe is a savory mooncake that translates to “mooncake with five types of nuts.” The five types are: walnuts (核桃仁, hetao ren), Chinese almonds, or bitter almonds (杏仁, xin ren), regular almonds (橄榄仁, gannan ren), pumpkin seeds (瓜子仁, guazi ren), and sesame seeds (芝麻仁, zhima ren). The savory element is the addition of Chinese hard-cured ham (京华火腿) and bits of pork fat. Many of you will be glad to hear that I omitted the pork fat. It’s pretty overpowering and definitely overkill with all the richness of the nuts and ham. The filling usually also contains dried fruits like candied winter melon, although I think candied orange and candied ginger are better picks. I used currants, but you should feel free to use whatever your favorite nuts and dried fruits are and tailor the filling to your tastes, like I did! Just be mindful of the respective weights and total ratios for each ingredient to make sure you’re balancing the flavors and textures of the mooncake filling.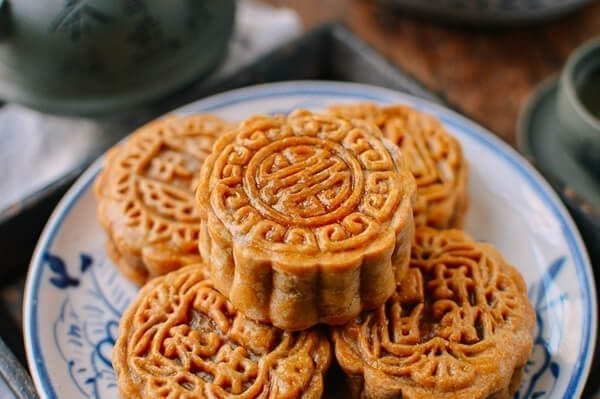
Baijiu: A Surprise Ingredient
One surprise ingredient in the filling is the addition of Chinese bai jiu, 白酒, which has a whopping 45% alcohol content. I would never drink it, but believe me, plenty of people do! While you might think its chief job is to put you flat on your back, the fragrance of bai jiu is actually delicious and adds a distinctive flavor to the mooncake filling. You can find bai jiu in certain Chinese supermarkets. I f you’re worried about how to use up the rest of the bottle, you can also use it to make our Chinese Cured Pork Belly, 腊肉.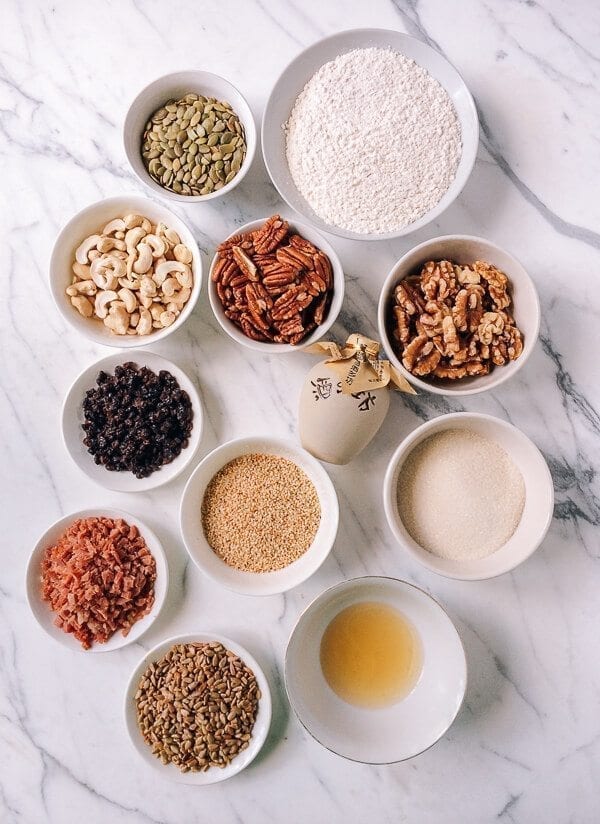
Important Mooncake Tips
Before we begin, here are a few important tips:- I bought my mooncake mold from Amazon. The mold should be round, especially if you’re giving the mooncakes out as gifts. If you have trouble finding a mold, just shape the mooncakes into discs about 3-inches in diameter and 1-inch in height. Even without all the fancy patterns, it’s still a mooncake!
- The mooncake mold must be completely dry and well-coated with flour when shaping each individual mooncake.
- It’s very important to weigh everything, so you must dust off your kitchen scale!
- You must set a timer when baking the mooncakes. These little cakes are a lot of work, and I’d hate to see your efforts foiled by a few minutes too long in the oven!
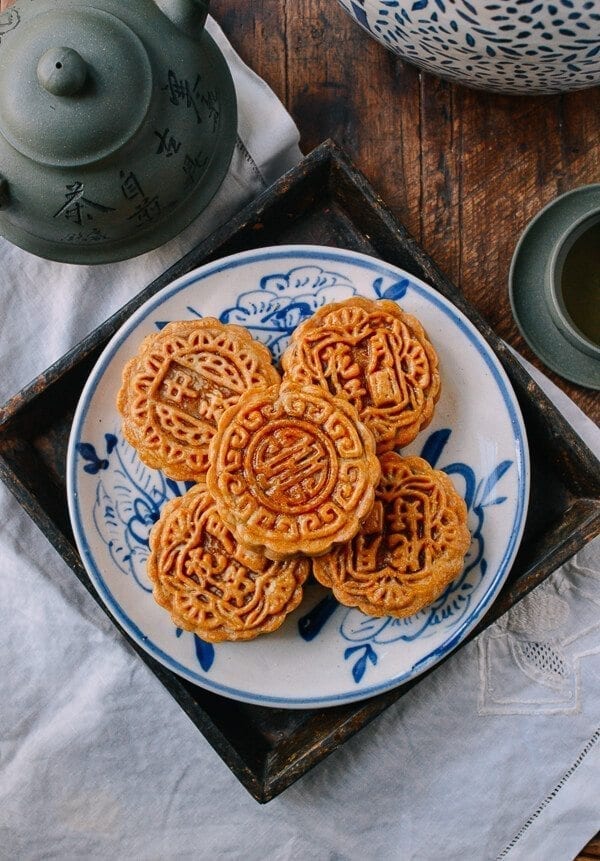
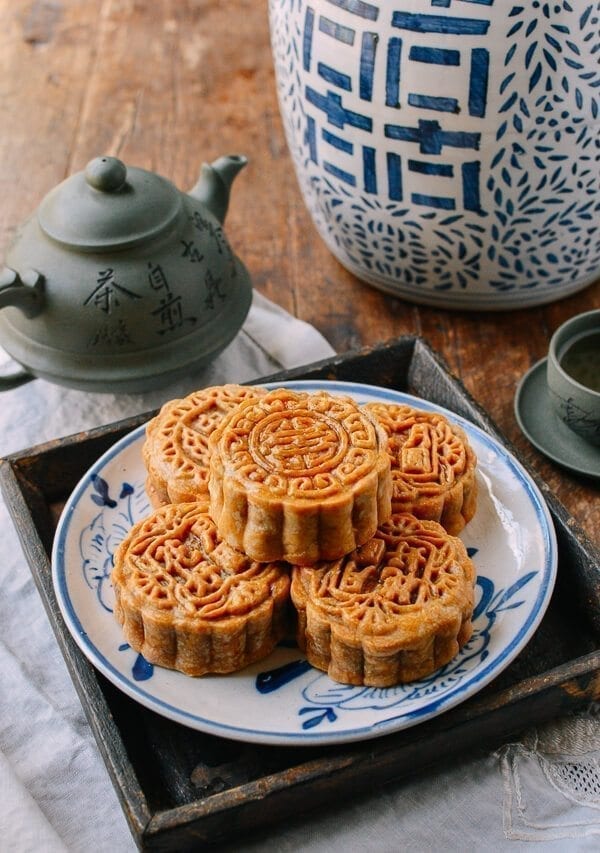
- Mooncakes tend to be quite dense and heavy. It’s best to serve them with tea to help with digestion. Also, for the tea aficionados out there, I’ve read that you should pair oolong tea (乌龙茶) with savory mooncakes and floral teas like jasmine tea (茉莉茶) or rose tea (玫瑰花茶) with sweet mooncakes.
- Don’t use a brush with silicone bristles to brush on the egg wash like I did. It leaves too much egg wash on your mooncake. It’s best to use a pastry brush with natural bristles. Live and learn!
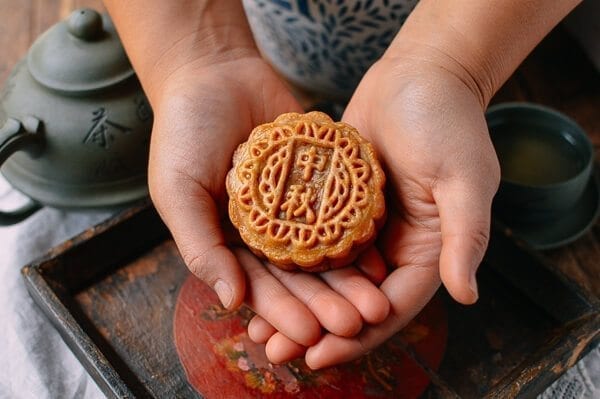 This recipe makes 18 mooncakes. Let’s start!
Ham & Nut Mooncakes: Recipe Instructions
Mooncake Recipe PART I: Inverted sugar syrup You can buy this syrup online (click here for “Lyle’s Golden Syrup”), but it’s so simple to make that I suggest that you save the $9. It’s also ideal for making ahead of time–you can store it in the fridge for months. The right consistency of the finished product is similar to honey. ½ pound granulated sugar (1 cup plus 2 tablespoons) (Note: I used organic sugar, so my syrup is slightly darker in color compared with syrup made with regular granulated white sugar.)- ½ cup water
- Juice of half a lemon
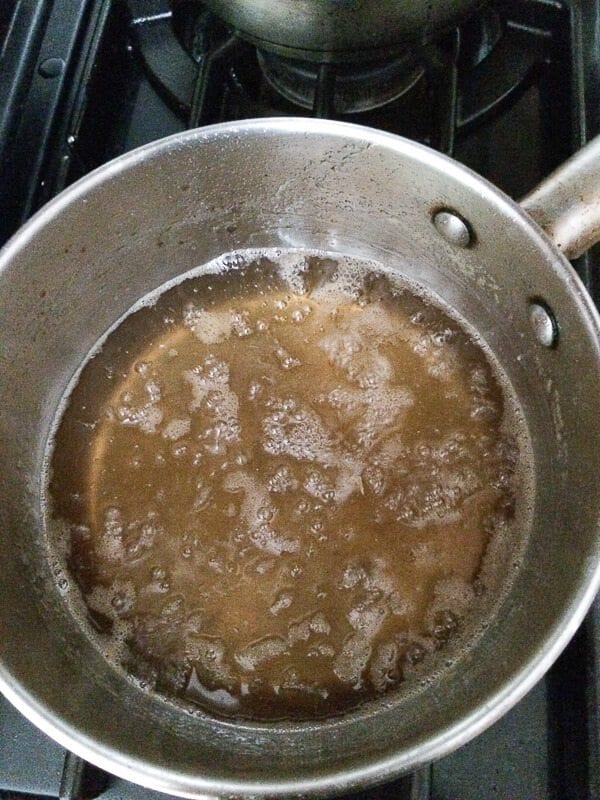 Now, pour the syrup into a heatproof container, and cool completely before storing it in the refrigerator.
Mooncake Recipe PART II: The dough
- 140 mL inverted sugar syrup (which you bought or made in Part I)
- ⅓ cup peanut oil or corn oil
- 1 teaspoon lye water (available at your Chinese grocery store)
- 1 ⅔ cups all-purpose flour (about 250 grams), plus more for dusting
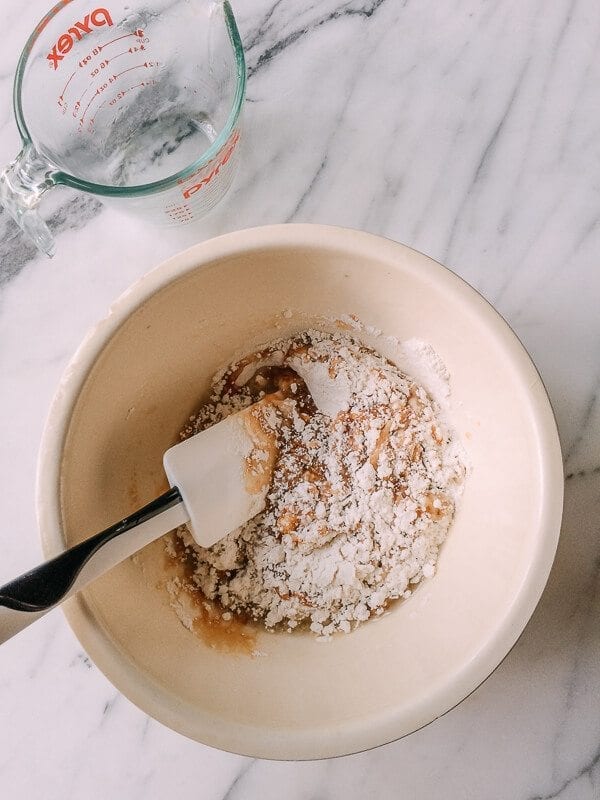
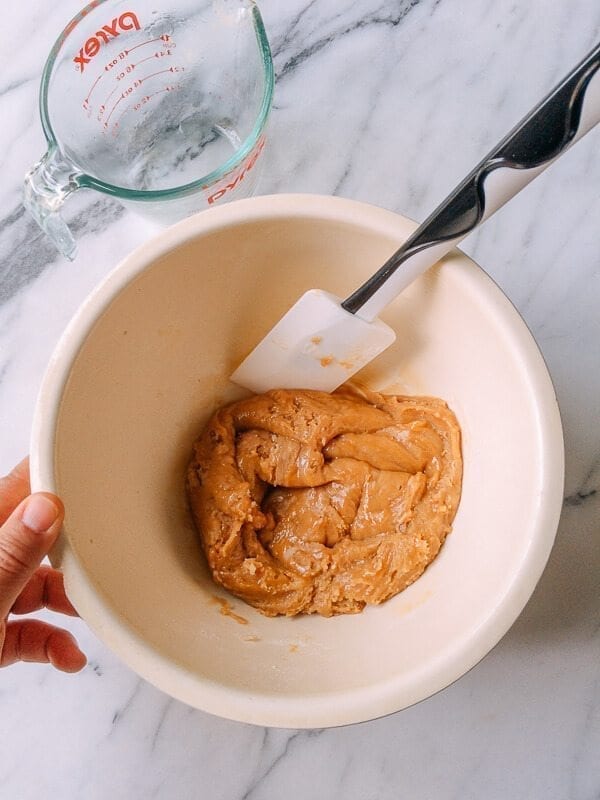 Do not overwork the dough. This step should only take about a minute or two. Cover the dough in an airtight container or wrap it in plastic wrap. Let it rest in the refrigerator for at least an hour to make it easier to work with. You can also refrigerate the dough overnight if you’d like to make it ahead of time.
Mooncake Recipe PART III: The ham and nut filling
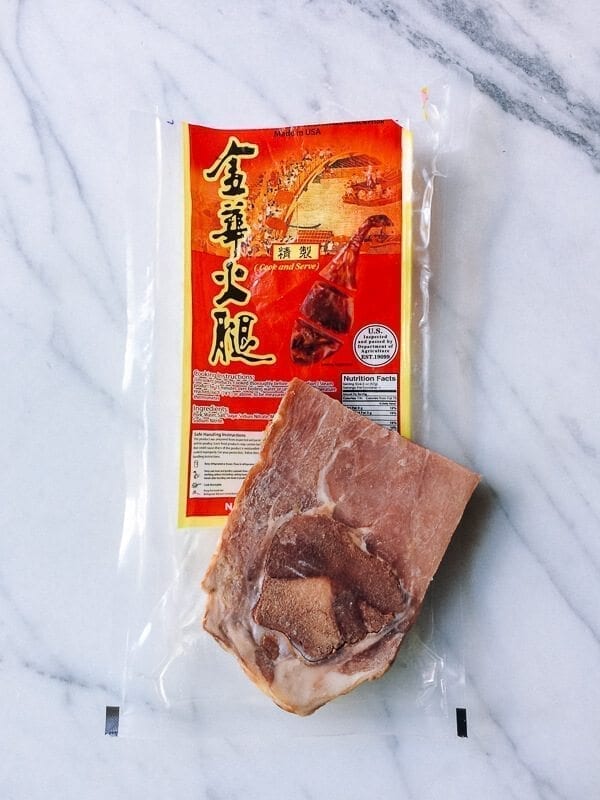
- 100 grams Chinese hard-cured ham (京华火腿)
- 2 tablespoons ham juice (from steaming the ham––see instructions below)
- 100 grams walnuts, toasted
- 100 grams cashews, toasted
- 100 grams pecans, toasted
- 75 grams pumpkin seeds, toasted
- 60 grams sunflower seeds, toasted
- 60 grams sesame seeds, toasted
- 200 grams sweet rice flour
- ⅓ cup peanut oil (or corn oil), about 75 ml
- 50 grams dried currants
- 150 grams granulated sugar
- ½ teaspoon salt
- ¼ teaspoon five spice powder
- 2 tablespoons Chinese bai jiu 白酒
- ½ cup water (about 120 ml)
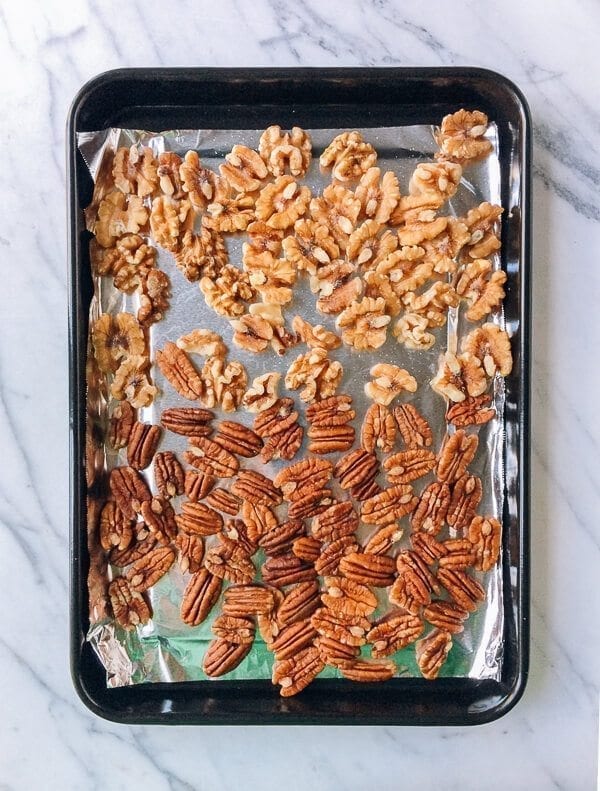
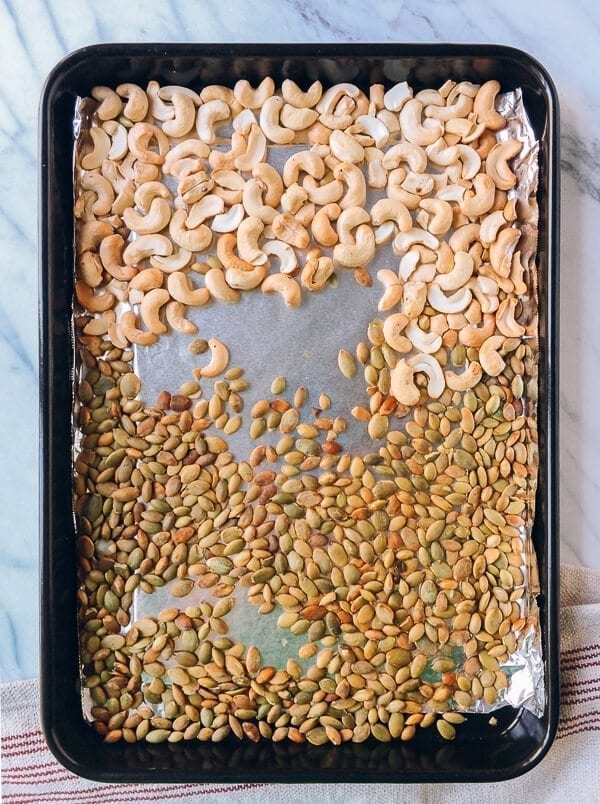
 If you’re using pre-toasted nuts, you can save some time. If not, toast the raw nuts in a preheated oven at 325 degrees F for 5-10 minutes with each batch. Roast the walnuts, cashews, and pecans together, and roast the pumpkin seeds, sunflower seeds, and sesame seeds in a separate batch. My tip is that once you smell a nutty aroma after 3-4 minutes, stand in front of the oven until the nuts are toasted to your liking. Don’t walk away from the oven, because the nuts can burn quickly! Once cool enough to handle, chop the walnuts, cashews, and pecans, and add them to a large mixing bowl along with the toasted pumpkin, sunflower, and sesame seeds.
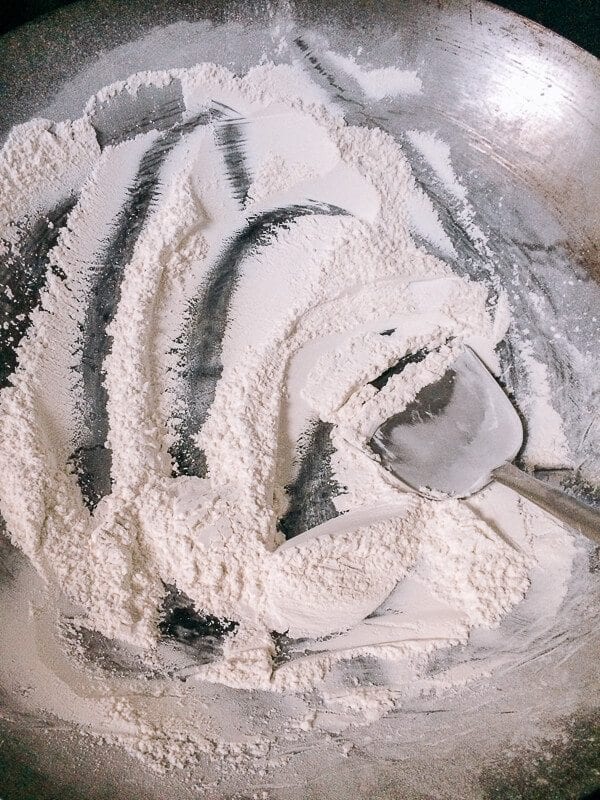
 In a clean, dry wok, toast the sweet rice flour for 15 to 20 minutes over medium low heat until it turns a light brown color. Stir often, and adjust the heat accordingly to prevent burning.
 In a small pot, heat up the oil until it’s lightly smoking. Turn off the heat, and let it cool. Believe it or not, cooking the oil this way adds fragrance and flavor to the mooncakes!
To your mixing bowl full of chopped nuts and seeds, add the chopped ham, currants, sugar, salt, and five spice powder.
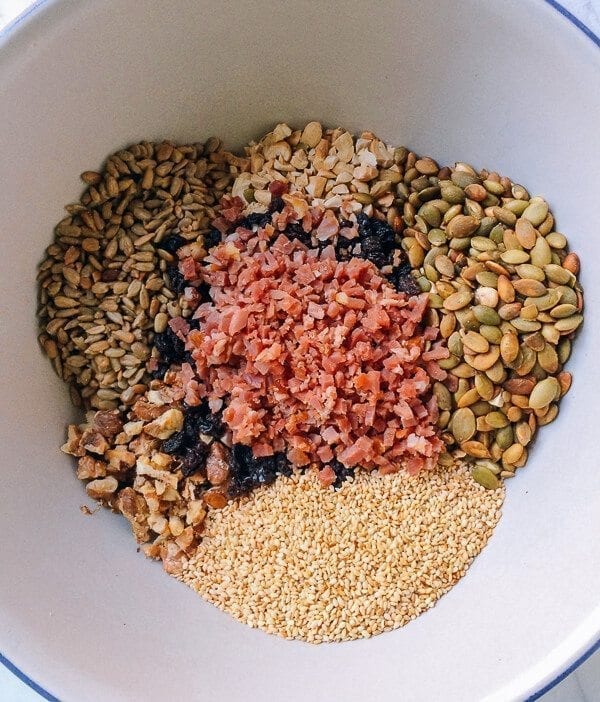 Mix well. Now add in the liquids: the water from steaming the ham, the bai jiu, the “cooked” peanut oil, and the water. Stir everything to combine.
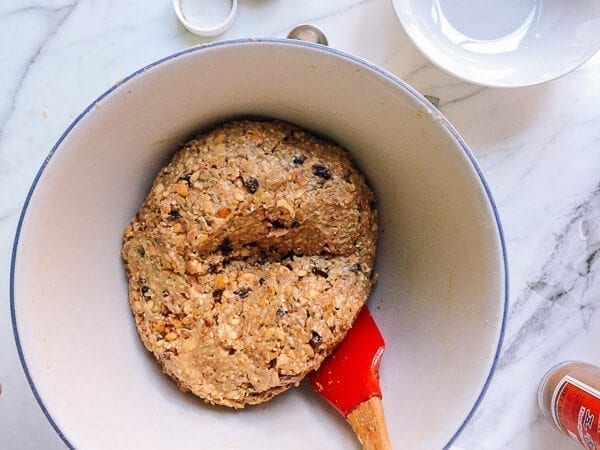
Lastly, slowly add in the toasted sweet rice flour to bind all the ingredients together. The final mixture should be somewhat dry and slightly crumbly, but you should be able to squeeze everything together tightly and form a ball. If you need to, add a little bit more peanut oil to moisten the mixture.
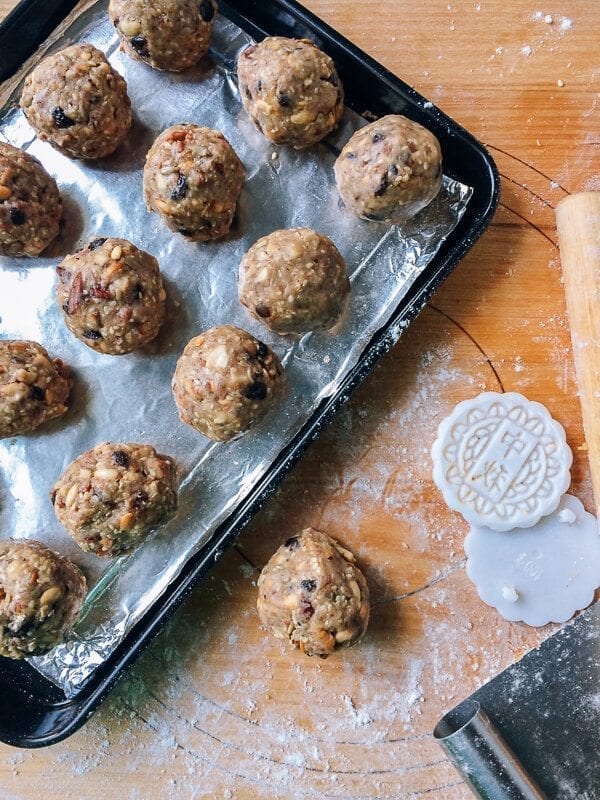
 Weigh and divide the mixture into 18 equal pieces – a digital scale really comes in handy for this step. Form each piece into a ball, and set aside for assembling the mooncakes.
 Mooncake Recipe Part IV: Assembling the mooncakes
After the dough is done resting, divide it into 18 equal pieces.
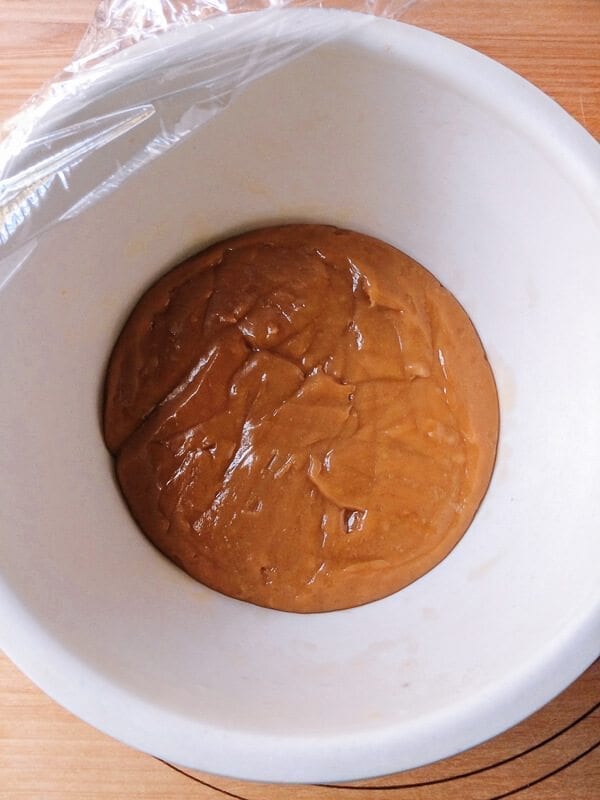
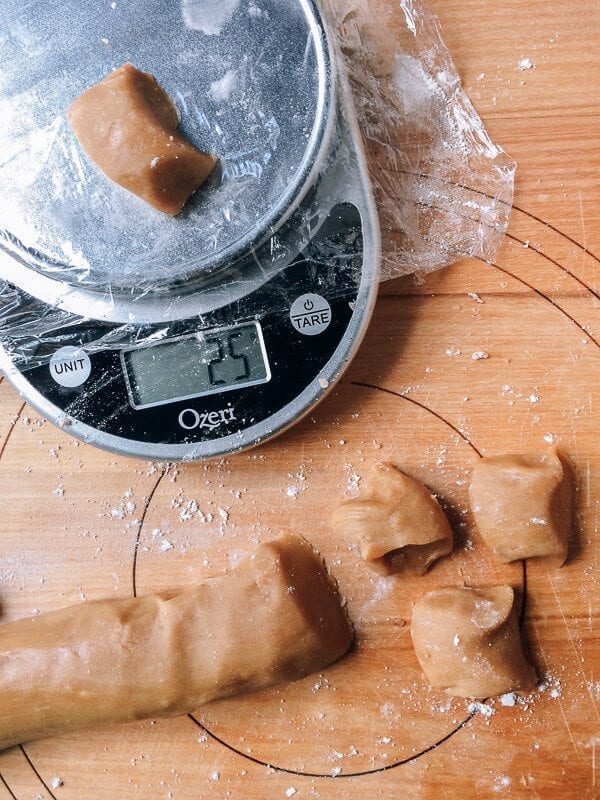 My mooncake mold holds 100 grams, which means that each mooncake should weigh about 100 grams after assembly. You should be able to use these guidelines when assembling the mooncakes:
- Each dough ball is around 25 to 30 grams. Set aside a smaller dough ball for scraps and mending, which I will get to. Shape each piece into a ball.
- Each ball of filling should be around 65 to 70 grams.
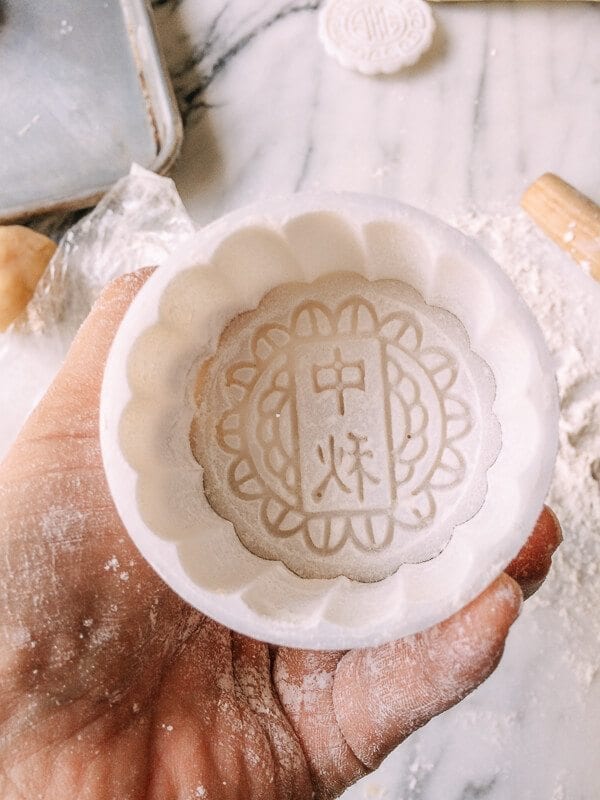 Dust the balls of dough with flour. Take one ball of dough, and roll it out on a floured surface into a 4-inch round.
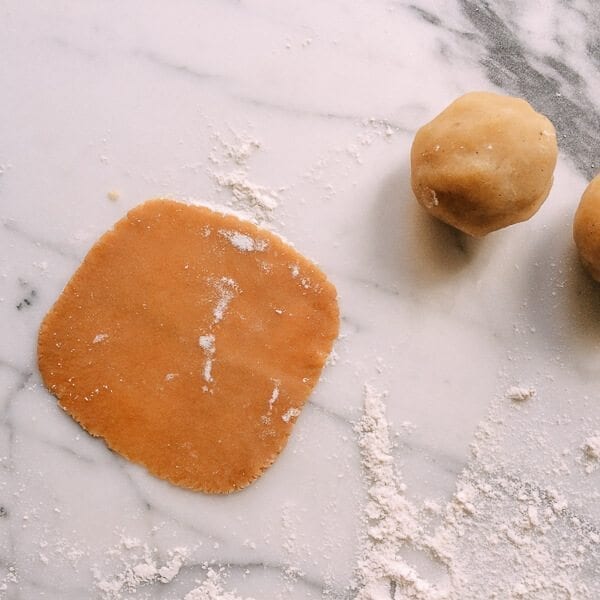 Put one piece of filling in the center. Carefully lift it up (I use a dough cutter to scrape it up from my work surface), and gently press out the air bubbles without breaking the dough. Next, make sure the opening is facing up, and slowly pinch the dough closed around the filling, keeping the distribution of the dough as even as possible.
(Remember, the filling in the photo below is different––lotus and egg yolk instead of the ham/nut filling in this recipe, but the process is still exactly the same!)
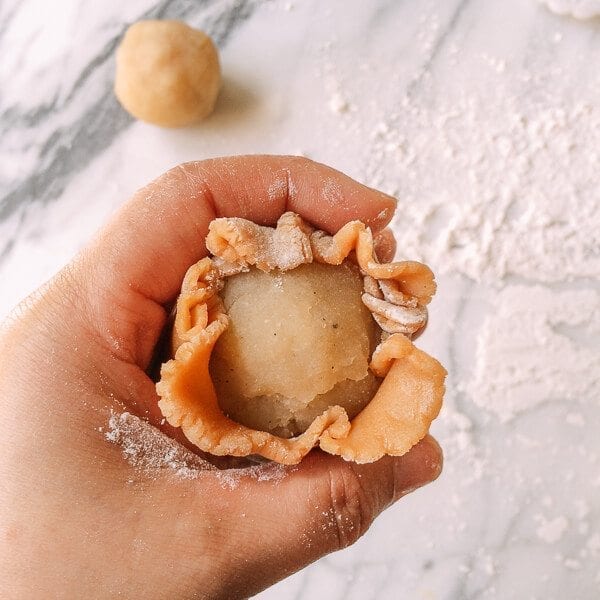 The dough feels like Play-doh, so it’s easy to break, but it’s also easy to squish back together. These instructions might sound confusing, but follow along with the pictures, and keep in mind that the chief goal here is to close the dough around the filling without any air pockets. Now dust the assembled ball with additional flour.
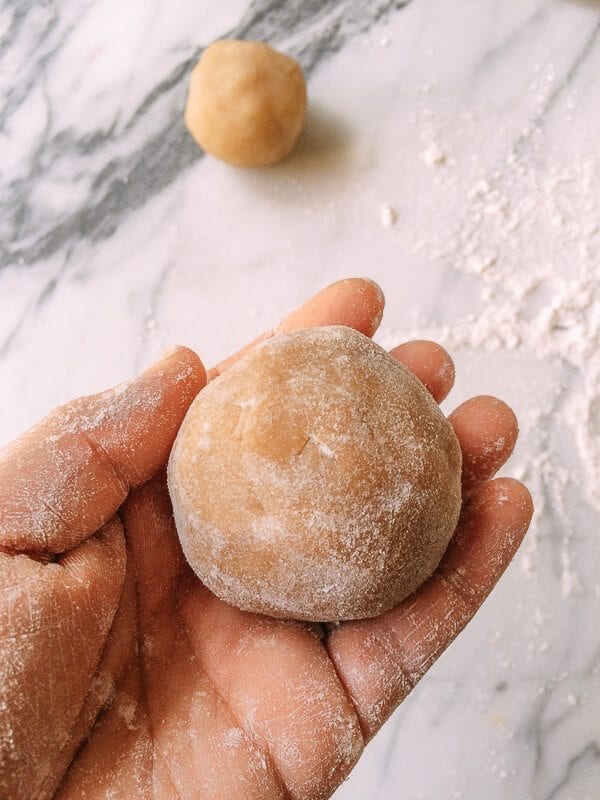 Place the ball of dough and filling inside the mooncake mold with the mold opening facing up. Next, press in the bottom piece (with the clear plastic-wrapped plate that you prepared). With some pressure, gently press it inward.
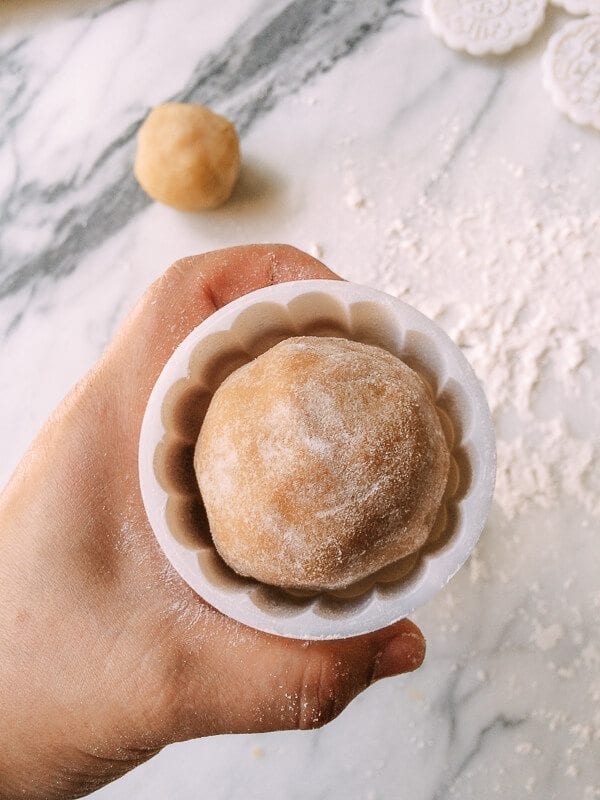
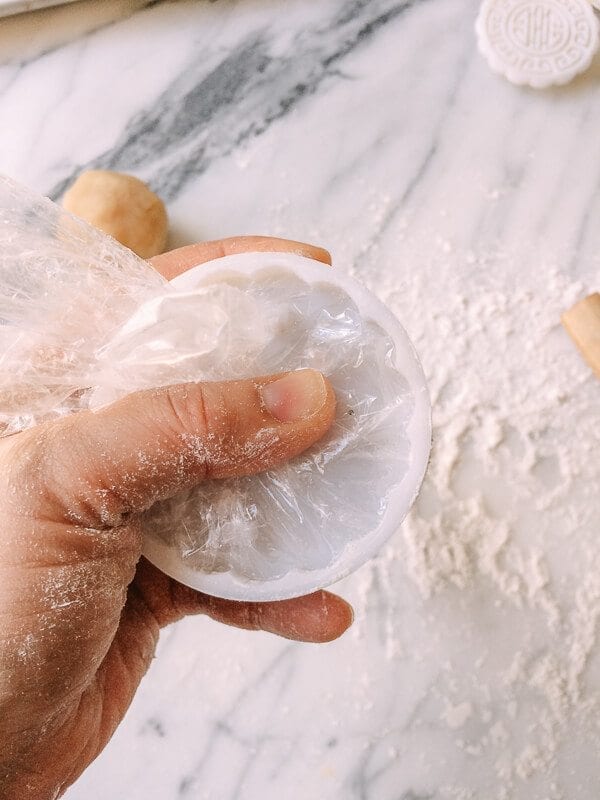 Quickly put the mold down, and press the mooncake out with the top pressure bar. The bottom piece will come out no problem, but use your other hand to VERY GENTLY guide the mooncake out of the mold.
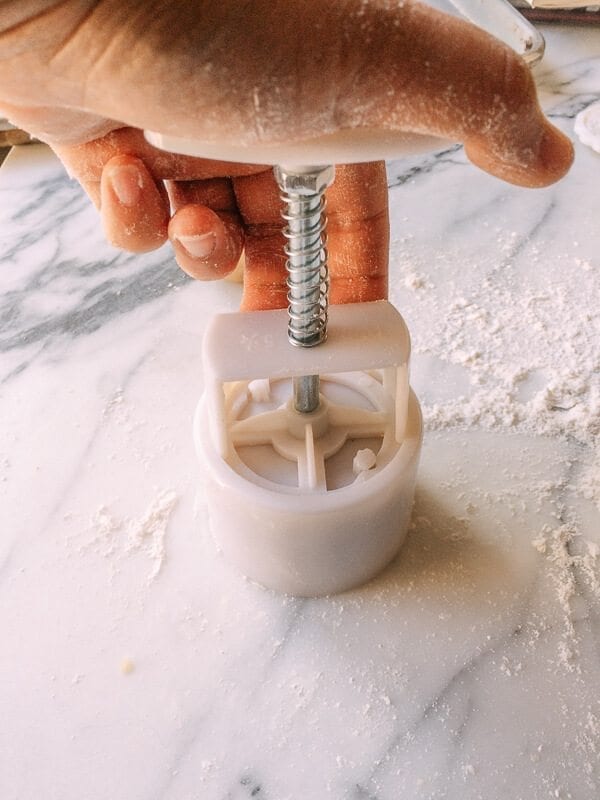 When/if a small piece of dough gets stuck and does not come out, get a small piece of your scrap dough to patch up the area. Then clean the mold, and dust it well with flour again.
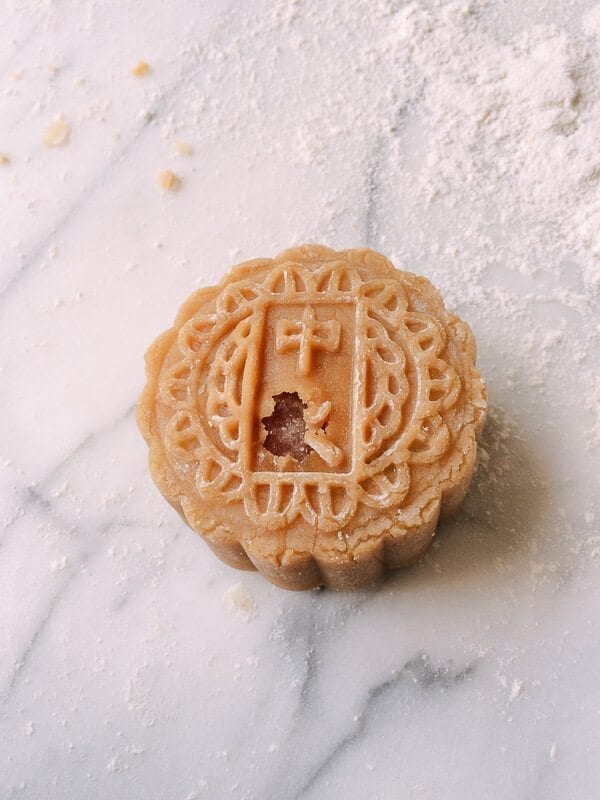
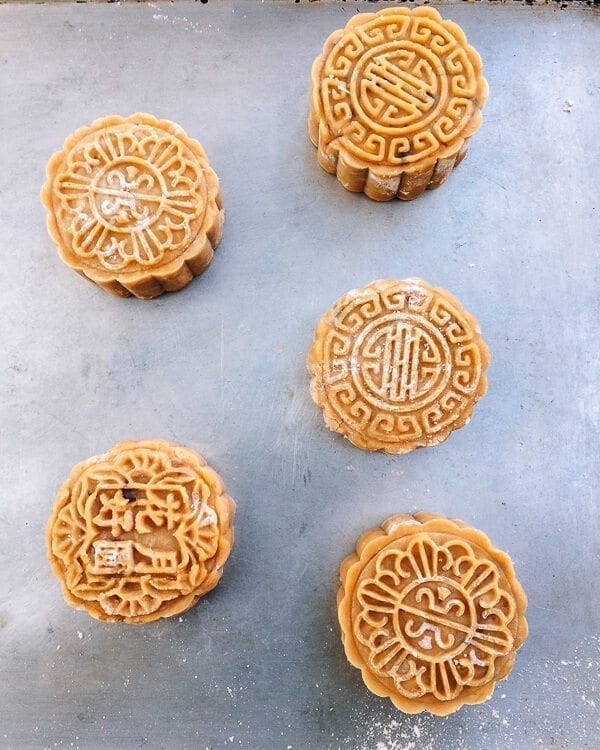
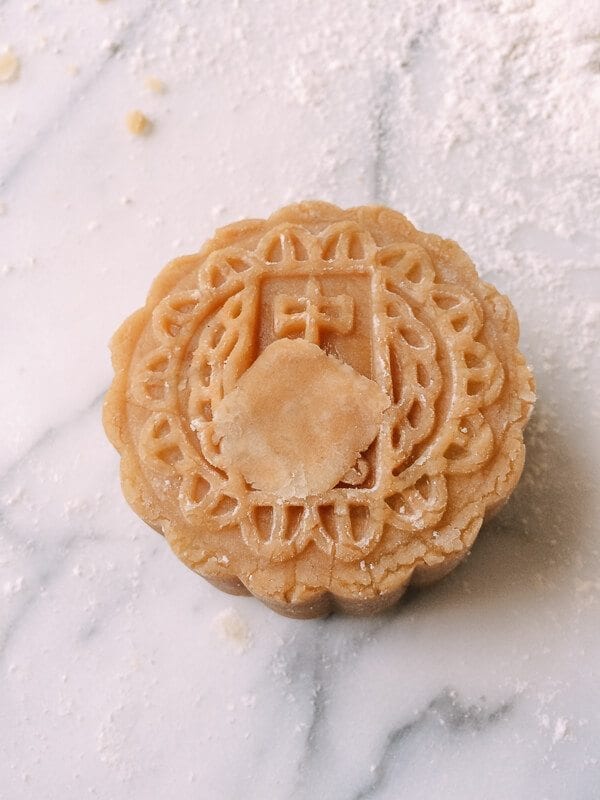 Next, gently flatten all sides of the mooncake to make it smaller, so it can go back in the mooncake mold for re-shaping. Use slightly more flour for dusting if this becomes a persistent issue. Place the mooncakes on a baking sheet as you make them.
 Mooncake Recipe PART V: Baking the mooncakes
- 1 egg yolk
- 3 tablespoons water
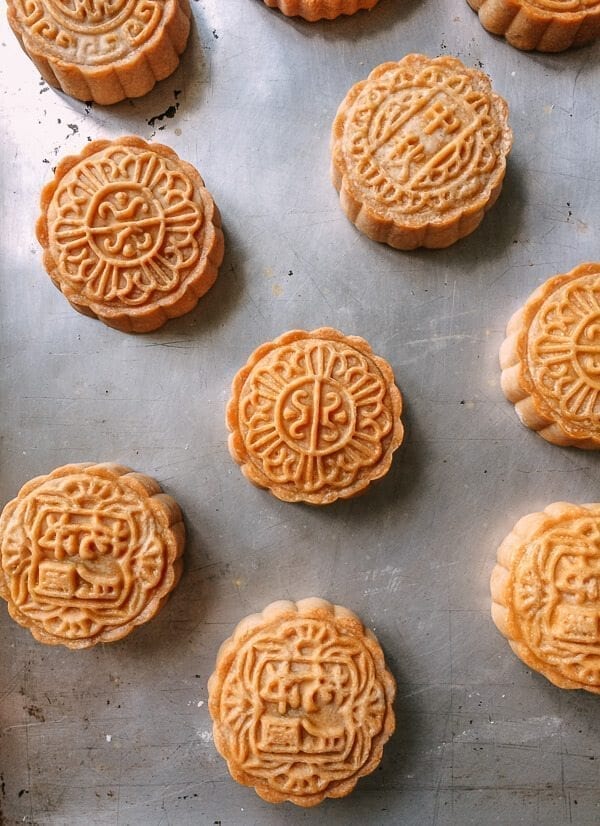 Bake them for another 15 minutes (set a timer!). When the time has elapsed, take them out, and let them cool completely. When the mooncakes first come out of the oven, the dough will look dry like bread, and not oily like what you are used to when opening packaged mooncakes. This is normal.
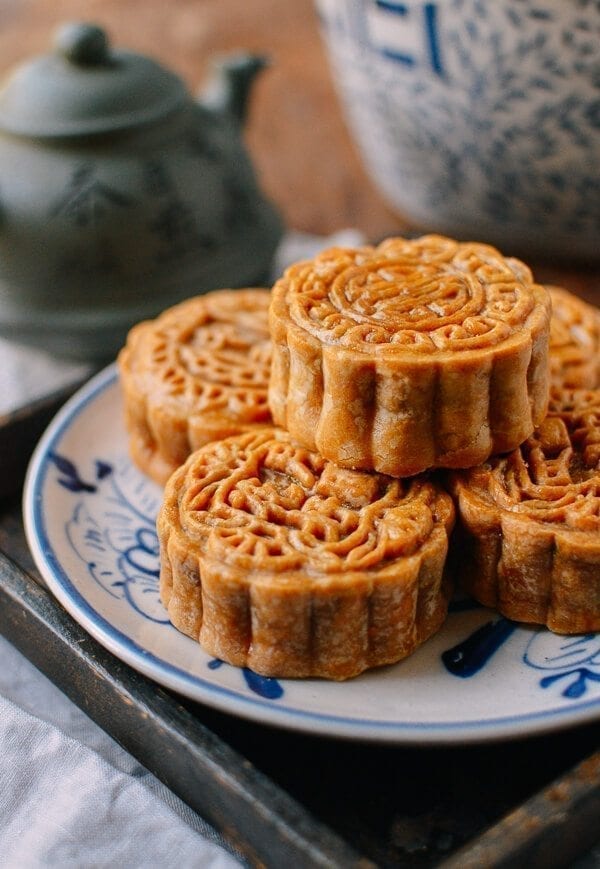
Store the completely cooled mooncakes in an airtight container for a day or two, and the outside will get that sheen that you recognize and love.
Phew! You made it. Put on a pot of tea and have a great Mid-Autumn Festival! Any uneaten mooncakes can be wrapped and kept in the refrigerator for up to two weeks.
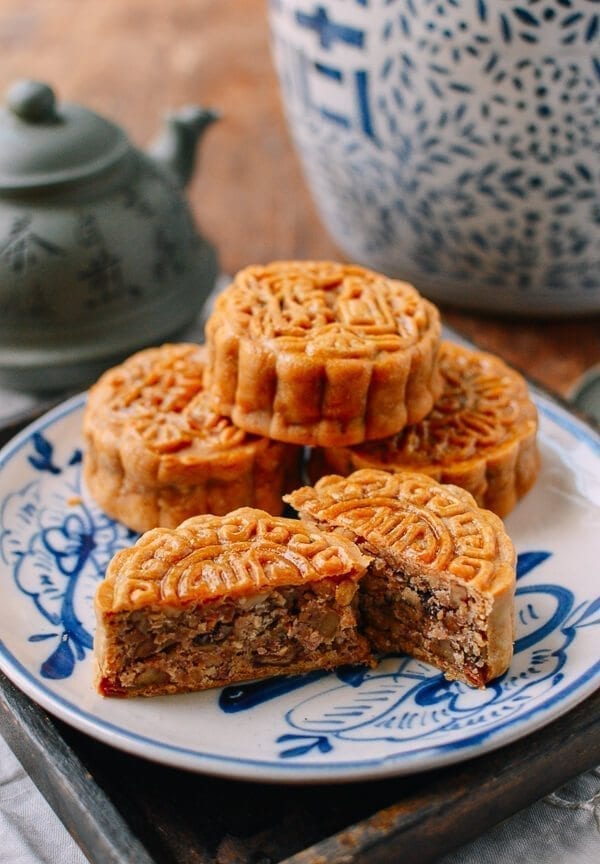
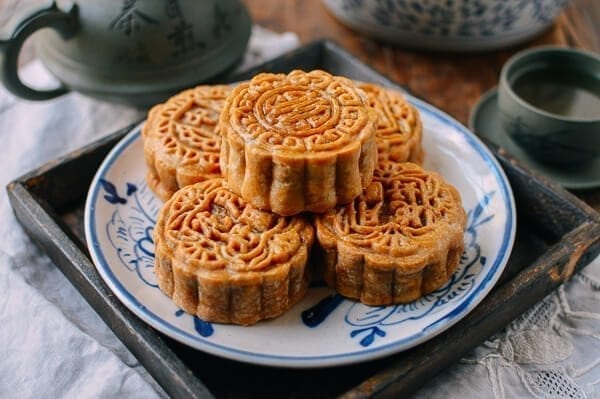 For more mooncake madness, check out our mooncake recipes for Lotus Mooncakes with Salted Egg Yolks and Savory Mooncakes!
Recipe
Ham and Nut Mooncakes (Wu Ren Yue Bing 五仁月饼)
An authentic mooncake recipe for a beautiful version of this Mid-Autumn festival treat, with mixed nuts, dried fruit, and some rich Chinese cured ham.
Serves: 18
Ingredients
PART I: Inverted sugar syrup
- ½ pound granulated sugar (226g, or 1 cup plus 2 tablespoons; I used organic sugar, so my syrup is slightly darker in color compared with syrup made with regular granulated white sugar.)
- ½ cup water
- Juice of half a lemon
PART II: The dough
- 140 ml inverted sugar syrup (which you bought or made in Part I)
- ⅓ cup peanut oil or corn oil
- 1 teaspoon lye water (available at your Chinese grocery store)
- 1 ⅔ cups all-purpose flour (about 250 grams, plus more for dusting)
PART III: The ham and nut filling
- 100 grams jinhua ham (京华火腿)
- 2 tablespoons ham juice (from steaming the ham––see instructions below)
- 100 grams walnuts (toasted)
- 100 grams cashews (toasted)
- 100 grams pecans (toasted)
- 75 grams pumpkin seeds (toasted)
- 60 grams sunflower seeds (toasted)
- 60 grams sesame seeds (toasted)
- 200 grams sweet rice flour
- ⅓ cup peanut oil (or corn oil, about 75 ml)
- 50 grams dried currants
- 150 grams granulated sugar
- ½ teaspoon salt
- ¼ teaspoon five spice powder
- 2 tablespoons Chinese bai jiu 白酒
- ½ cup water (about 120 ml)
Part IV: Assembling the mooncakes
- [no additional ingredients needed for this step]
PART V: Baking the mooncakes
- 1 egg yolk
- 3 tablespoons water
Instructions
PART I: Inverted sugar syrup
- Heat the sugar and water in a saucepan over medium heat. Stir to dissolve the sugar. Once it’s boiling, add the lemon juice, stir, and immediately turn the heat down to low.
- Keep the lid off, and let the syrup simmer for about 60 to 70 minutes until the sugary liquid turns a light amber color. Do not stir during this timeframe! By now, the liquid might look too watery, but it will thicken once it’s cooled. Try not to overcook it, because it will become thick like caramel. (Just in case you do overcook the syrup, and it’s too thick, add a few drops of hot water to thin it out. Keep adding the hot water until you get the right consistency.)
- Now, pour the syrup into a heatproof container, and cool completely before storing it in the refrigerator.
PART II: The dough
- First, mix the inverted sugar syrup, oil, and lye water together. Then add the flour to the mixture, using a rubber spatula to fold and combine everything into a soft dough.
- Do not overwork the dough. This step should only take about a minute or two. Cover the dough in an airtight container or wrap it in plastic wrap. Let it rest in the refrigerator for at least an hour to make it easier to work with. You can also refrigerate the dough overnight if you’d like to make it ahead of time.
PART III: The ham and nut filling
- Steam the ham in a heatproof bowl for 15 minutes. You will end up with some liquid in the bowl after it’s done steaming. Save this liquid and set it aside. Finely chop the ham.
- If you’re using pre-toasted nuts, you can save some time. If not, toast the raw nuts in a preheated oven at 325 degrees F for 5-10 minutes with each batch. Roast the walnuts, cashews, and pecans together, and roast the pumpkin seeds, sunflower seeds, and sesame seeds in a separate batch. My tip is that once you smell a nutty aroma after 3-4 minutes, stand in front of the oven until the nuts are toasted to your liking. Don’t walk away from the oven, because the nuts can burn quickly! Once cool enough to handle, chop the walnuts, cashews, and pecans, and add them to a large mixing bowl along with the toasted pumpkin, sunflower, and sesame seeds.
- In a clean, dry wok, toast the sweet rice flour for 15 to 20 minutes over medium low heat until it turns a light brown color. Stir often, and adjust the heat accordingly to prevent burning.
- In a small pot, heat up the oil until it’s lightly smoking. Turn off the heat, and let it cool. Believe it or not, cooking the oil this way adds fragrance and flavor to the mooncakes!
- To your mixing bowl full of chopped nuts and seeds, add the chopped ham, currants, sugar, salt, and five spice powder. Mix well. Now add in the liquids: the water from steaming the ham, the bai jiu, the “cooked” peanut oil, and the water. Stir everything to combine.
- Lastly, slowly add in the toasted sweet rice flour to bind all the ingredients together. The final mixture should be somewhat dry and slightly crumbly, but you should be able to squeeze everything together tightly and form a ball. If you need to, add a little bit more peanut oil to moisten the mixture.
- Weigh and divide the mixture into 18 equal pieces. Form each piece into a ball, and set aside for assembling the mooncakes.
Part IV: Assembling the mooncakes
- After the dough is done resting, divide it into 18 equal pieces. My mooncake mold holds 100 grams, which means that each mooncake should weigh about 100 grams after assembly. You should be able to use these guidelines when assembling the mooncakes:
- Each dough ball is around 25 to 30 grams. Set aside a smaller dough ball for scraps and mending, which I will get to. Shape each piece into a ball.
- Each ball of filling should be around 65 to 70 grams.
- Let’s start assembling the mooncakes by preparing the mooncake mold. My mooncake mold came with four pattern plates––one plate should be attached to the mold itself. Wrap another one with clear plastic, because you’ll use it to press the mooncake from the bottom. Now, dust the inside of the mold with plenty of flour, and shake off the excess. You’ll need to repeat this process before pressing every mooncake to avoid sticking.
- Dust the balls of dough with flour. Take one ball of dough, and roll it out on a floured surface into a 4-inch round. Put one piece of filling in the center. Carefully lift it up (I use a dough cutter to scrape it up from my work surface), and gently press out the air bubbles without breaking the dough. Next, make sure the opening is facing up, and slowly pinch the dough closed around the filling, keeping the distribution of the dough as even as possible.
- The dough feels like Play-doh, so it’s easy to break, but it’s also easy to squish back together. These instructions might sound confusing, but follow along with the pictures, and keep in mind that the chief goal here is to close the dough around the filling without any air pockets. Now dust the assembled ball with additional flour.
- Place the ball of dough and filling inside the mooncake mold with the mold opening facing up. Next, press in the bottom piece (with the clear plastic-wrapped plate that you prepared). With some pressure, gently press it inward.
- Quickly put the mold down, and press the mooncake out with the top pressure bar. The bottom piece will come out no problem, but use your other hand to VERY GENTLY guide the mooncake out of the mold. When/if a small piece of dough gets stuck and does not come out, get a small piece of your scrap dough to patch up the area. Then clean the mold, and dust it well with flour again. Next, gently flatten all sides of the mooncake to make it smaller, so it can go back in the mooncake mold for re-shaping. Use slightly more flour for dusting if this becomes a persistent issue. Place the mooncakes on a baking sheet as you make them.
PART V: Baking the mooncakes
- Preheat the oven to 325 degrees F, and put the baking rack in the middle of the oven when you’re almost finished assembling the mooncakes. Once the oven is preheated, gently mist the mooncakes with a food-grade spray bottle (if you have one) filled with water. If you don’t have one, you can just use your hands. Dip your fingers into a bowl of water, and fling the water on your fingers onto the mooncakes a couple of times. This prevents the dough from cracking in the hot oven.
- Then, immediately put the mooncakes in the oven, and bake for 5 minutes. (Remember to set the timer!) Now, prepare the egg wash by whisking together an egg yolk with 3 tablespoons of water.
- After the mooncakes have been baking for 5 minutes, take them out of the oven and immediately lower the oven temperature to 300 degrees. Using a natural-bristle pastry brush, lightly brush each mooncake with egg wash, and put them back in the oven.
- Bake them for another 15 minutes (set a timer!). When the time has elapsed, take them out, and let them cool completely. When the mooncakes first come out of the oven, the dough will look dry like bread, and not oily like what you are used to when opening packaged mooncakes. This is normal.
- Store the completely cooled mooncakes in an airtight container for a day or two, and the outside will get that sheen that you recognize and love.
Nutrition Facts
Calories: 450kcal (23%) Carbohydrates: 52g (17%) Protein: 9g (18%) Fat: 25g (38%) Saturated Fat: 3g (15%) Cholesterol: 14mg (5%) Sodium: 182mg (8%) Potassium: 205mg (6%) Fiber: 3g (12%) Sugar: 29g (32%) Vitamin A: 20IU Vitamin C: 1.1mg (1%) Calcium: 56mg (6%) Iron: 2.8mg (16%)


