Many Chinese people love good salted pork or yān xián ròu (腌咸肉) when dining out, but few ever bother to find out how to make it at home. In my case, I used to just ask my aunt to make it for me!
I love her salted pork, because she uses Sichuan peppercorns, which give off a wonderful aroma with none of the numbing effect when they are kept whole in a salt curing application. The salted pork you can get at a store is usually cured with only salt, and most of the time, it’s just too salty.
Carrying On The Tradition
The shortcomings of store-bought salted pork aside, many readers have requested this recipe. I figure I’ve been bothering my aunt long enough, and it’s time for me to make some homemade salted pork for myself.
Plus, it’s a surefire way to carry on the tradition now that it’s in our family recipe archive, not to mention the timing is perfect for Chinese New Year, which is just around the corner. You have just enough time to prepare some of this salted pork for special Chinese New Year dinner dishes—and gifts!
An Investment Not of Effort, But Time
You may be surprised to hear that this Chinese salted pork recipe takes very little work, but it does require time–one and a half weeks to complete. With such a time investment, I recommend that you make both this Homemade Salted Pork and our recipe for Chinese Cured Pork Belly, store them in the freezer, and enjoy them throughout the year.
Better yet, make a whole bunch and offer them to friends and family. They will be grinning from ear to ear. Trust me on this, I’ve seen it. Plus, since both types of pork are salted, they don’t freeze solid, and there’s no need to defrost them when you need them! It’s a lifesaver when you need to get dinner on the table quickly.
Another tip, if you are in a part of the world that’s too hot to safely make salted pork and/or cured pork at home, for the drying process, you can set the meat on a rack, uncovered, and let the pork dry in the refrigerator for a few days. That works well too.
In general, the drying conditions should be cool, dry and with air flow, temperature should be around 50-60° F/10-15°C.
What to Do With Chinese Salted Pork
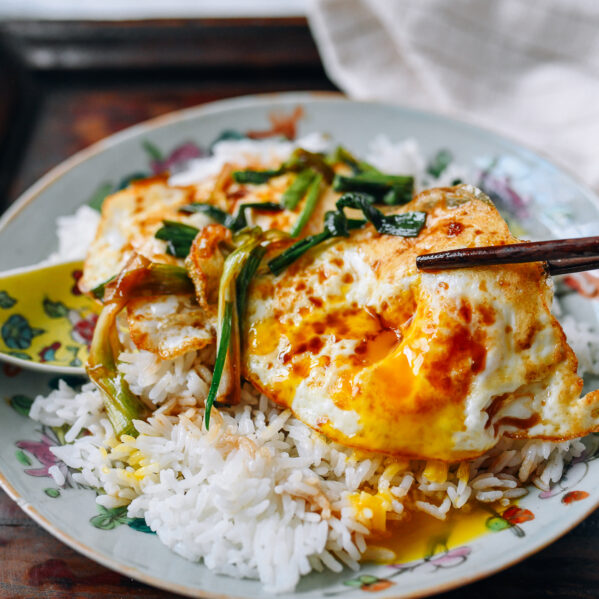
So far, we have two recipes that call for salted pork: Yan Du Xian and Shanghai Cai Fan. Most common applications of salted pork are soup-based dishes and stir-fry dishes where the salted pork can really go far.
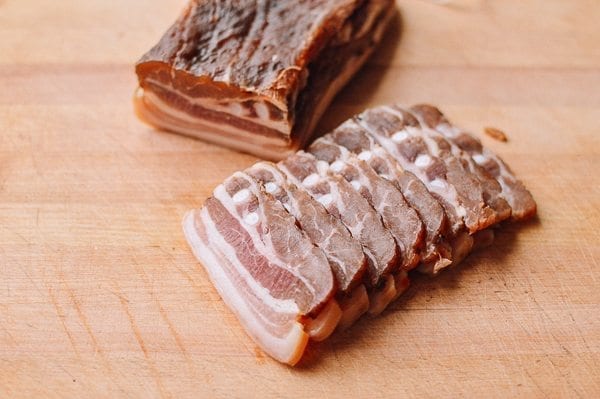
Like I mentioned in my Yan Du Xian post, the combination of fresh pork and salted pork in a soup just can’t be beat. And a few slices of salted pork in a stir fry really adds a great deal of flavor and complexity without needing a huge amount of meat.
The only downside to this homemade salted pork is that this post might make many readers very homesick!
Group hug! Now go make some salted pork.
Chinese Salted Pork: Recipe Instructions
Day 1:
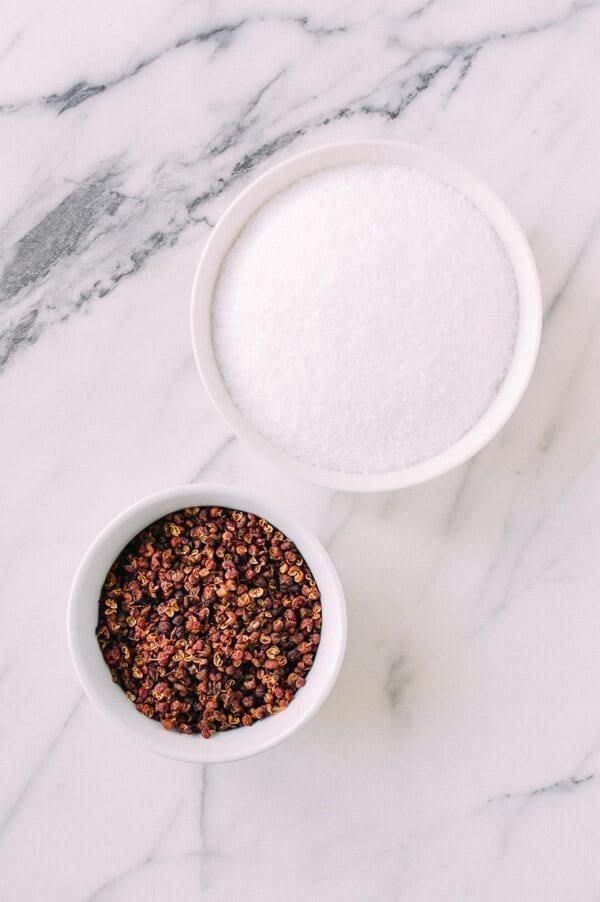
In a clean, dry wok or cast iron skillet over medium heat, add the coarse sea salt and Sichuan peppercorns.
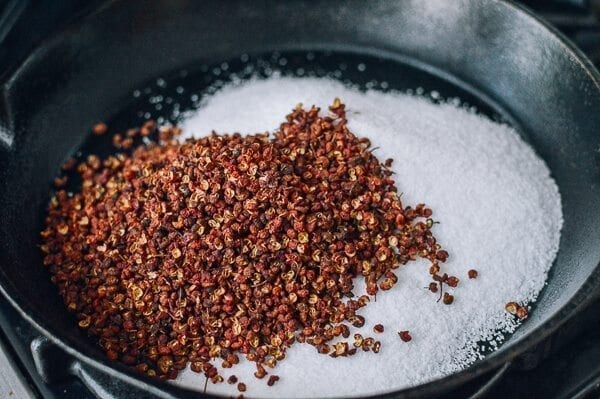
Stir the mixture for 25-30 minutes, until the salt starts to turn light yellow. BE VERY CAREFUL during this process. Although there isn’t much indication in the form of steam or smoke from the mixture as you stir, the sea salt does get extremely hot, so handle with care! Once the sea salt turns light yellow, turn off the heat, and let the mixture cool.
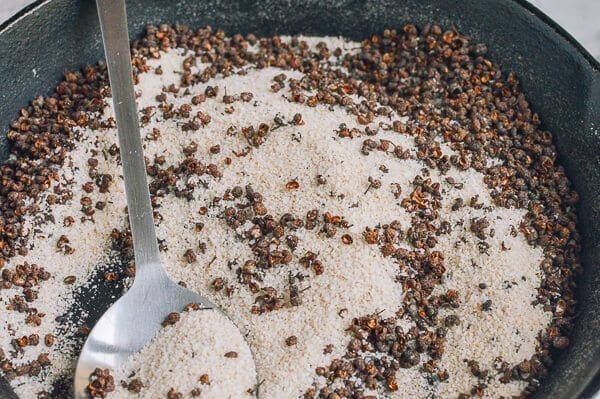
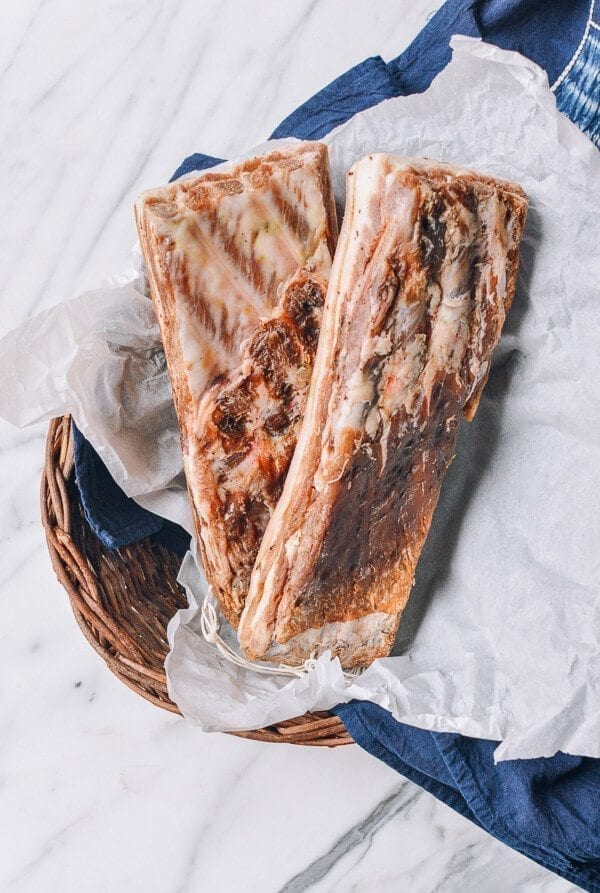
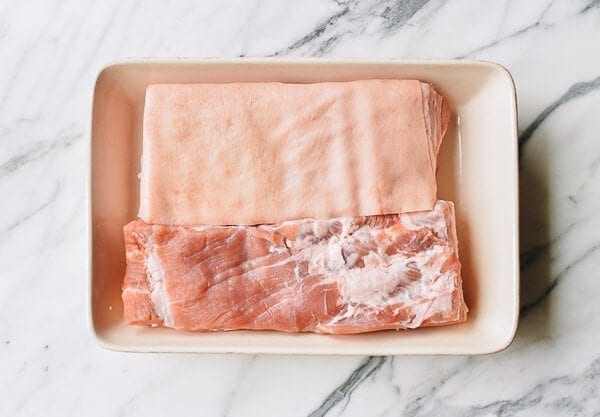
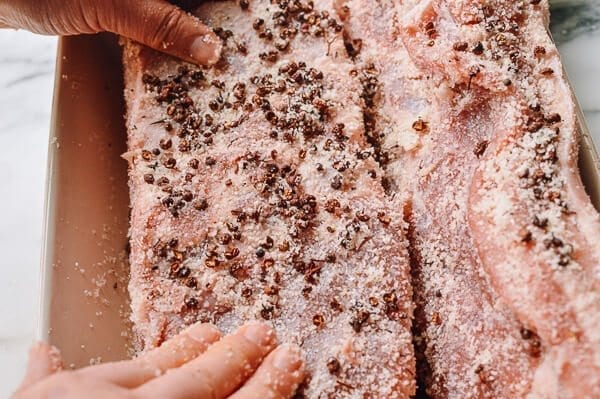
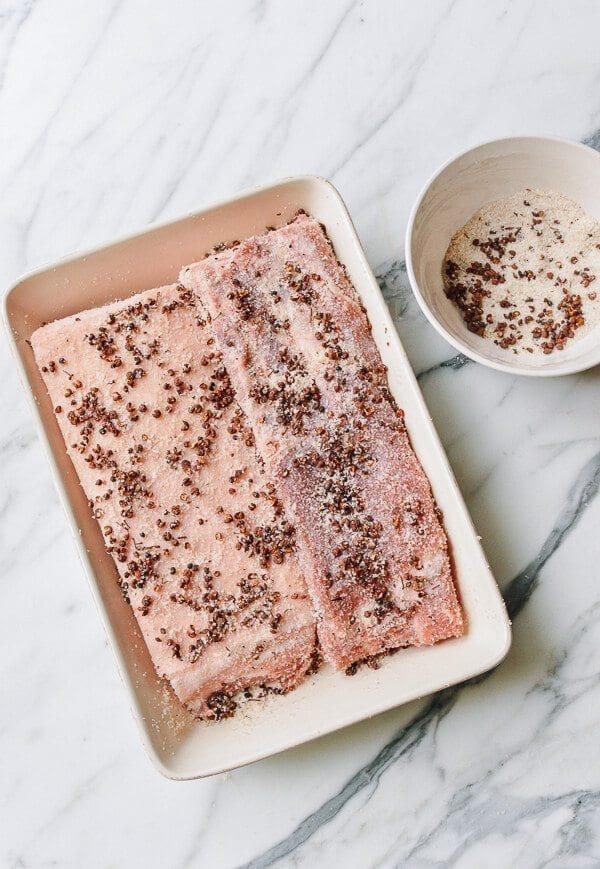
Now rinse the pork belly under cold water, and pat it thoroughly dry with paper towels. Once the sea salt mixture has cooled, but is still warm to the touch, remove ⅓ cup and set it aside. Place the pork belly on a rimmed sheet pan or in a casserole dish…
And rub (and press) the remaining salt mixture evenly onto the pork belly on ALL sides, the goal is to get all the salt and Sichuan peppercorns onto the pork belly.
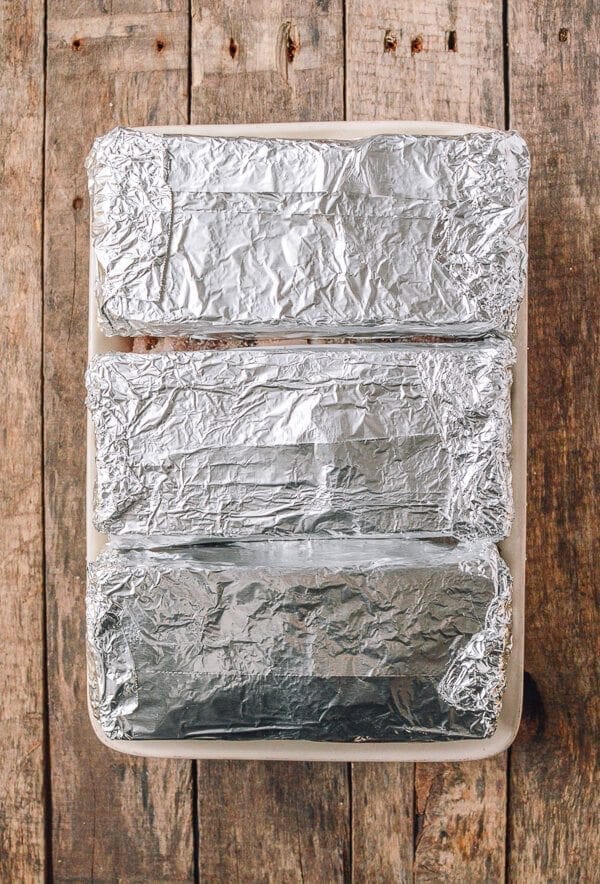
Weigh down the pork belly with a couple of flat stones or bricks that have been wrapped in foil. Cover with plastic wrap and transfer to the refrigerator.
Day 2:
Take out your pork belly and pour off any liquid that collected in the pan. After all the liquid is drained, evenly apply the ⅓ cup of the salt mixture that you put aside the day before. Put the stones/bricks back on, cover the pork belly with plastic wrap, and put back in the refrigerator.
Day 4:
Take the pork belly out and pour off any liquid. Put the stones/bricks back on top of the pork, replace the plastic wrap, and put it back in the refrigerator.
Day 6:
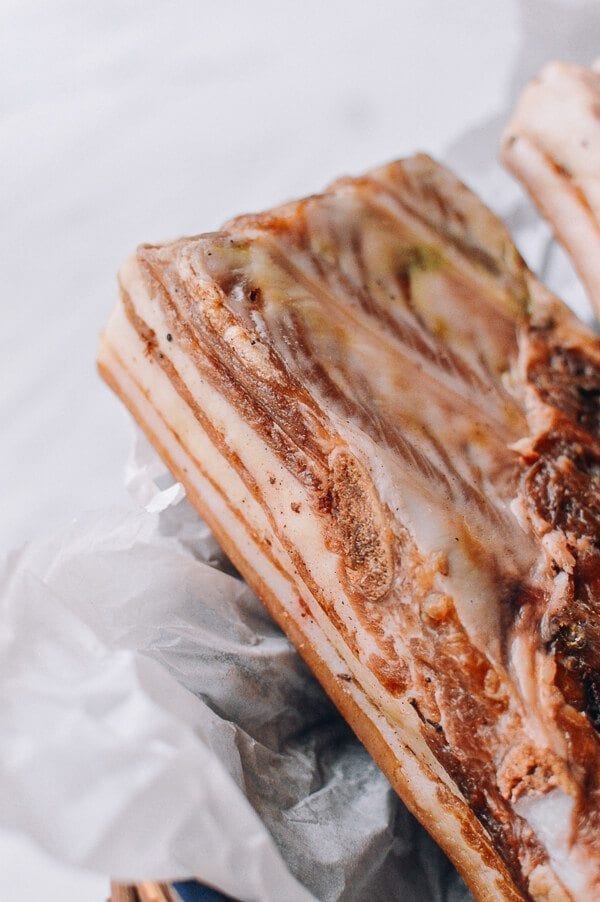
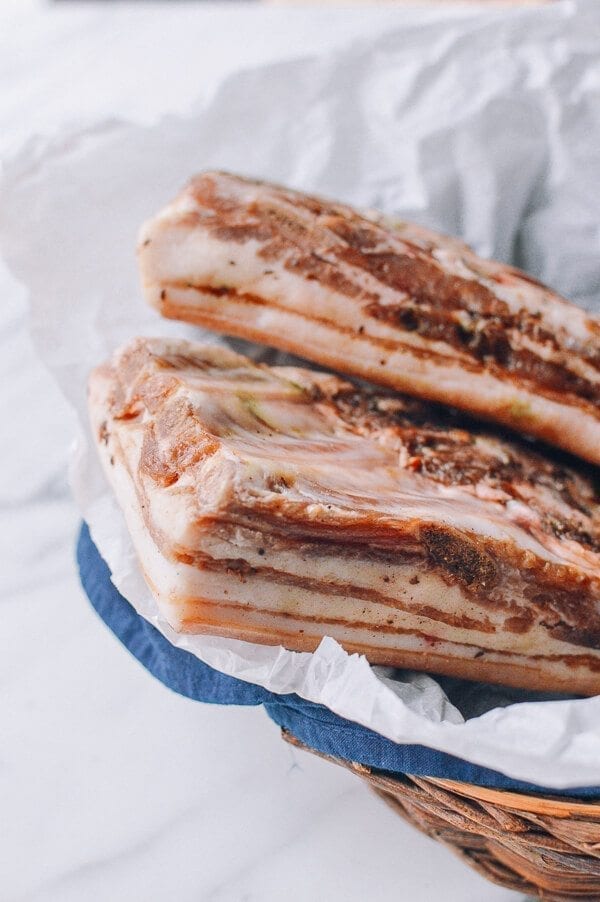
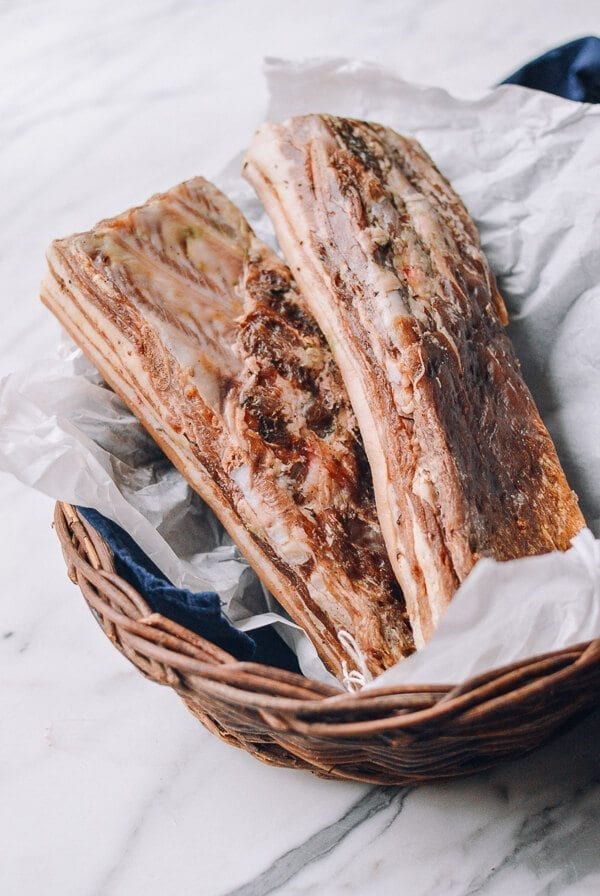
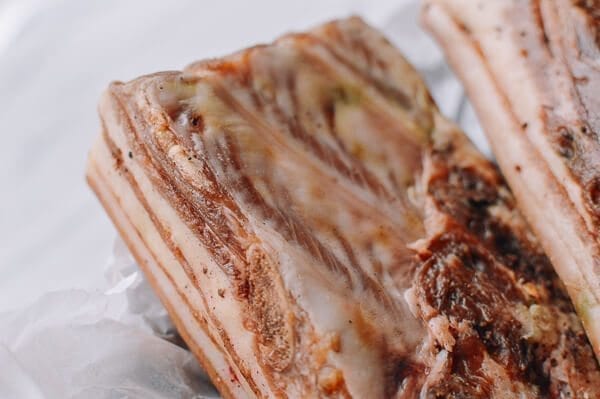
Take out the pork belly, and rinse it under cold water to wash away all the peppercorns and visible sea salt crystals. Pat it dry with paper towels, string it up with thick kitchen twine, and hang it in a place that’s cool and dry (and where no critters will be able to get to it) for 4-5 days until the meat is dry to the touch, but not too hard to cut. You don’t want to dry out the meat too much, or it will become tough and difficult to slice.
P.S. Feel free to marinate the pork for a couple of days longer if you like it saltier.
Day 10:
Your salted pork belly is ready! Store it in a zip-top bag in the freezer!
Here are the two recipes that call for salted pork:
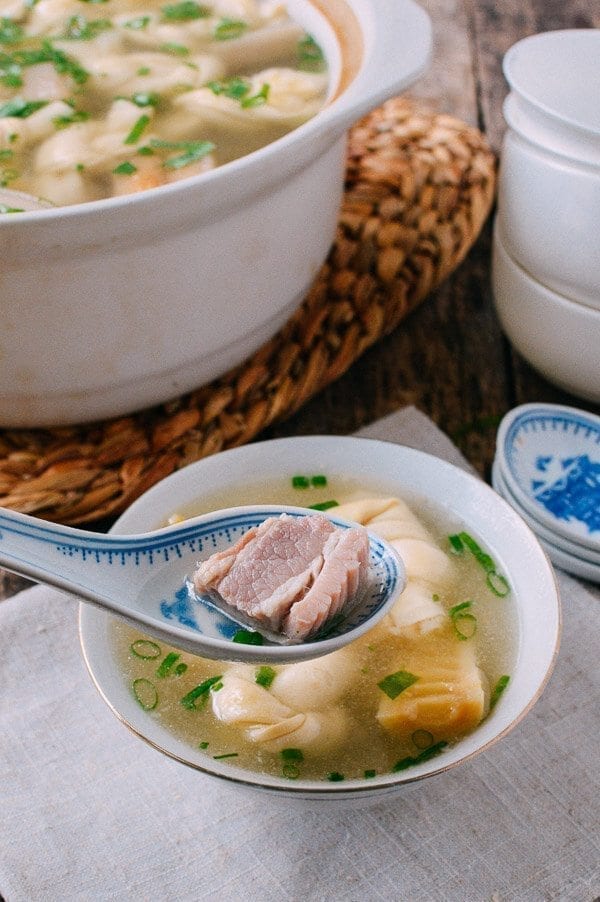
Shanghai Yan Du Xian Soup
Yan Du Xian Shanghai Pork Soup w/ Bamboo & Tofu is pretty much the crown jewel. It was always reserved for special occasions. Both salted and fresh pork combined with bamboo shoots and tofu knots produce a really tasty soup
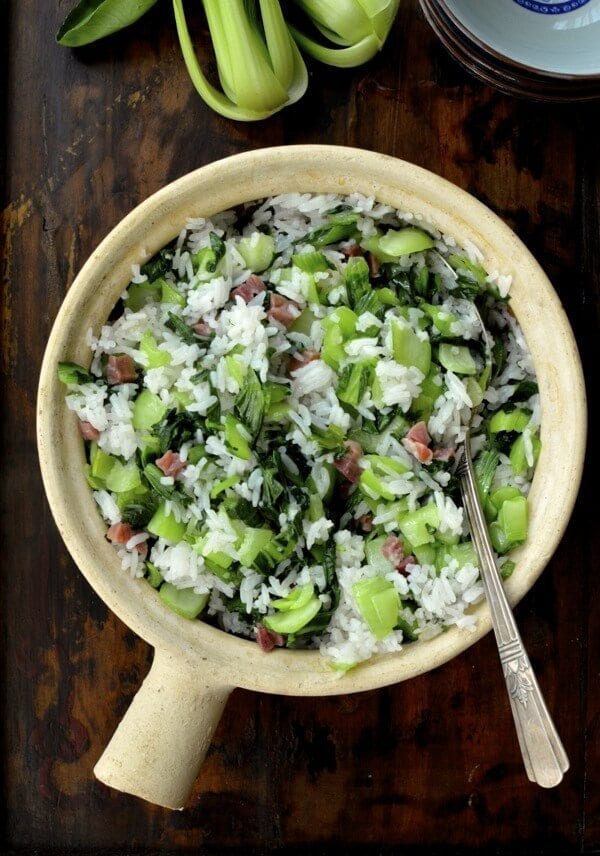
Shanghai Cai Fan
Shanghai Cai Fan (Rice with Salted Pork and Greens) is a classic one pot meal made with salted pork, chopped bok choy. One spoonful of pork fat adds to the richness and flavor of this Shanghai cai fan clay pot meal
Looking for more authentic recipes? Subscribe to our email list and be sure to follow us on Pinterest, Facebook, Instagram, and Youtube!
Recipe

Homemade Chinese Salted Pork (腌咸肉)
Ingredients
- ½ pound coarse sea salt
- 1 ounce Sichuan peppercorns
- 4½ pounds pork belly
Instructions
Day 1:
- In a clean, dry wok or cast iron skillet over medium heat, add the sea salt and Sichuan peppercorns. Stir the mixture for 25-30 minutes, until the salt starts to turn light brown. BE VERY CAREFUL during this process. Although there isn’t much indication in the form of steam or smoke from the mixture as you stir, the sea salt does get extremely hot, so handle with care! Once the sea salt turns light brown, turn off the heat, and let the mixture cool.
- Now rinse the pork belly under cold water, and pat it thoroughly dry with paper towels. Once the sea salt mixture has cooled, but is still warm to the touch, remove ⅓ cup and set it aside. Place the pork belly on a rimmed sheet pan or in a casserole dish, and rub (press) the remaining salt mixture evenly onto the pork belly on ALL sides, the goal is to get the salt and Sichuan peppercorns onto the pork belly. Weigh down the pork belly with a couple of flat stones or bricks that have been wrapped in foil. Cover with plastic wrap and transfer to the refrigerator.
Day 2:
- Take out your pork belly and pour off any liquid that collected in the pan. After all the liquid is drained, evenly apply the ⅓ cup of the salt mixture that you put aside the day before.
- Put the stones/bricks back on, cover the pork belly with plastic wrap, and put back in the refrigerator.
Day 4:
- Take the pork belly out and pour off any liquid.
- Put the stones/bricks back on top of the pork, replace the plastic wrap, and put it back in the refrigerator.
Day 6:
- Take out the pork belly, and rinse it under cold water to wash away all the peppercorns and visible sea salt crystals.
- Pat it dry with paper towels, string it up with thick kitchen twine, and hang it in a place that’s cool and dry (and where no critters will be able to get to it) for 4-5 days until the meat is dry to the touch, but not too hard to cut. You don’t want to dry out the meat too much, or it will become tough and difficult to slice.
- P.S. Feel free to marinate the pork for a couple of days longer if you like it saltier.
Day 10:
- Your salted pork belly is ready!
- Store it in a zip-top bag in the freezer!