This chili oil recipe has become one of the most popular on the blog, and for good reason. It is as much a foundational ingredient for many of our recipes as it is a delicious condiment. Also, learning how to make chili oil yourself means:
1. having a much more flavorful result
2. knowing exactly what goes into it
Over the years, we’ve received many questions and comments from readers on this recipe, so we’ve updated it with more detail and instructions, as well as options to tailor it to your exact liking!
Note: This recipe was originally posted on August 10, 2015 and has since been updated with a Youtube video, clearer instructions, more details, helpful links, new photos, and more. Enjoy!
Chili Oil Makes Everything Better
If you hang around our blog, it doesn’t take long to realize that we are kind of obsessed with all things chili oil and hot sauce.
Spicy sauces and oils show up in our fried rice and noodle recipes so often that my dad had to point out, “hey, you know there are people out there who may not like chili oil,” a statement my sister and I met with blank stares before piling more chili oil onto our bowls.
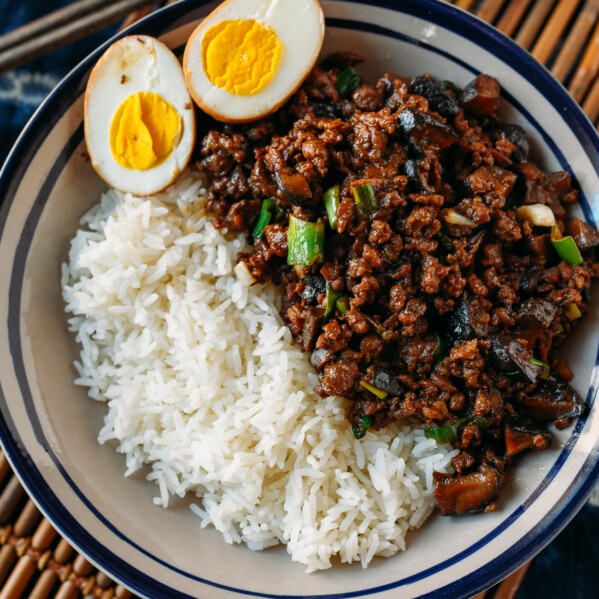
A plate of noodles or a bowl of fried rice just isn’t as good without some delicious chili oil on top.
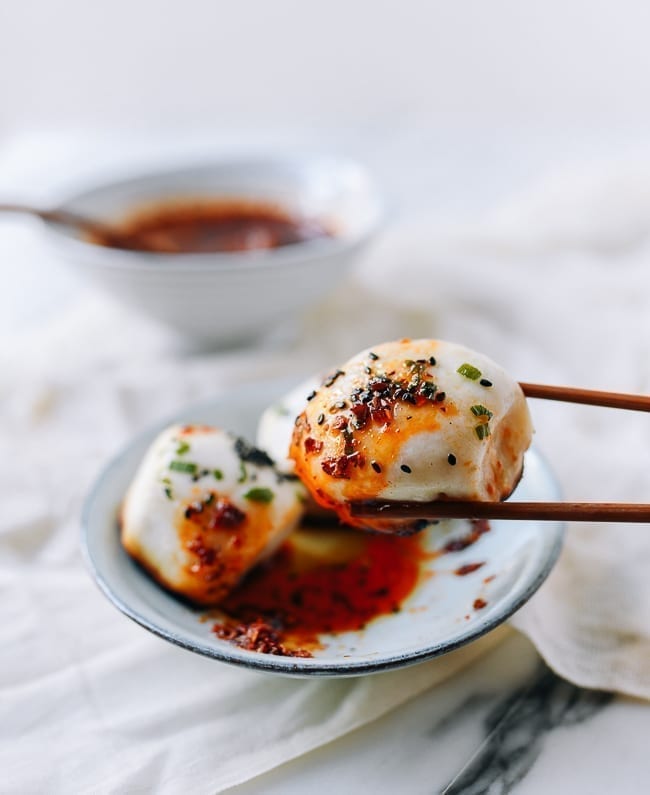
Dumplings and bao are a shadow of what they could be without chili oil––it is a crucial ingredient in our Perfect Dumpling Sauce.
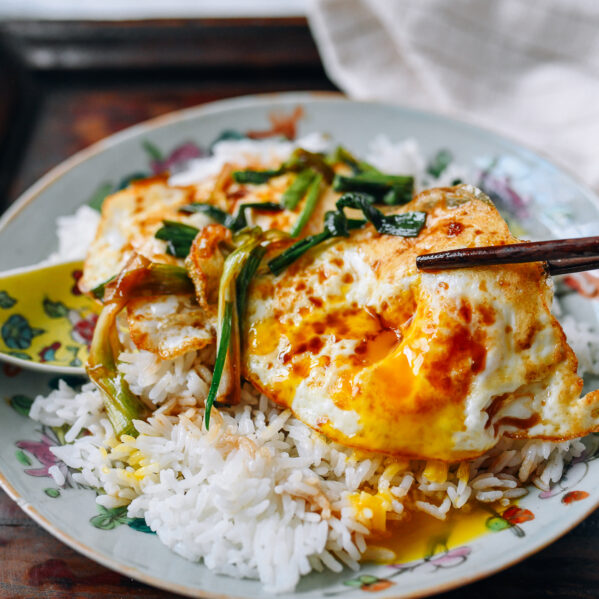
Eggs in the morning? A little avocado toast? Pot of gumbo boiling on the stove? Needs a ‘lil something. Inevitably, the answer is a bit of molten chili oil.
Then there are all of the classic Chinese dishes that require a great homemade chili oil.
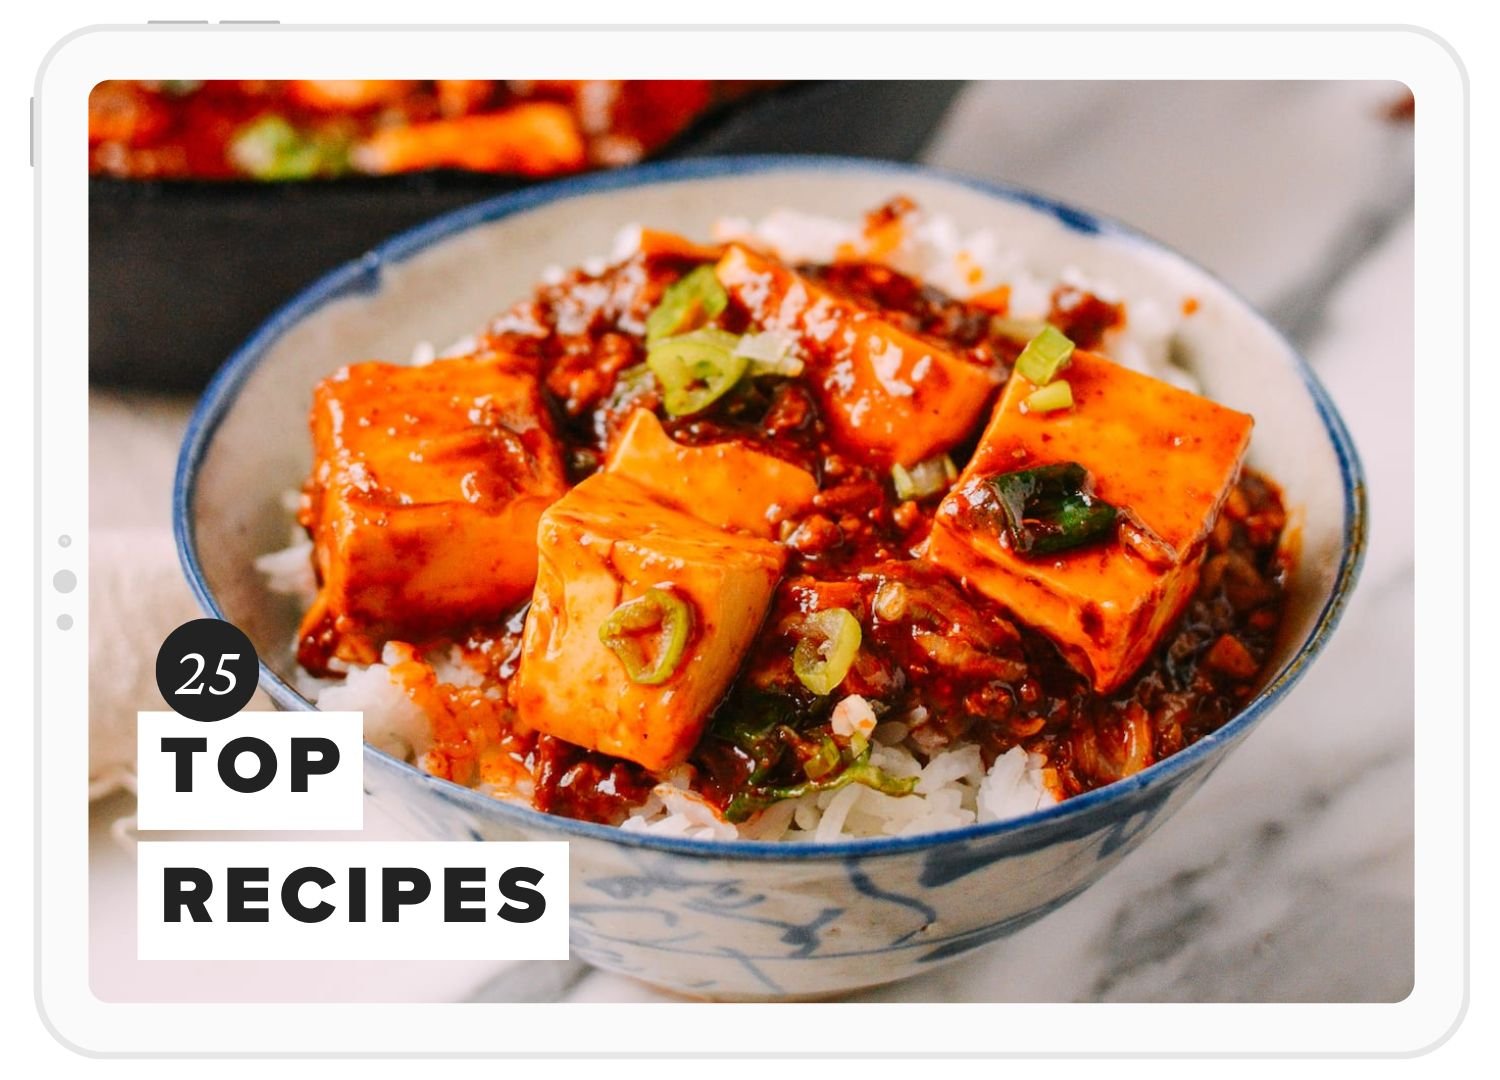
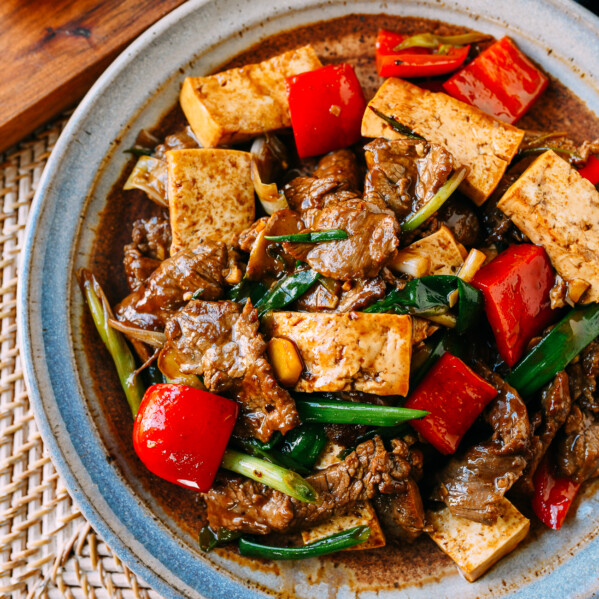
Think Mapo Tofu, Homemade Chili Bamboo Shoots, Peanut Noodles, Smashed Cucumber Salad, Sichuan Spicy Red Oil Wontons, and Lanzhou Beef Noodle Soup. With this recipe, you’ll open doors to so many other awesome dishes on the blog!
Watch: How to make Perfect Chili oil!
An important note: If you’re a flavor hound, and you’re looking for something a little more garlicky, we recommend the sister recipe this one: our Chiu Chow Chili sauce. It is packed with toasty garlic, extra chilies, salt, and soy sauce!

The best store bought chili oil brands?
If you’d rather skip the homemade route, check out our post on the best store bought chili oil brands, complete with taste test!
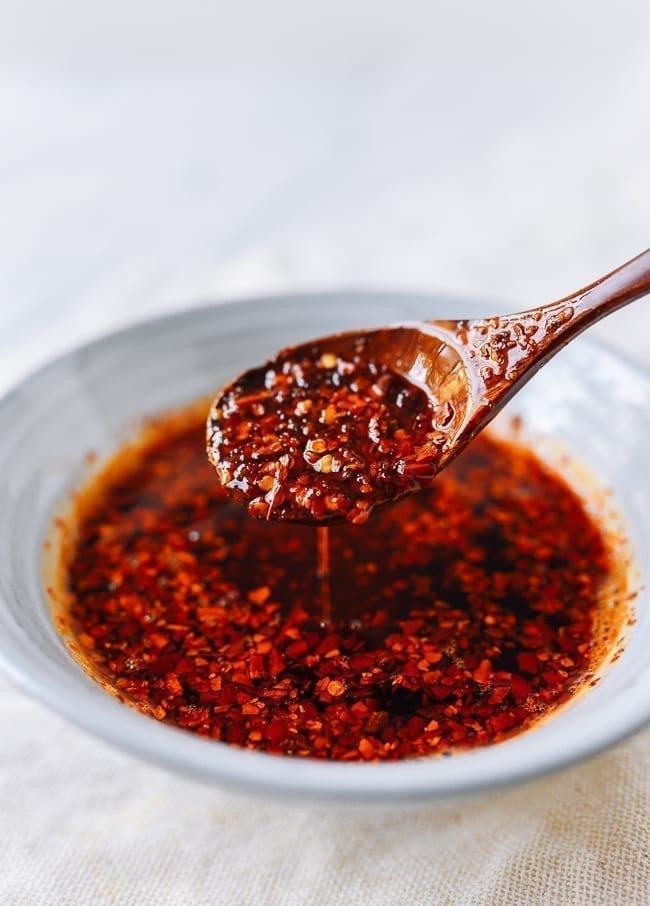
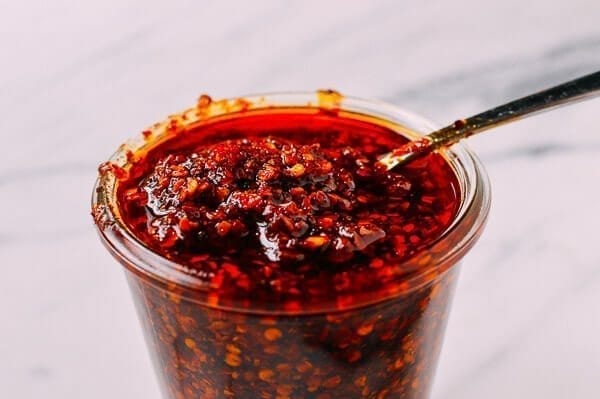
How To Make Authentic Chinese Chili Oil
If you go to any Chinese restaurant (in the US or in China) worth their salt and ask for chili oil, they will bring out a deliciously fragrant, dark red, viscous chili oil that could make even a piece of shoe leather taste good.
For a while, we tried to approximate these tasty chili oils at home with only limited success. There was some secret that we just weren’t getting—some key elements and execution details that would lead us to the perfect chili oil recipe.
Well. After many kitchen experiments (we had many mediocre jars of chili oil at the back of the fridge to prove it), I think I’ve created the perfect chili oil.
The secret is to infuse the oil with a special blend of aromatics first, then pour it over Sichuan crushed chili flakes.
These flakes are brighter red and have fewer seeds than your run-of-the-mill Italian crushed red pepper flakes, which tend to be roasted longer and darker (pouring hot oil over them results in a burnt, dull-flavored chili oil, and no one wants that).
This chili oil has a magical ability to elevate EVERYTHING. In fact, every time we eat it, we still engage in silent, solemn head-shaking, in awe of how good it tastes. And the best part? Homemade chili oil is actually extremely simple to make. You KNOW you want some.
Find Sichuan red chili flakes at Chinese grocery stores. You can also find them online from Asian grocery merchants like sayweee.com and The Mala Market. The Mala Market in particular sources their Sichuan Chili Flakes directly from small producers in China.
If you want to read up on the spices used in this and other recipes, check out our Dry Spices page in our Ingredients Glossary.
Ingredients:
Ok, let’s quickly talk ingredients. Here’s an overview of what you need, and what’s optional in the recipe:
- Oil: Ideally a neutral flavored oil, such as vegetable, canola, peanut, soybean, or grapeseed oil. Traditional Chinese caiziyou is also a great option if you can find it (it’s available at The Mala Market). It’s related to canola oil, which is is cultivated in a low-acid, more commercially viable seed and treated differently in many parts of the world (canola is actually a brand name, kind of like “bandaid”). Light olive oil can also work, but it has a lower smoke point and a tendency to harden in the refrigerator. These days, avocado oil is also becoming a popular healthy oil option, but you’re better off saving that for other applications, as it holds up well, but has a tendency to set in the refrigerator (albeit, not as intensely as olive oil will). The more aromatics you use, the more oil you can add. If using “the minimum” of aromatics, use 1½ cups. If you’re using almost all of the aromatics, you should net out at 3 cups. It is okay for this to be somewhat imprecise.
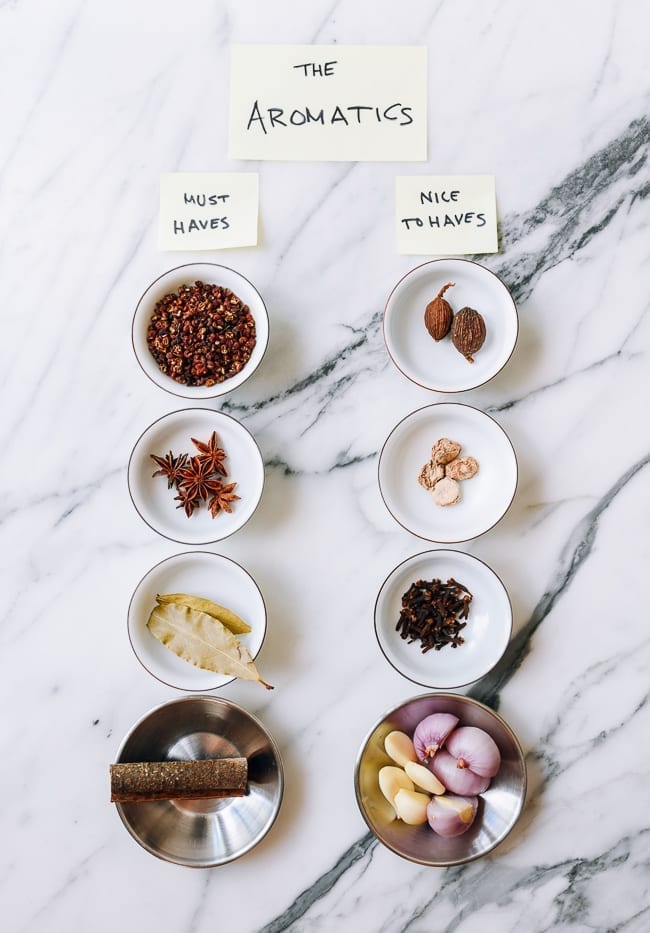
- Essential spices: At a minimum, you’ll need 4 aromatic spices: star anise, cinnamon stick (preferably cassia cinnamon), bay leaves, Sichuan peppercorns.
- Optional spices & aromatics: If you want a bit more flavor and complexity, you can also add three additional spices: black cardamom (草果; pinyin: cǎoguǒ, or tsao-ko), dried sand ginger, cloves. If you’d like to deviate from a pure spice flavor, you can also add fresh garlic and/or shallots to the oil infusion.
- Chili flakes: You will need Sichuan chili flakes for best results. Avoid regular crushed red pepper flakes. We recommend the Sichuan Chili Flakes from The Mala Market, whether you don’t have access to a Chinese grocery or are looking for premium quality chilies!
- Salt: Necessary to bring out the flavor of all the spices and aromatics!
- Optional final add-ins: Whether or not you add anything further is totally up to personal preference. Add-ins include: toasted sesame seeds, Chinese black vinegar, sesame oil, soy sauce, and raw garlic. *Note: raw garlic should be added to smaller amounts of chili oil to be consumed immediately or not too long thereafter and definitely stored in the refrigerator if you are making ahead.
Food safety reminderS :)
Over the years as this recipe has become more and more popular, some folks have voiced concerns about food safety. We’re not experts in food safety and we are definitely not scientists—we are simply common sense home cooks.
Here are some common sense tips:
Some folks have voiced concerns about the inclusion of garlic and shallot in the oil infusion leading to food-borne illness. It’s true that this risk goes down significantly if you omit the garlic and shallot, so you can leave those out for your own peace of mind.
If you find yourself worried yet yearning for garlic and shallot-y goodness, you can follow PennState Extension‘s instructions for acidifying fresh ingredients prior to the oil infusion step. While we haven’t tested this process, the article is a great resource for tips to safely make infused oils.
You should do a quick inspection before enjoying chili oil that has been hanging around for a while. If jar lids are bulging, there are weird smells, gases, or other signs of spoilage, dispose of the chili oil right away.
Use only clean utensils to dip into your chili oil.
It’s best to store chili oil in the refrigerator.
You can halve the recipe and just make a batch more frequently so your chili oil is always relatively fresh. Just use the slider in the recipe card to get the right amounts!
Updated: February 21, 2023
Chili Oil Recipe Instructions
The three variables to getting the perfect chili oil are:
- Oil temperature: Getting the right temperature when you infuse the oil with the aromatics, and when you pour it over the chili flakes. You want the oil to be hot enough to toast the spices and release flavor, but not so hot that the spices burn
- How long you infuse the oil
- Any add-ins used, and when they are added
We’re going to break it all down into 4 easy steps!
Step 1: Prepare Aromatics
There are many differing opinions when it comes to the best aromatics for chili oil, as well as many variations. In the years since I first posted this recipe, I’ve experimented with more variations, and have outlined some additions you can use, as well as the bare minimum you’ll need to make a great chili oil.
At minimum, you’ll need these spices:
- 5 star anise
- 1 cinnamon stick (preferably cassia cinnamon; note that cassia cinnamon comes in larger rolls, so you really just need about a 3×1-inch piece)
- 2 bay leaves
- 3 tablespoons Sichuan peppercorns
If you want more flavor, add these spices:
- 2 black cardamom pods
- 4 nuggets of sand ginger (about 1 tablespoon)
- 2 teaspoons cloves
- *Addendum*:
- 3-4 white cardamom (bai dou kou)
- 2-3 teaspoons fennel seed
If you want to deviate from a pure chili flake flavor, you can add these additional aromatics:
- 3 crushed garlic cloves
- 1-2 shallots, halved (if you don’t have shallots you can use the white parts of 2 scallions or a small chunk of onion)
Gather all the aromatics you plan to use and have them at the ready.
Step 2: Prepare Oil
Place oil and selected aromatics into a pot with at least two inches of clearance between the oil and the rim of the pot. If using minimum aromatics, 1 ½ cups of oil should do it. If using all the aromatics, you can add up to 3 cups of oil.
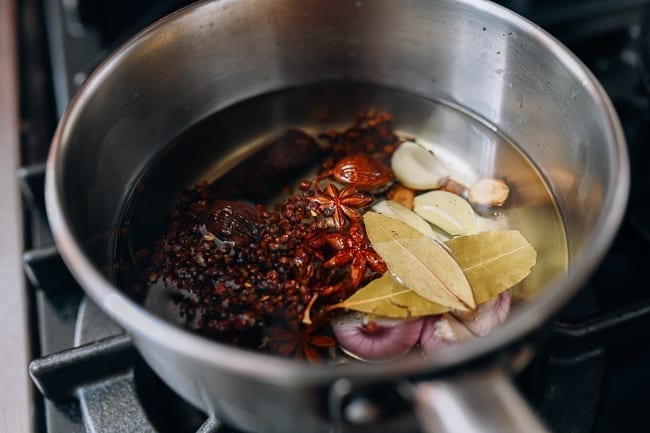
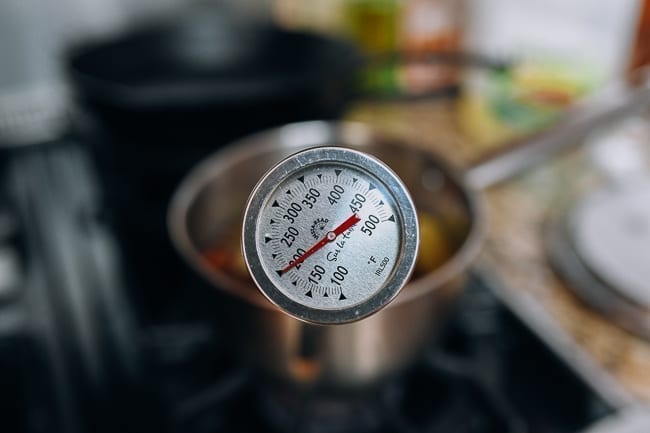
Set it over medium heat to start, then progressively lower it to medium low or low heat as the oil comes to temperature. The oil should be at about 225-250° F / 110-120° C and causing small bubbles to slowly rise from the aromatics.
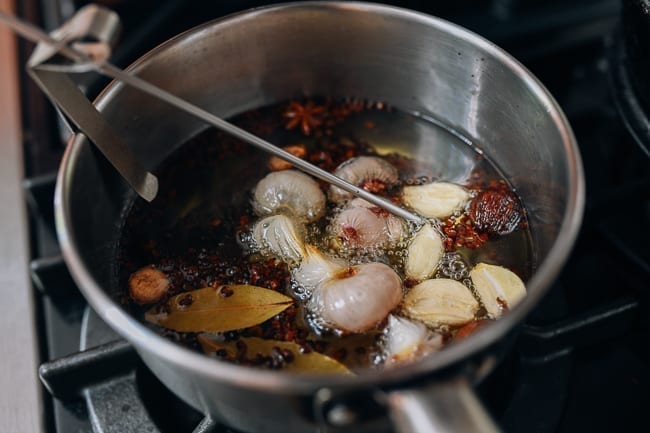
If you notice the spices sizzling more vigorously than that or turning dark too quickly, reduce the heat to cool it down.
If you are not achieving small bubbles, slowly increase the heat. For novice cooks, hovering around 200-225° F is the safest way to prevent burning. In this instance, we kept ours at 225°F.
Infuse the aromatics this way for a minimum of 30 minutes, or up to 1 hour for best results. As you are heating the oil, here are some things to look out for:
- If just using hard spices, the bubbling of the oil should be very tiny but constant. They will cling to the spices and rise up. The oil should not be hot enough to show any additional visible movement.
- If you are using garlic and shallots, the oil will bubble slightly more vigorously due to the water content of the fresh ingredients. This is normal, but you should still ensure that the garlic and shallot are still browning very slowly.
- Once you see bubbles, the heat can hover between 200-225°F. If you want to infuse your oil for less time, it’s best to stay at the higher end of the temperature spectrum.
- If you are at the lowest heat setting and it’s still too hot, take the oil off the heat periodically to avoid burning.
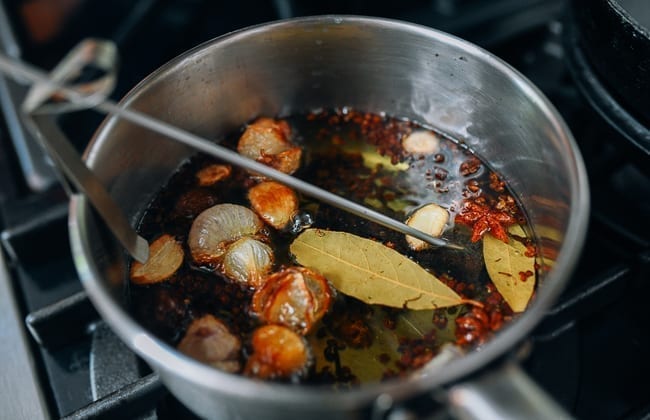
- When the garlic and shallot get brown all over, remove them from the oil so they don’t burn. But don’t let them go to waste. They are delicious on toast, as my dad was quick to take advantage of!

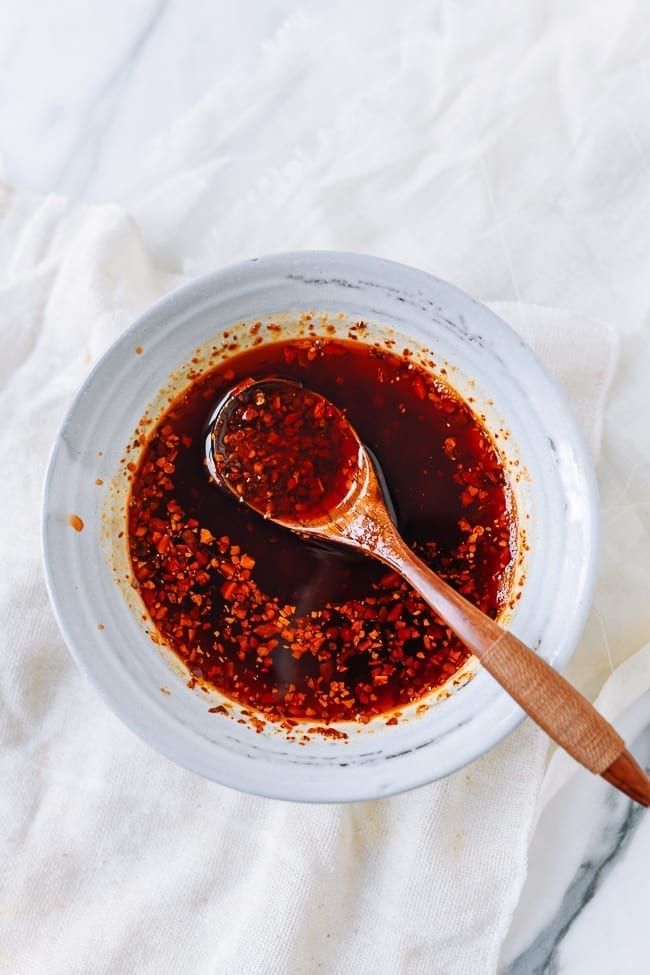
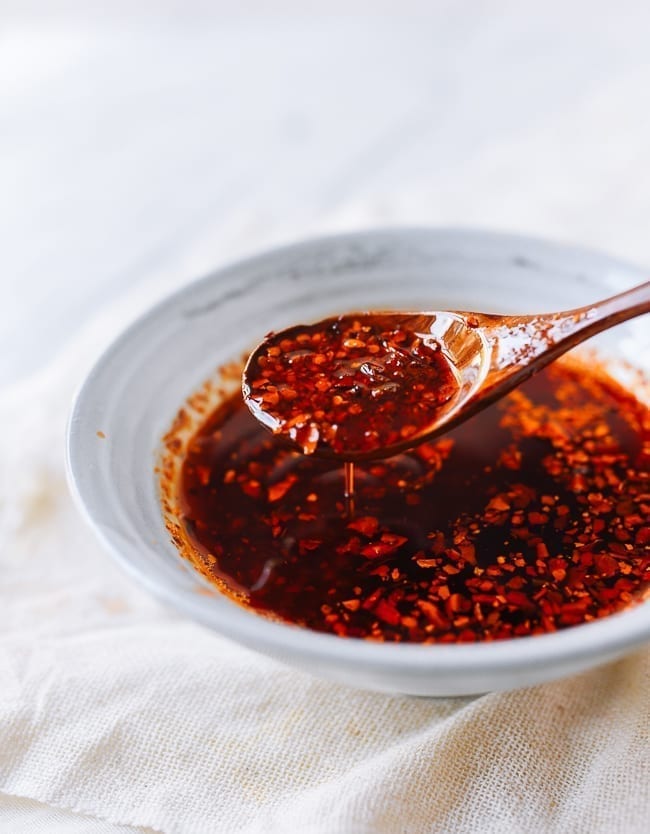
Step 3: Pour Hot Oil Over Chili Flakes
While the oil is infusing, prepare your chili flakes by placing them in a heatproof bowl.
How much chili flake should I use?
If you used 1½ cups of oil, ¾ cup of chili flakes is best. For 3 cups of oil, use 1¼ cups of chili flakes. You can experiment within this range (if you like more oil and fewer flakes, for instance). Just bear in mind the quantity of oil needed to ensure you get enough flavor and color.
What kind of chili flakes should I use?
We bought a few kinds of chili flakes from our local Asian market to show you some of the differences across brands. Let’s take a closer look.
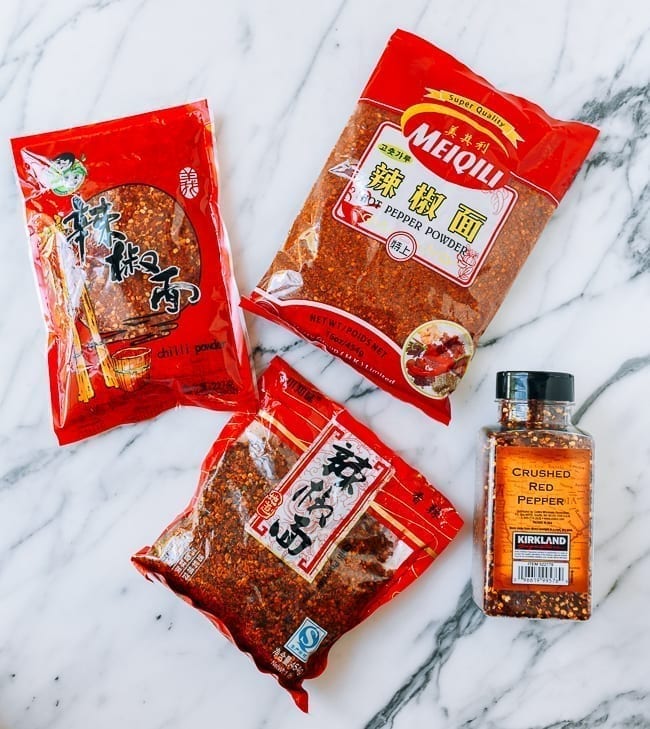
Firstly, do not be tempted to use Italian red pepper flakes. I included them in the photo above, so you could see just how different they look from the Chinese versions.
You will not get a deep red chili oil, and the flavor just won’t be there. We also get questions about using coarse Korean gochugaru. You could use that in a pinch, but it will not be Chinese chili oil! Gochugaru is also often milder than Sichuan chili flakes.
The best chili flakes to use are Sichuan chili flakes, but you can see in this photo that there are still slight variations in what you can buy. Some brands are finer than others. Some brands appear slightly more moist. Still others are more roasted and dark vs. bright red. This brings us to oil temperature.
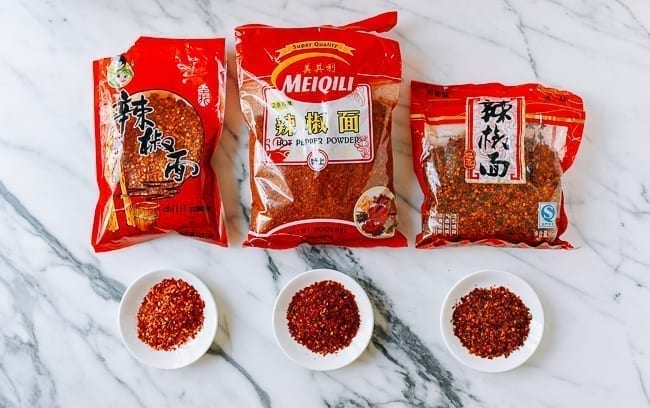
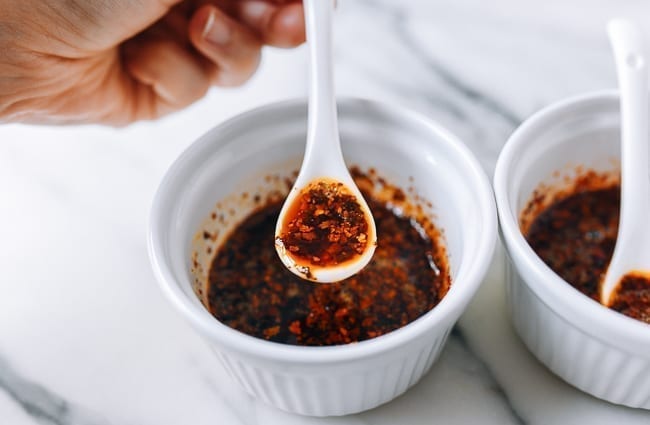
What temperature should the oil be when I pour it over the chili flakes?
It’s important to note what your chili flakes look like before pouring the hot infused oil over them. This will help you avoid burning.
Note!
I also want to emphasize the *true* importance of cooking by sight and smell at this phase. Thermometer quality varies, as does chili flake roast levels, which is what I want to talk about now.
You can see in this experiment that we added oil of the same temperature to each of three different chili flake brands.
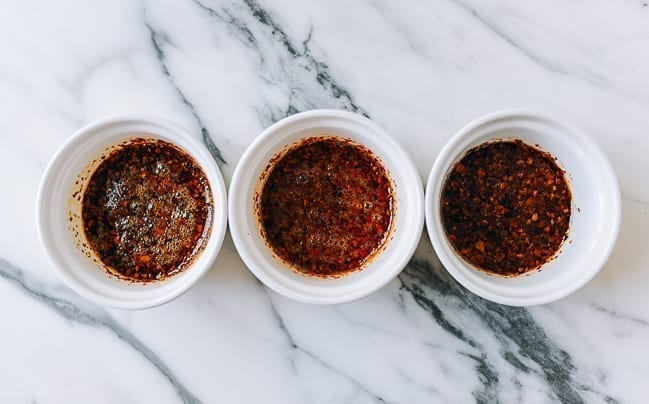
In my opinion, only the middle bowl is perfect.
The one on the left (the finest chili flakes of the three) is slightly over-toasted…
And the one on the right (the chili flakes that appear pre-roasted) has burned.
The one in the middle, however, is just right.
This is all due to the chili flake size, moisture level, and whether or not the peppers were toasted before grinding. Take note of these important characteristics!
If your chili flakes are very fresh, with a higher moisture content (they’ll be a deeper, brighter red), the oil temperature should be at 325-350° F/163-177° C to achieve the correct sizzling effect. We typically use fresher chili flakes with a higher moisture content from the Mala Market (they are roasted in rapeseed oil), which required an oil temperature of 350° F/177° C.
If you have drier chili flakes, opt for 250-275° F/120-135° C.
If your chili flakes are already super roasted and darker, you may want to be closer to 225-250° F/110-120° C.
Your best bet is to test your oil temperature on a small amount of chili flakes to make sure it’s to your liking, but don’t dawdle, as the oil will cool as it sits.
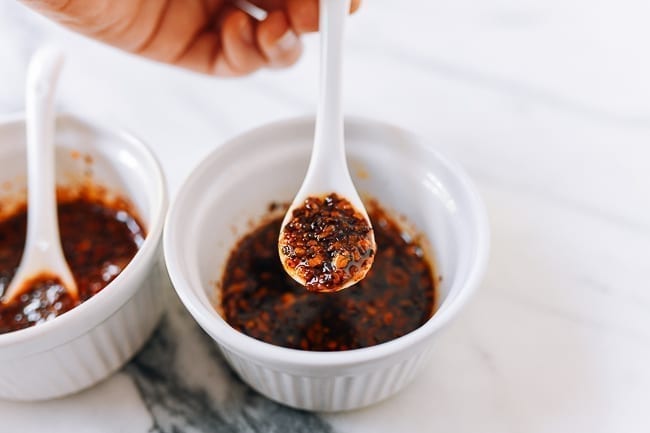
MORE About thermometers…
We’ve found that there can be huge variances between thermometers. From a candy thermometer to a run of the mill all-purpose metal probe thermometer to an infrared laser thermometer, there is definitely big variation. When heating oil to 350° F/177° C, the probe thermometer read 350° F, whereas the infrared laser thermometer read 380° F/193° C.
Bottom line: in this case, your best bet is to test the oil on a small amount of flakes to check for that sizzle, as shown in the photos.
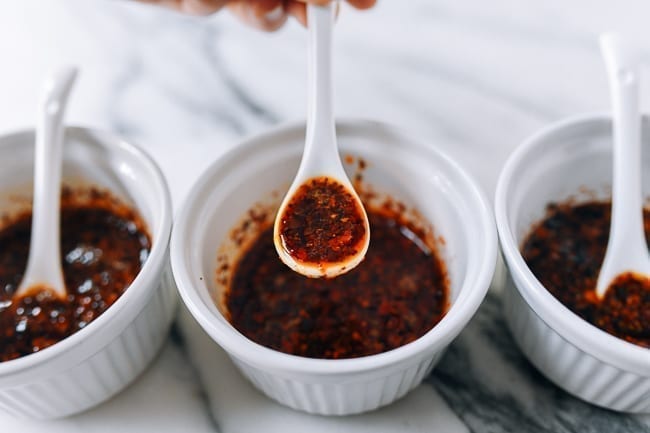
You can either heat your oil and pour it through a fine-meshed strainer OR remove the spices first with a fine-meshed strainer. If your spices are very dark by the time you get to this step, to avoid burning (and bitterness!), it’s safest to remove the spices entirely before pouring over the chili flakes.
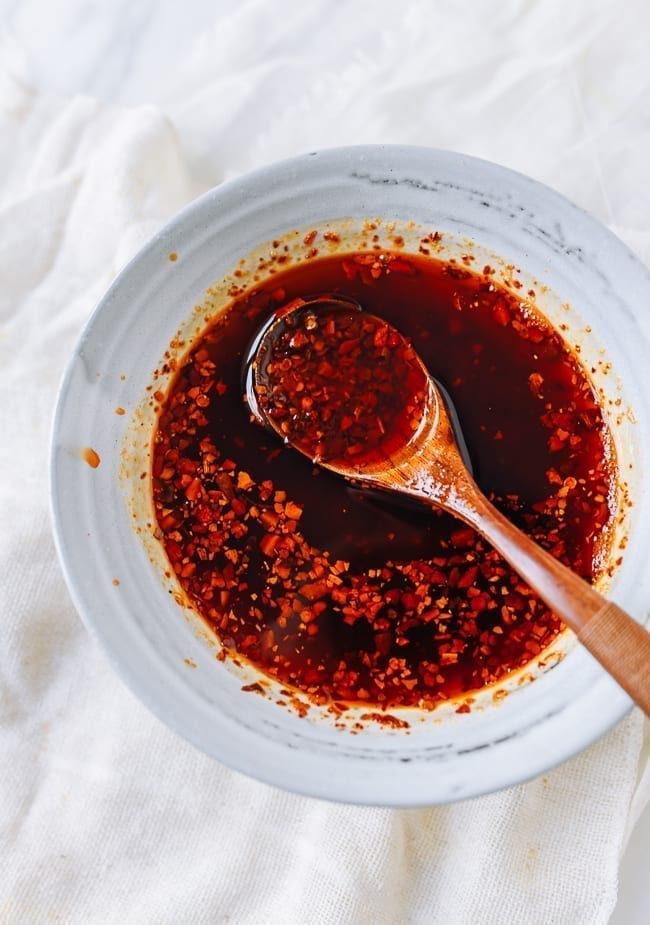
When your oil is at the correct temperature for your chili flakes, pour it through a fine meshed strainer over the chili flakes in a heatproof bowl.
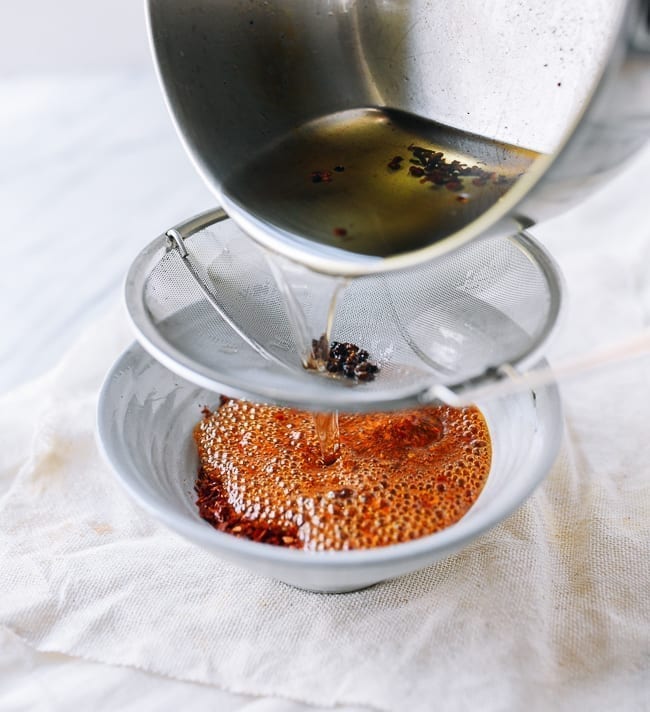
You’ll know you’ve gotten it right when you smell a “popcorn” kind of smell—it should not smell burnt at all.
Chili flakes will sizzle with smaller bubbles at first, and then the bubbles will get larger as you pour in more oil.
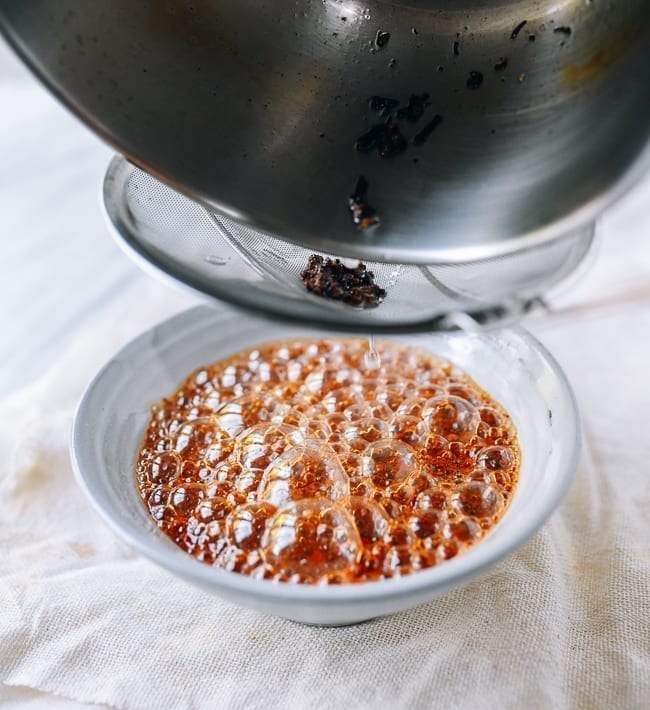
Stir the chili flakes and oil together to distribute the heat of the oil evenly.
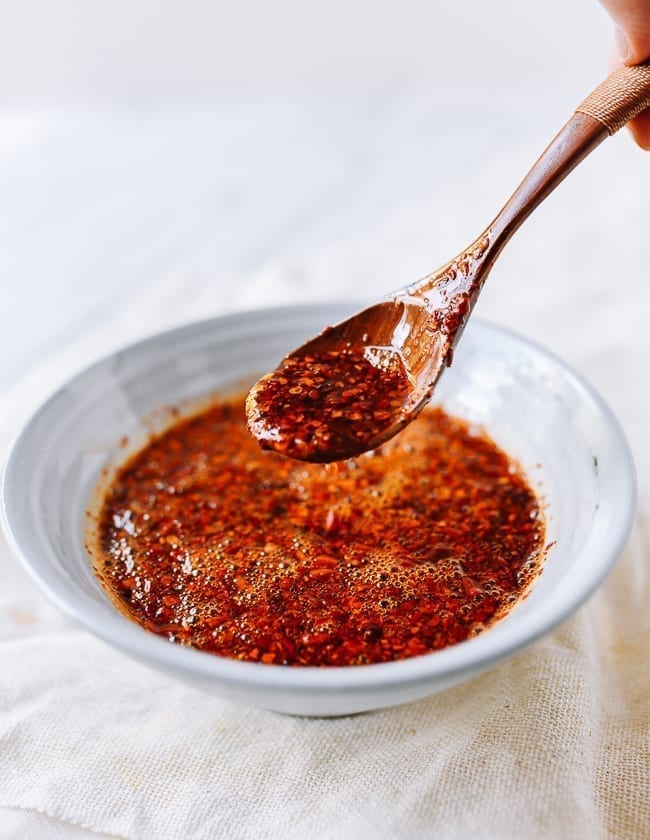
Step 4: Choose Add-ins (Optional)
Some chili oil recipes call for add-ins like soy sauce, black vinegar, or sesame oil. These can be tasty, but I do want to emphasize that this changes your chili oil into something else.
I think chili oil should be: infused oil, chili flake, and salt when all is said and done!
However, I’ve outlined options here for you:
Necessary add-in:
1 – 2 teaspoons salt (to taste)
Stir the salt into the chili oil at the very end.
Be sure to mix your chili oil with a clean spoon every time you dip into it. (The salt will settle to the bottom of the container. )
Optional add-ins (not recommended if you’re looking for a pure chili oil):
These can be mixed into your chili oil after you’ve added the hot oil. However, I would recommend simply adding these to taste when serving. Then you can keep a pure jar for other applications. If you want more umami, you may be better off making our Chiu Chow Chili Sauce, which includes soy sauce as a standard ingredient.
1-3 tablespoons sesame seeds (lightly toasted)
If using sesame seeds, they should be lightly toasted. (You can toast them in a dry pan if starting with raw sesame seeds.) Mix them in with the chili flakes before pouring the warm oil over the top.
Chinese black vinegar
If you’d like to add black vinegar, start with 2 teaspoons and adjust from there to taste.
Sesame oil
Start with 1 teaspoon and adjust from there to taste.
Light soy sauce
Start with 2 tablespoons and adjust from there to taste.
Raw garlic
Do not add raw garlic directly to the entire batch, as it can cause spoilage. It’s great for serving with a small portion of chili oil, however. Start with 1 minced clove of garlic for every 2 tablespoons or so of chili oil. Adjust from there to taste. If you’re looking for a more prominent “cooked” garlic flavor, try our Chiu Chow Chili Sauce recipe.
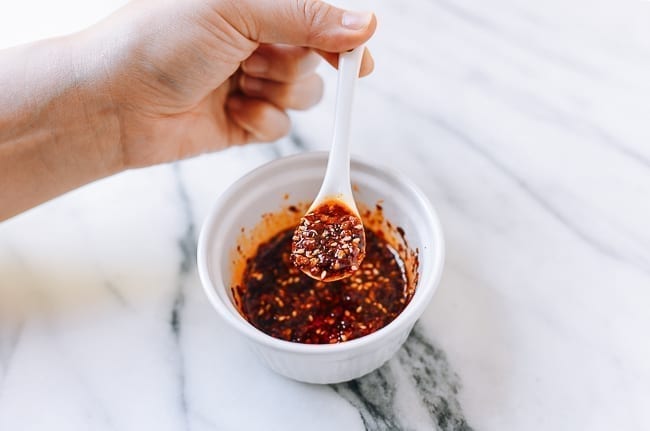
Allow the chili oil to cool before storing in airtight containers in the refrigerator. Always use a clean utensil when handling to prevent spoilage. It can last for up to 6 months if handled in this way.
And that’s it! Below, you’ll find our printable recipe card with the full list of ingredients. The instructions within the post itself have the most detail, while the instructions in the recipe card can serve as a quicker reference.
Enjoy this condiment on just about anything, and in our recipes that call for it!
Looking for more authentic recipes? Subscribe to our email list and be sure to follow us on Pinterest, Facebook, Instagram, and Youtube!
Recipe

How to Make Chili Oil
Ingredients
- 1½-3 cups neutral oil (350-700 ml)
- 5 star anise
- 1 cinnamon stick (preferably cassia cinnamon)
- 2 bay leaves
- 3 tablespoons Sichuan peppercorns
- 2 black cardamom pods (optional)
- 4 nuggets dried sand ginger (optional – about 1 tablespoon)
- 2 teaspoons cloves (optional)
- 3 cloves garlic (optional – crushed)
- 1-2 shallots (optional – halved)
- ¾-1 1/4 cup Sichuan chili flakes (65-110g)
- 1 – 2 teaspoons salt (to taste)
Instructions
- Gather all the aromatics you plan to use. Place oil and selected aromatics into a pot with at least two inches of clearance between the oil and the rim of the pot. If using minimum aromatics, 1 ½ cups of oil should do it. If using all the aromatics, you can add up to 3 cups of oil.
- Set it over medium heat to start, then progressively lower it to medium low or low heat as the oil comes to temperature. The oil should be at about 225-250° F / 110-120° C and causing small bubbles to slowly rise from the aromatics. If you notice the spices sizzling more vigorously than that or turning dark too quickly, reduce the heat to cool it down. If you are not achieving small bubbles, slowly increase the heat. Hovering around 200-225° F is the safest way to prevent burning. Infuse the aromatics this way for a minimum of 30 minutes, or up to 1 hour for best results. Also, when the garlic and shallot get brown all over, remove them from the oil so they don’t burn.
- While the oil is infusing, prepare your Sichuan chili flakes by placing them in a heatproof bowl. If you used 1½ cups of oil, ¾ cup of chili flakes is best. For 3 cups of oil, use 1¼ cups of chili flakes. You can experiment within this range (if you like more oil and fewer flakes, for instance).
- You can either heat your oil and pour it through a fine-meshed strainer OR remove the spices first with a fine-meshed strainer. If your spices are very dark by the time you get to this step, to avoid burning, it's safest to remove the spices entirely before pouring over the chili flakes.If your chili flakes are very fresh, with a higher moisture content (they'll be a deeper, brighter red), the oil temperature should be at 325°-350° F/163-177° C to achieve the correct sizzling effect (The Mala Market brand chili flakes we use do well with 350° F/177° C). If you have drier chili flakes and you like a darker color, opt for 250°-275° F/120°-135° C. If your chili flakes are already super roasted and darker, you may want to be closer to 225°-250° F/110°-120° C. Your best bet is to test your oil temperature on a small amount of chili flakes to make sure it’s to your liking, but don’t dawdle, as the oil will cool as it sits.When in doubt, test the oil on a small bowl of chili flakes before you do the rest. Carefully pour the hot oil through a strainer onto the chili flakes. Stir to evenly distribute the heat of the oil. You'll know you've gotten it right when you smell a "popcorn"-like smell that is not at all burnt-smelling.
- Stir in the salt, and allow the chili oil to cool. Store in airtight containers in the refrigerator. Always use a clean utensil when handling to prevent spoilage. It can last for up to 6 months if handled in this way.