This Asian milk bread recipe is a triumph. I’m not exaggerating when I tell you that for months, we’ve searched, tested, and failed time and time again to nail down a perfect recipe for soft, buttery, fluffy milk bread. Until that is, when we finally did it!
This recipe was originally posted January 17, 2015, and has been a hit ever since. We’ve recently added clearer photos, an FAQ section, and clearer instructions. The recipe remains the same. Enjoy!
What Is Milk Bread? What’s So Special About It?
Milk bread is an Asian style of soft, buttery, and slightly sweet bread. There are variations in Japan (where it’s known as shokupan) as well as China. In Chinese bakeries, you’ll find milk bread in various forms: loaves, sliced, pull-apart buns, and as the basis for a wide variety of Hong Kong Style bakery buns.
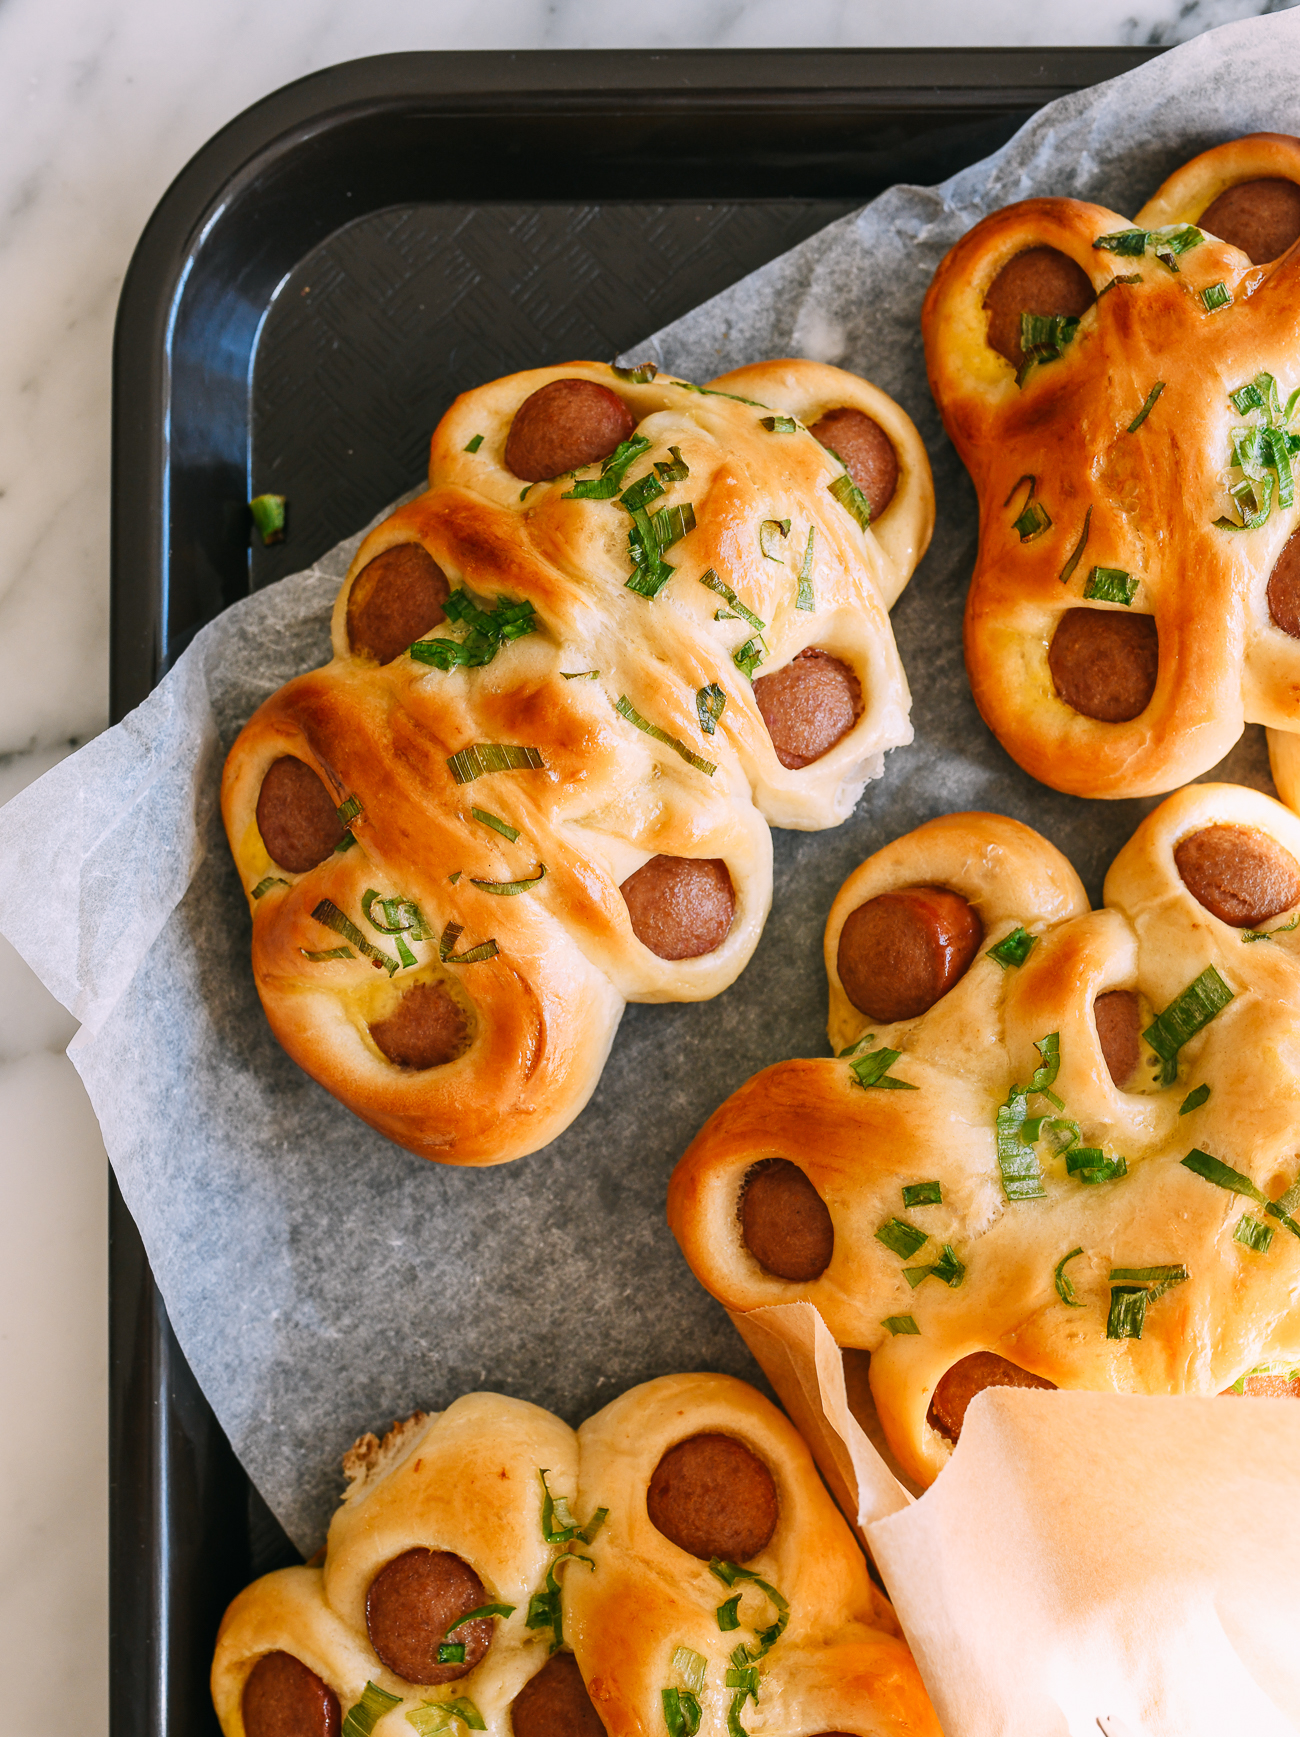
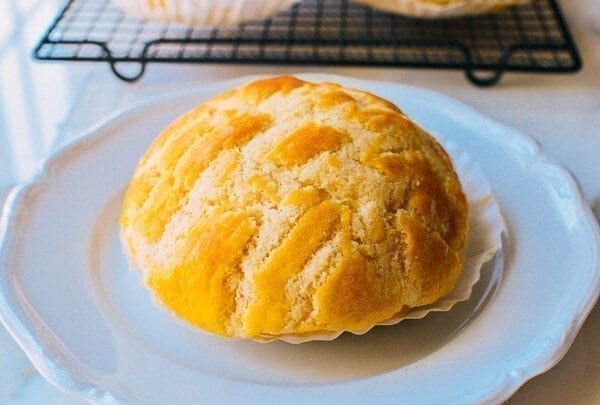
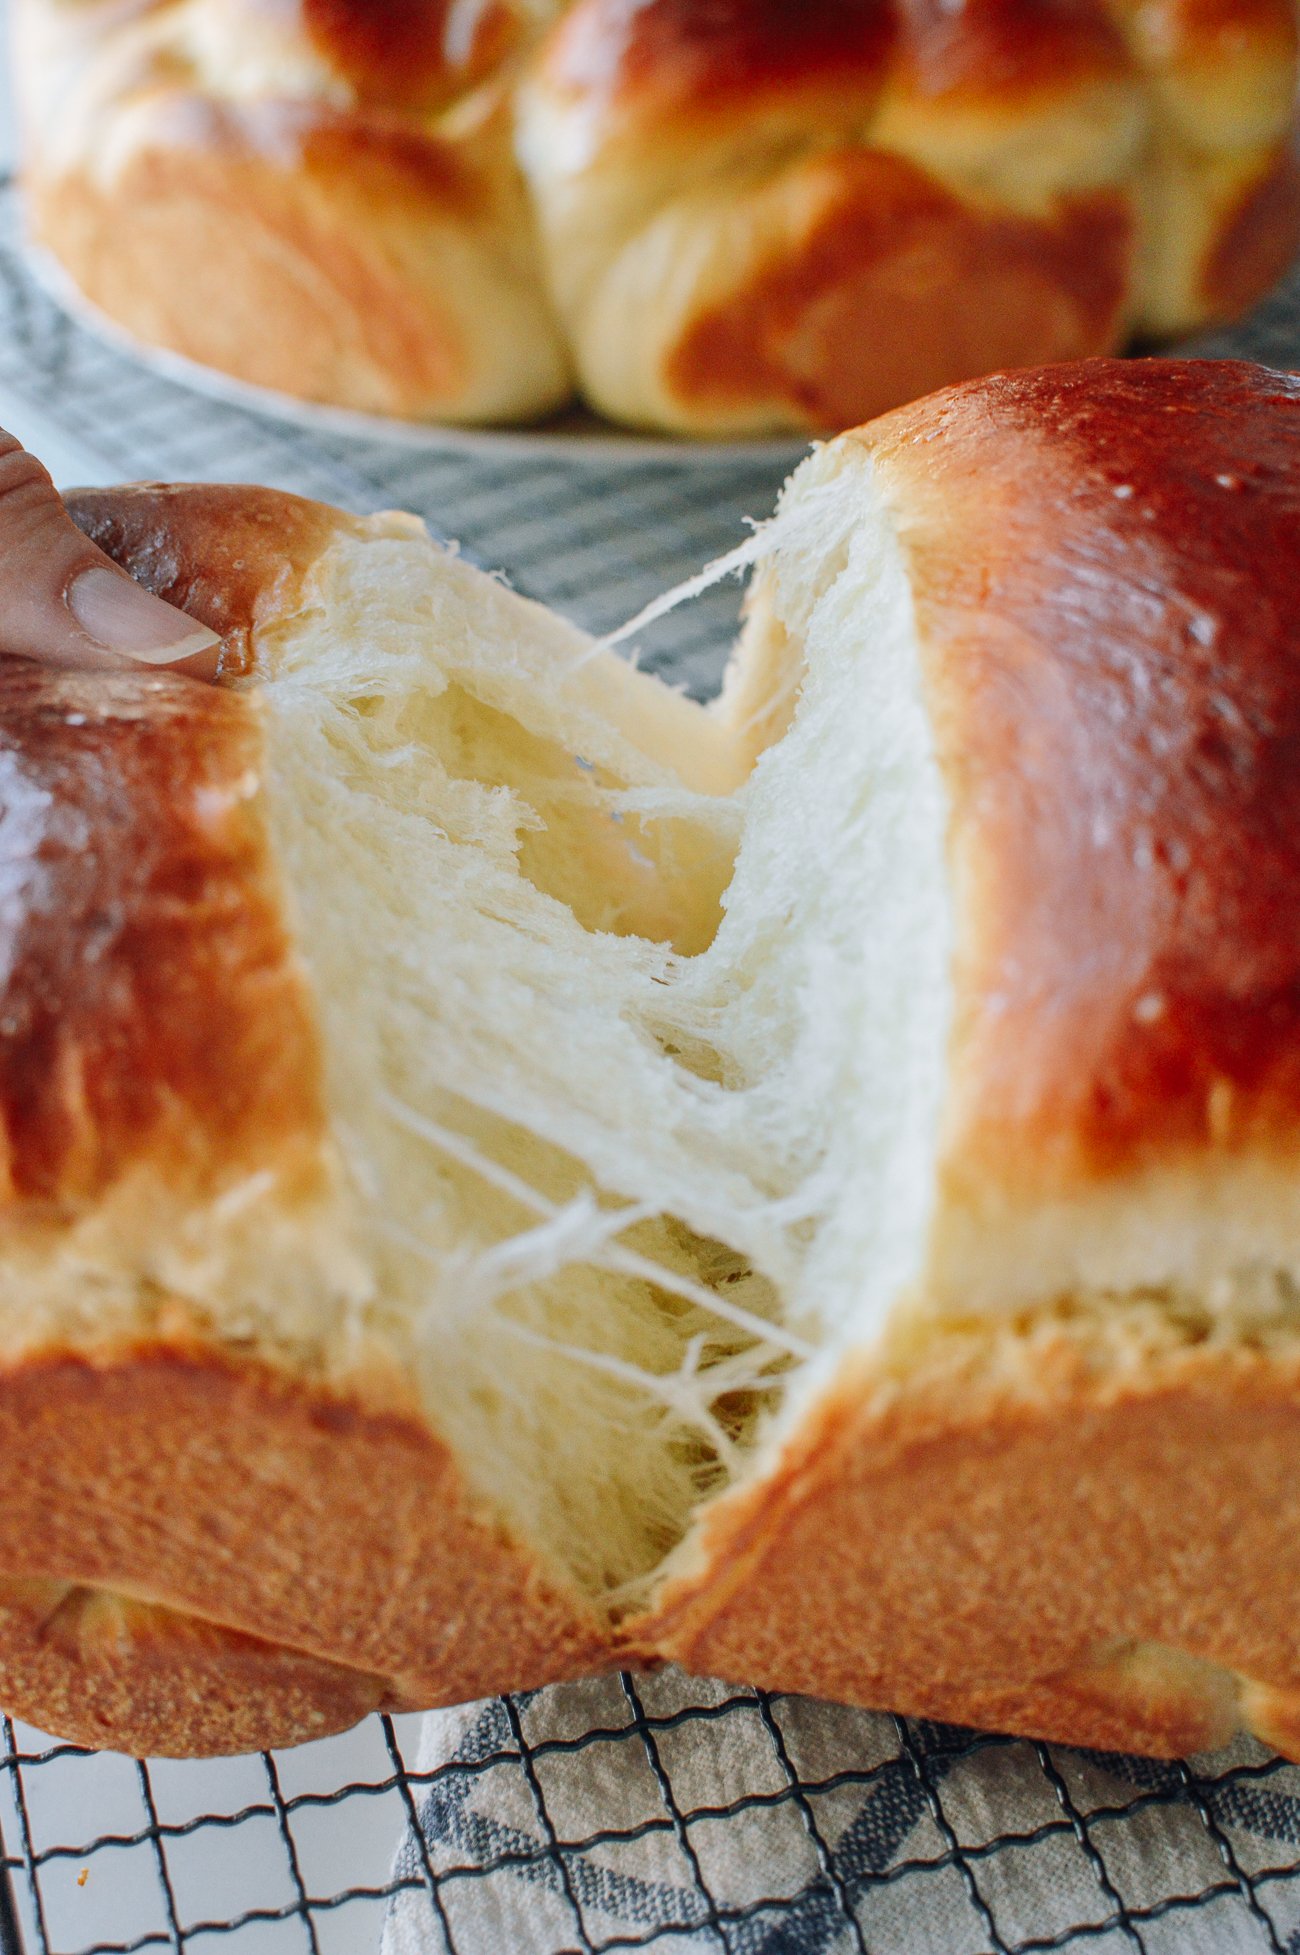
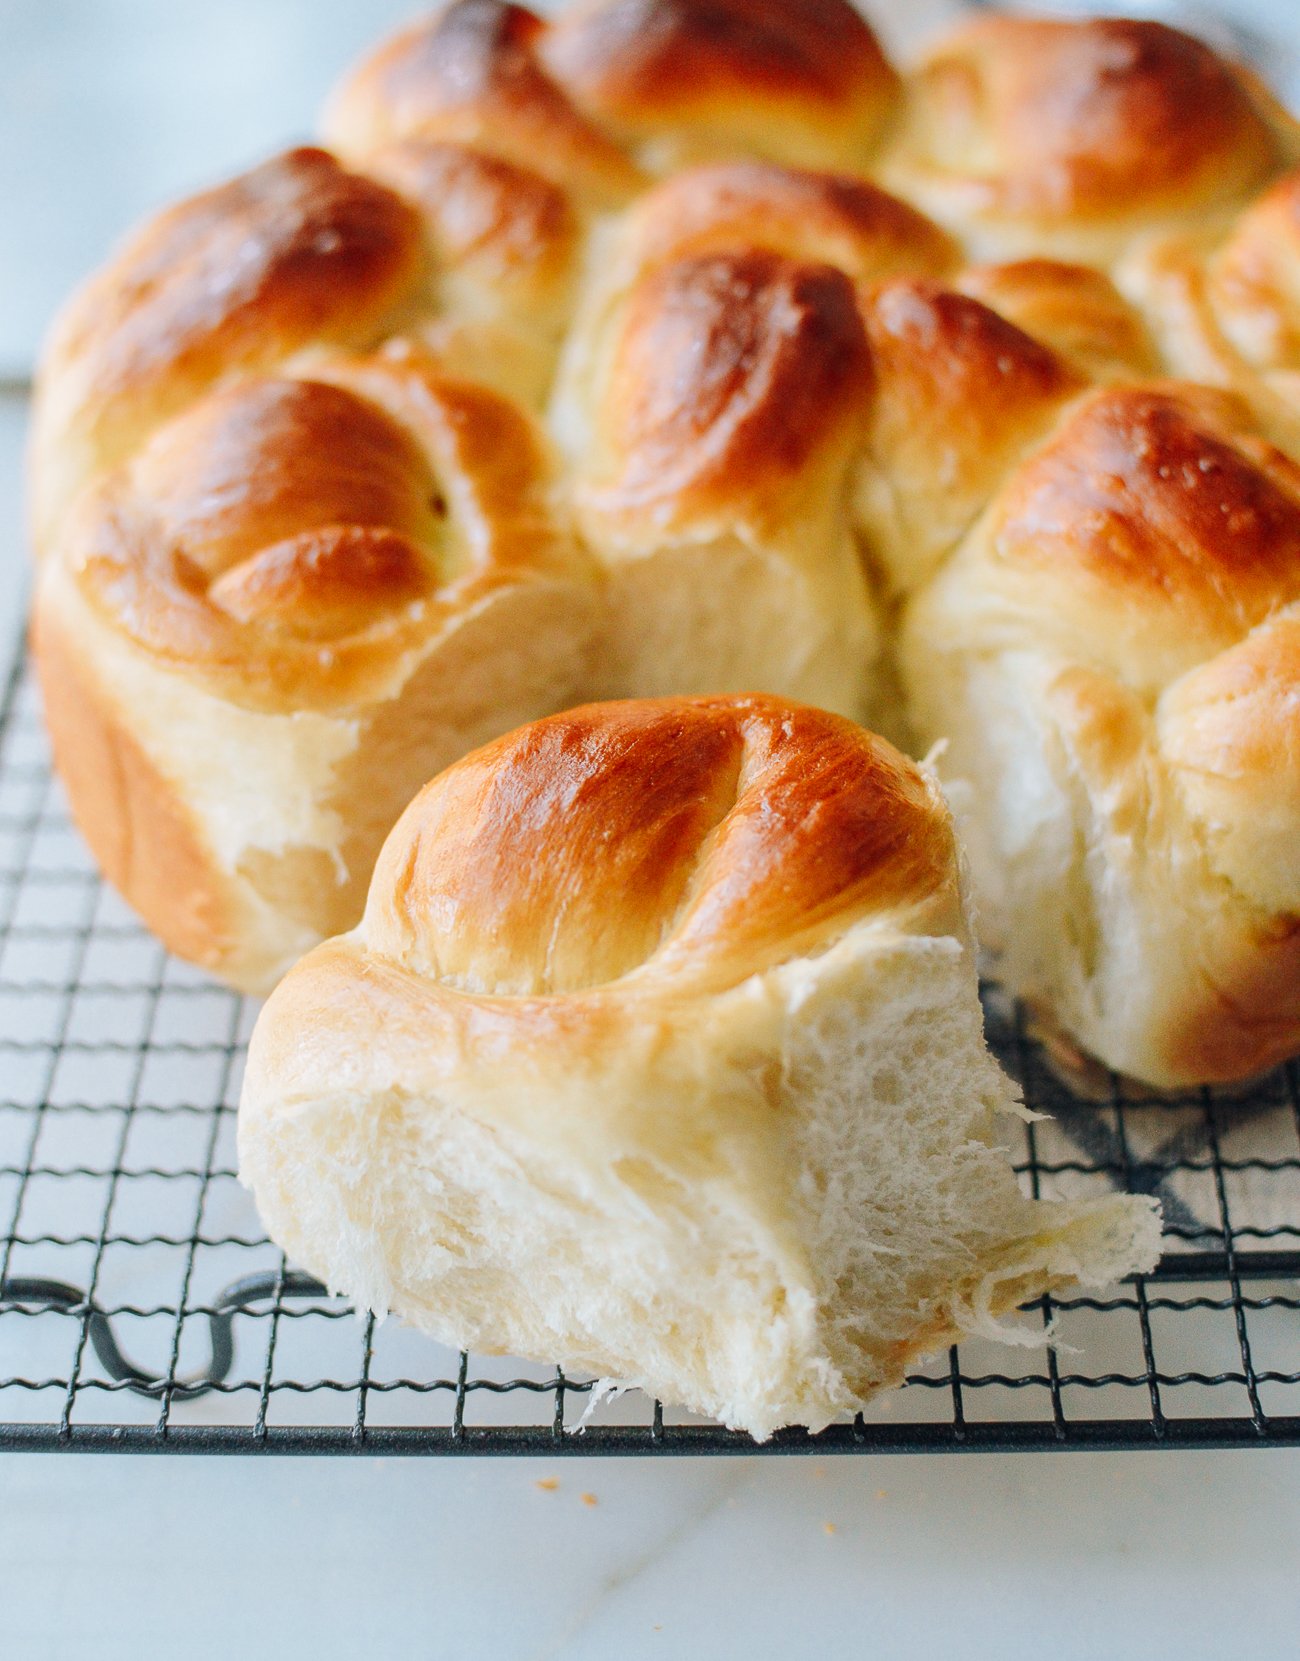
If you’ve ever had a baked Chinese BBQ Pork Bun (Char Siu Bao), Pineapple Bun, or Hot Dog Bun, you know what we’re talking about. Milk bread is light, incredibly fluffy, and tears apart in melt-in-your-mouth strands.
Milk bread dough is an enriched dough, which means it has dairy (milk, cream, and/or butter), eggs, oil, and/or sugar added to it. It is softer and richer than regular breads, which are made with primarily flour, water, salt, and yeast.
Other examples of enriched doughs include brioche, challah, and cinnamon roll dough. (We actually make the FLUFFIEST cinnamon rolls with this recipe as a base—try it!)
This Japanese/Chinese style of milk bread also influenced another similar style of bread—Hawaiian Sweet Bread, or Sweet Rolls.
But how is this soft fluffiness achieved?
A Simple Milk Bread Recipe, with Wholesome ingredients
There are many milk bread recipes on the internet, and many of them are quite complicated.
Some require a traditional Chinese method, known as tangzhong, which is a cooked flour and liquid mixture that gets added to the dough. Other recipes require dough enhancers, also known as dough improvers or dough conditioners.
However, we never got consistent results with the tangzhong method. And we didn’t want to use chemical dough conditioners, which aren’t in people’s normal baking pantries anyway.
Plus, no matter how closely I followed many of these recipes on other blogs and Chinese recipe sites alike, I was never satisfied with the outcome. Often, they wouldn’t come out anything like the picture! This futile search went on for about a year.
So where did this milk bread recipe finally come from? All along, it turned out that my cousin Heidi had the perfect recipe.
Not only is this the absolutely closest recipe I’ve tried to achieve the real-deal Asian milk bread you find in Chinese grocery stores and Chinatown bakery shops, it’s actually remarkably easy.
It has become the base recipe for all of our Chinese Bakery bun recipes. Since posting this recipe on January 17, 2015, thousands of our readers have made this bread part of their regular baking rotation!
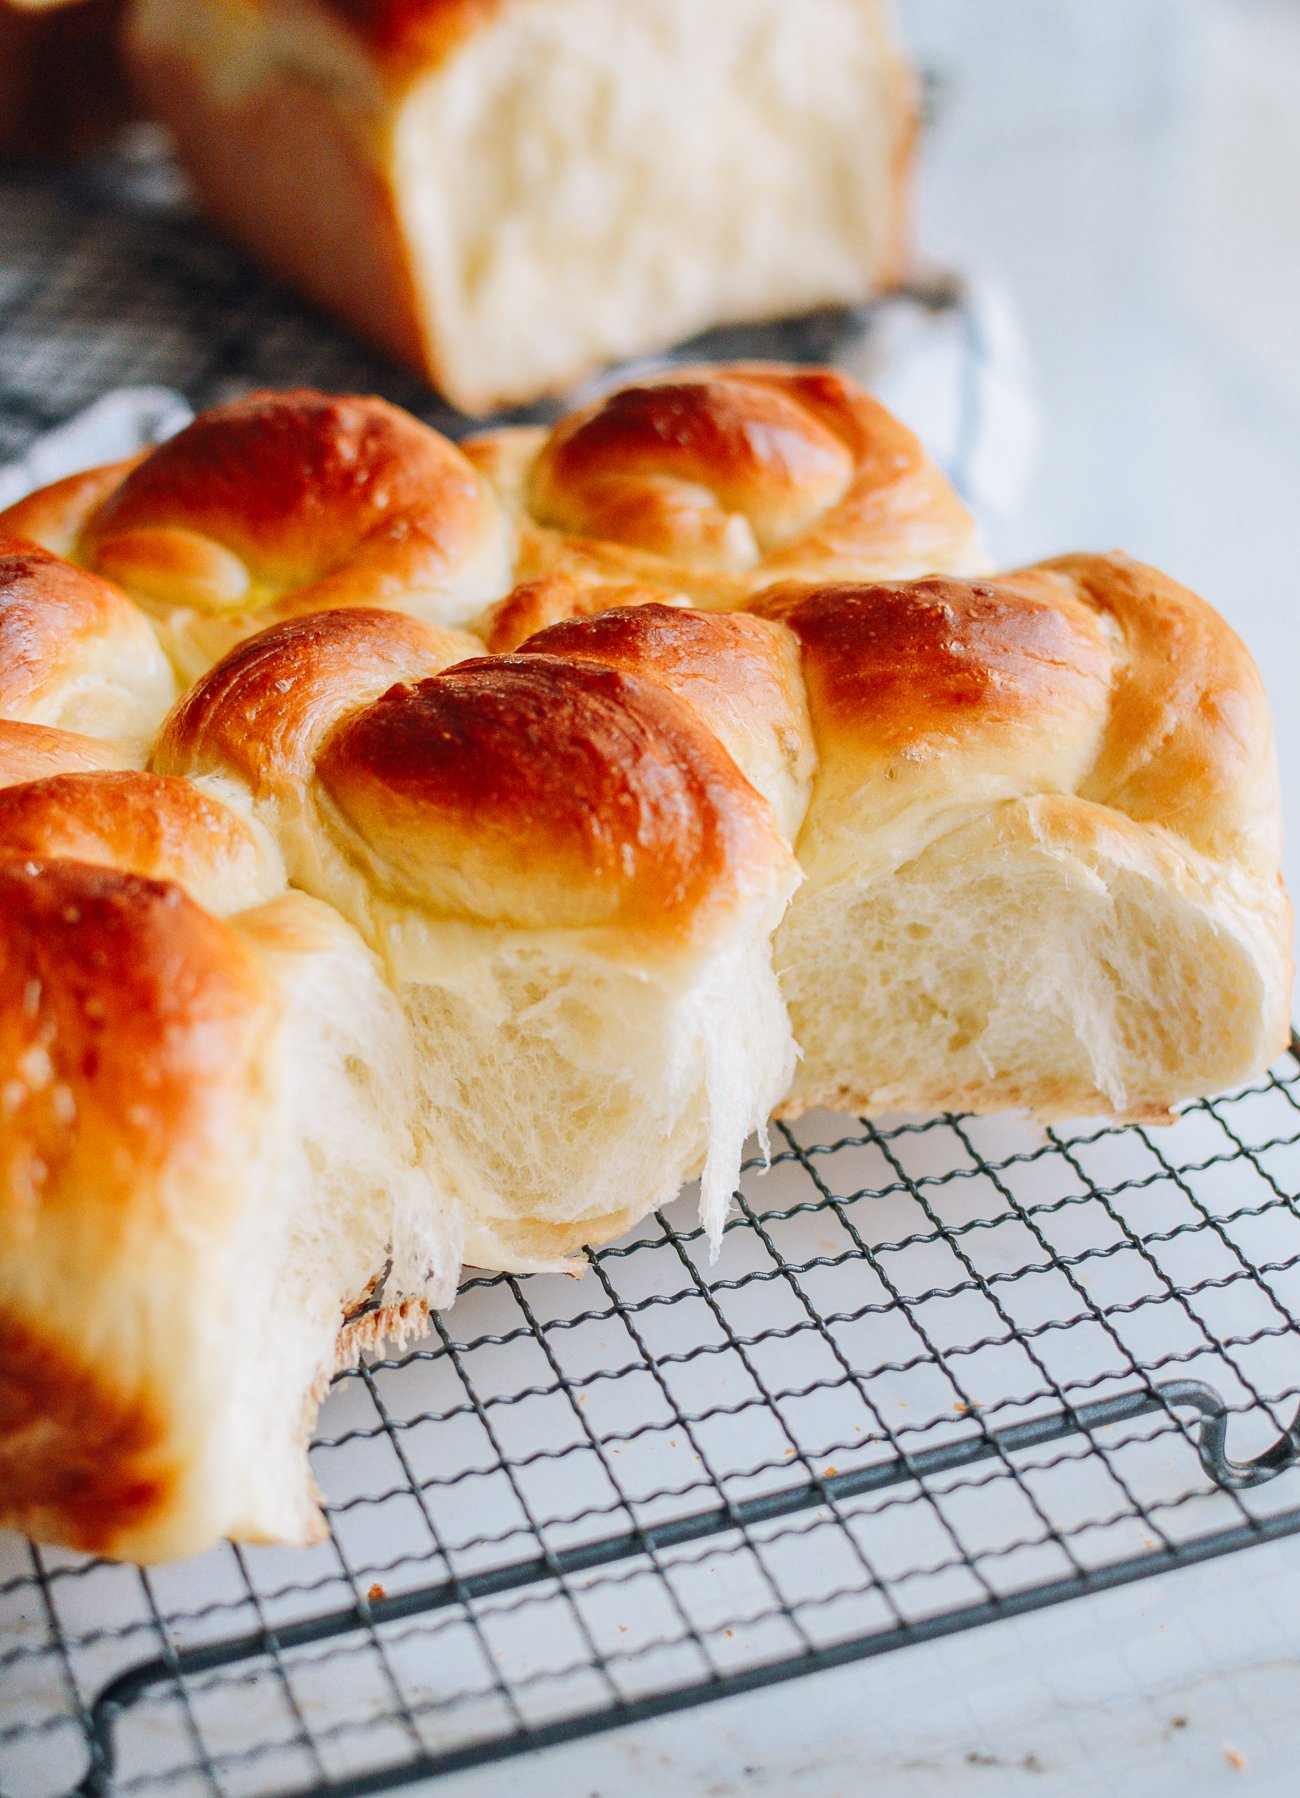
In the gif below, you can really see the fluffy texture of this milk bread as it gets pulled apart:
Watch: Judy shares all of her tips and advice for making perfect milk bread!
The All-in-One Method
This recipe employs the all-in-one method. You add all the ingredients (including, surprisingly, the yeast) to the mixing bowl at the same time.
You do have to make sure that the ingredients are at room temperature, and that they go into the mixing bowl in the order listed in the recipe, but it really is as easy as that. The yeast will dissolve into the liquid ingredients as the stand mixer (or your hands) combines everything together.
Once you’ve mixed the dough (either with a stand mixer or by hand), proof it until it doubles in size. Then you knead and shape it, proof again, and bake. No fancy ingredients or complicated steps.
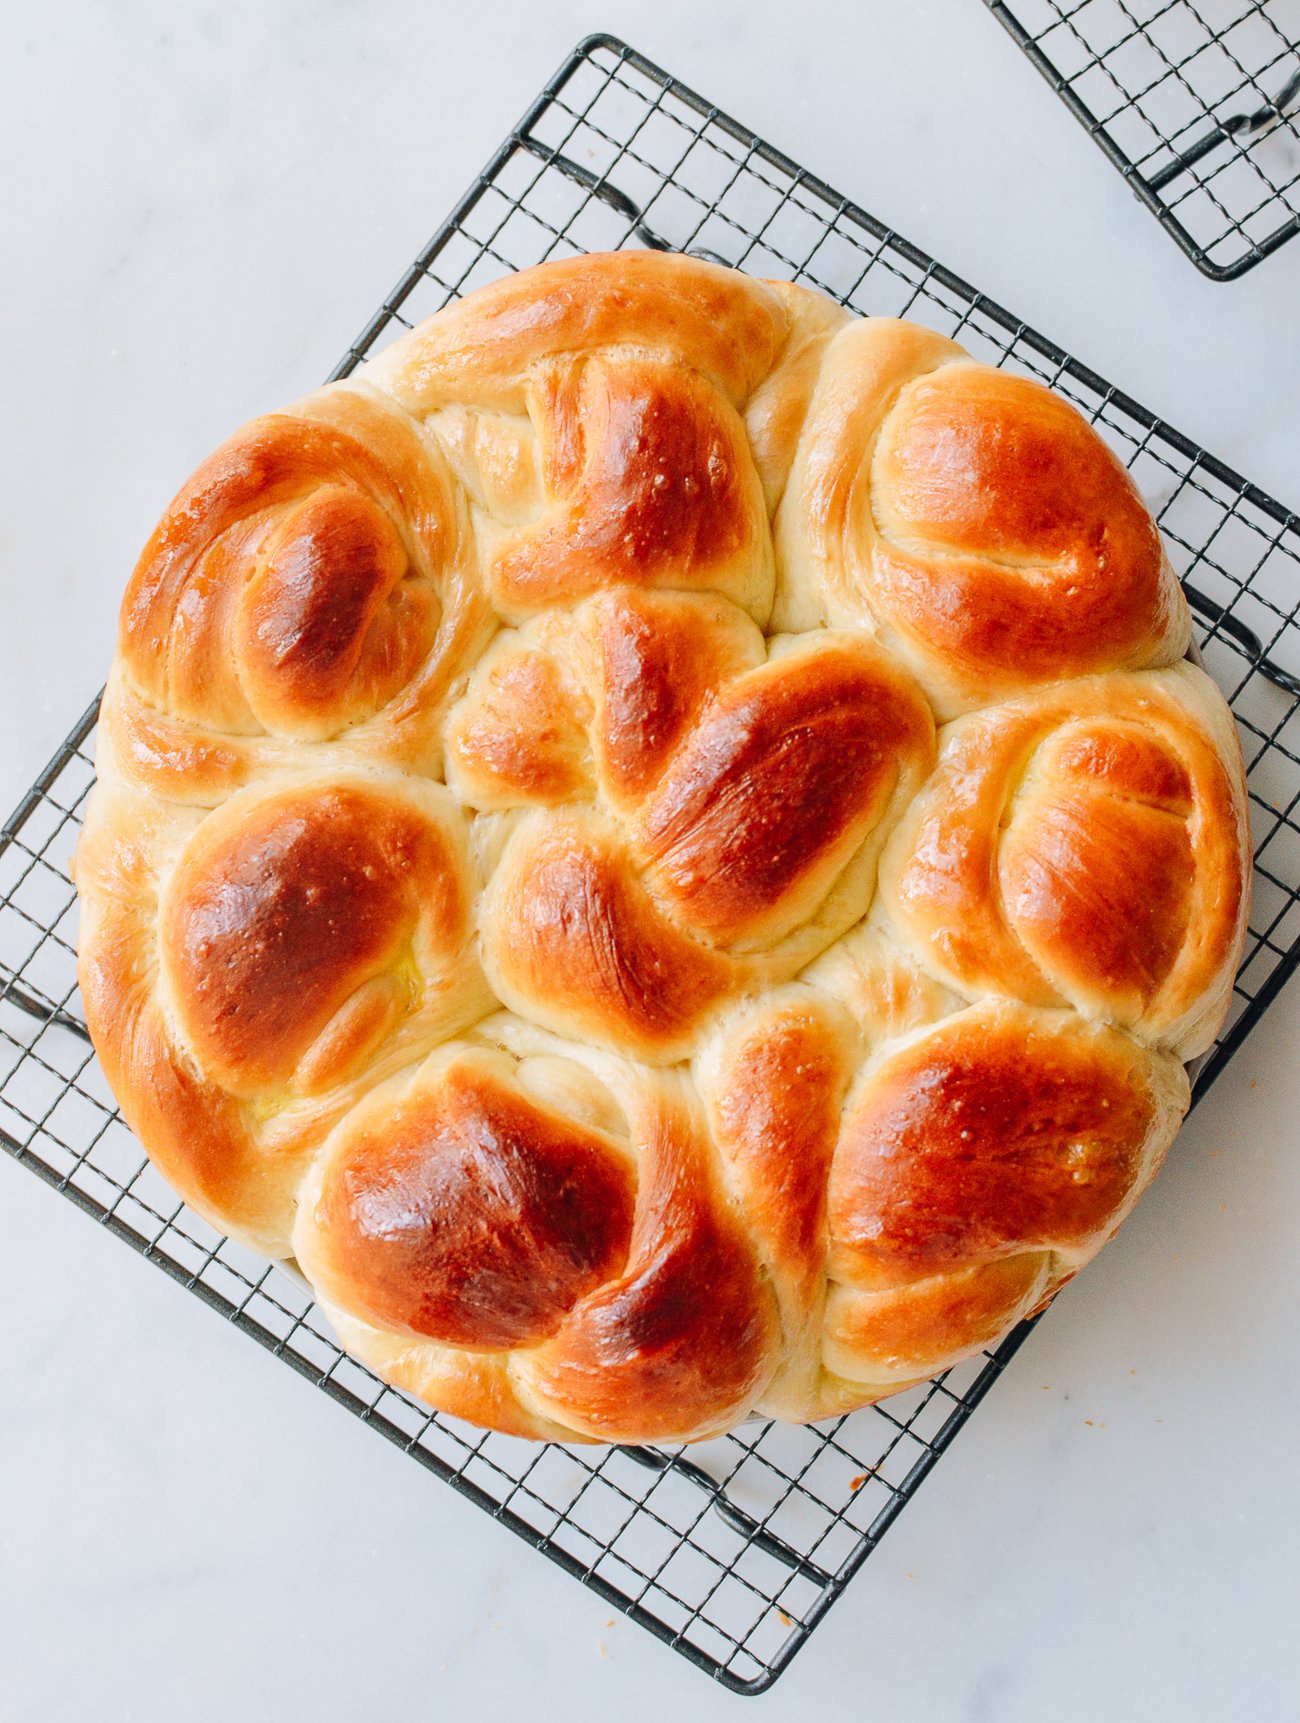
The final product, as you can see from our photos, is fluffy, soft, slightly sweet, and golden. What’s not to love about it?
My cousin told me that she’d been making this bread for years: two loaves a week. I can’t believe I didn’t think to ask her sooner. Ah well, all the stars eventually aligned, and I am now dizzy with happiness.
Now that this search is over, I am going to start on the next recipe on my ever-growing list. But before I do, I am eager to share this super easy milk bread recipe with you so you can enjoy the fruits of my (mostly unnecessary) labor.
FAQs
That’s right. You can use either active dry yeast or instant yeast in this recipe. With either, you do not have to activate it in lukewarm water and sugar beforehand. The yeast gets added to the rest of the ingredients in the mixer all at once. For this method to work, it’s very important that your wet ingredients are at room temperature. Also make sure that your yeast is fresh/within date. If not, you can bloom it with some of the sugar/milk in the recipe to make sure that it’s active before adding it to the rest of the ingredients.
Yes, in my cousin’s original recipe, she called for 1/2 cup cake flour and 3 1/2 cups bread flour. However, we have since extensively re-tested this recipe using only all-purpose flour, and the results were not meaningfully different. Since most of us already have all-purpose flour in the kitchen, we switched to 4 cups/570g AP flour. However, if you’d like to continue using the mix of cake flour and bread flour, you can!
This recipe yields two loaves or 16 buns. You can also make 1 standard loaf and 8 buns. We suggest making the entire recipe, because one loaf will disappear in no time!
We find that we get the best results from making this bread all in the same day. However, there is a way to prepare it in advance. You can assemble the dough, and then do the first proofing overnight in the refrigerator. Make sure it’s covered tightly to prevent it from drying out. The next day, take the dough out and let it come up to room temperature. Then continue with the recipe (punch the air out of the dough, shape, proof, etc.).
The dough should be a little bit sticky. It should stick to the bottom of your mixing bowl as the dough hook does its kneading, but not the sides. If your dough is sticking to the sides of the bowl, however, it is too sticky. This can happen sometimes in the summer, when it is extra humid in the kitchen. Add a little more flour 1 tablespoon at a time until the dough pulls away from the sides of the bowl. But don’t add too much, or you’ll end up with dense bread.
You may have added too much extra flour. Or, the dough may be under-proofed. Make sure that the dough doubles in size after the first proofing, and that the buns/loaves also increase in size after shaping.
While you can use a bread maker to mix the dough, I’d recommend that you proof the dough separately, because many bread makers’ proofing settings are too hot for this bread.
You can store the bread in an airtight container on the counter for 2-3 days, or in the fridge for 5 days. To revive the buns, heat them in the microwave for 15-30 seconds before enjoying.
Yes, you can freeze it in freezer bags! Then thaw, and reheat in the microwave for 15-30 seconds to get that fresh-baked taste.
There are many other creative ways to use this great milk bread recipe.
Examples of other recipes you can make using this milk bread:
- Hot Dog Buns
- Pineapple Buns
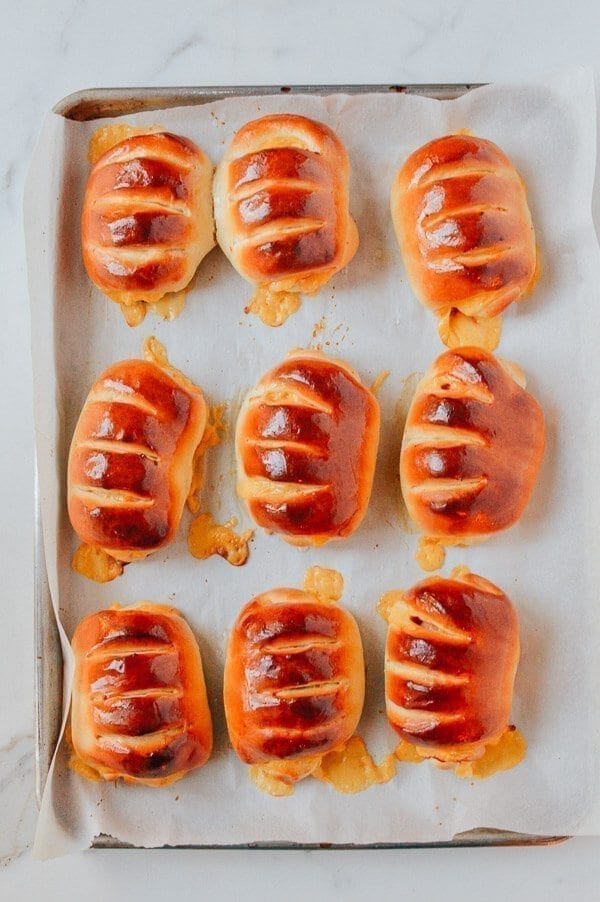
- Chinese Roast Pork Buns (Baked Char Siu Bao)
- Coconut Buns (Cocktail Buns)
- Inside Out Coconut Buns
- Pork Sung Buns
- Cinnamon Raisin Buns


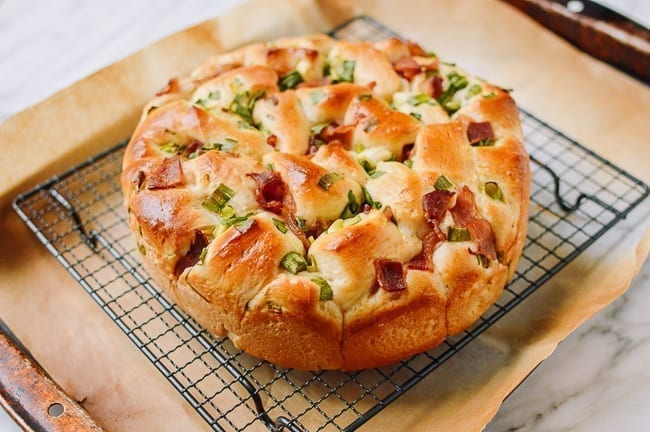
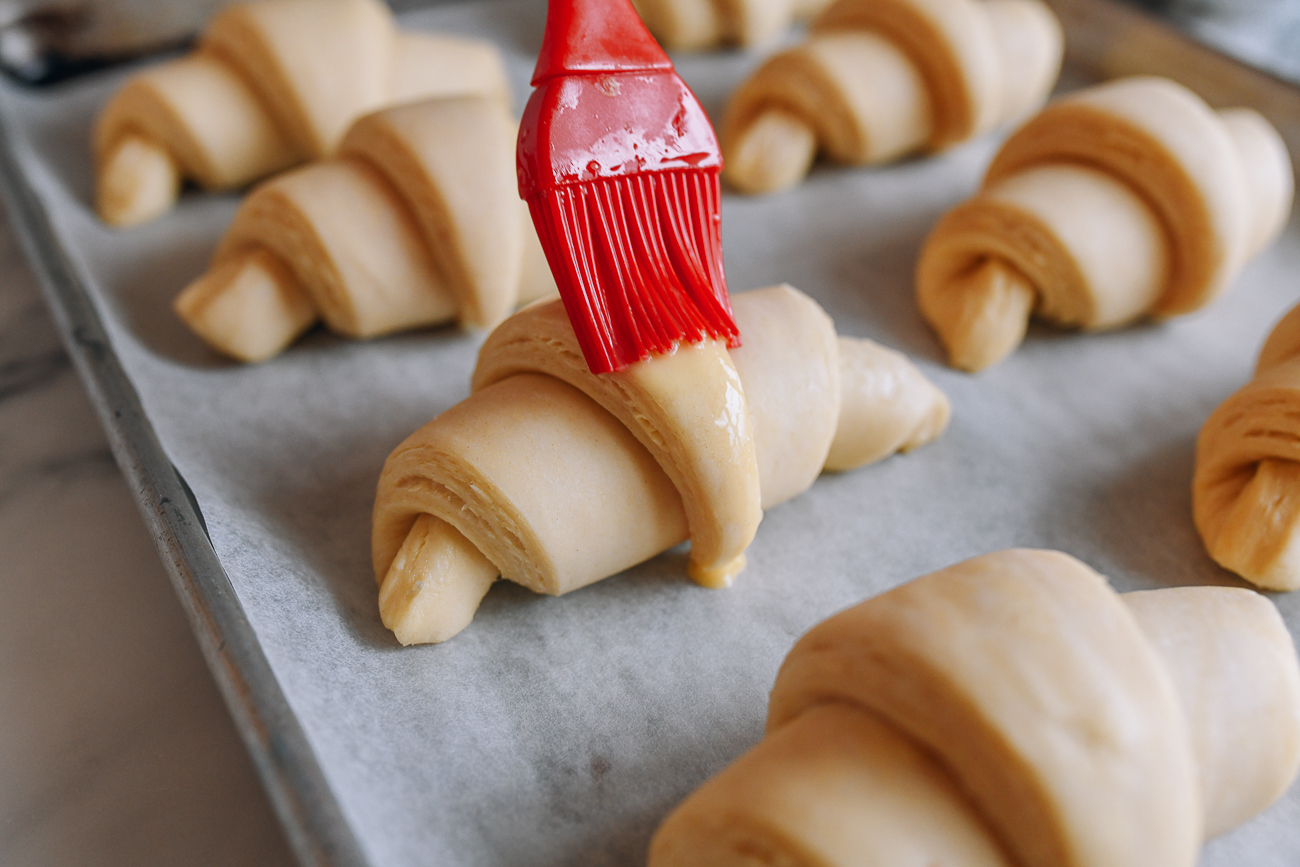
We’ve even used this recipe as a base to make the most delicious croissants!
Asian Milk Bread Recipe Instructions
In the bowl of a stand mixer, add the ingredients in the following order:
- heavy cream
- milk
- egg
- sugar
- all-purpose flour
- yeast
- salt.
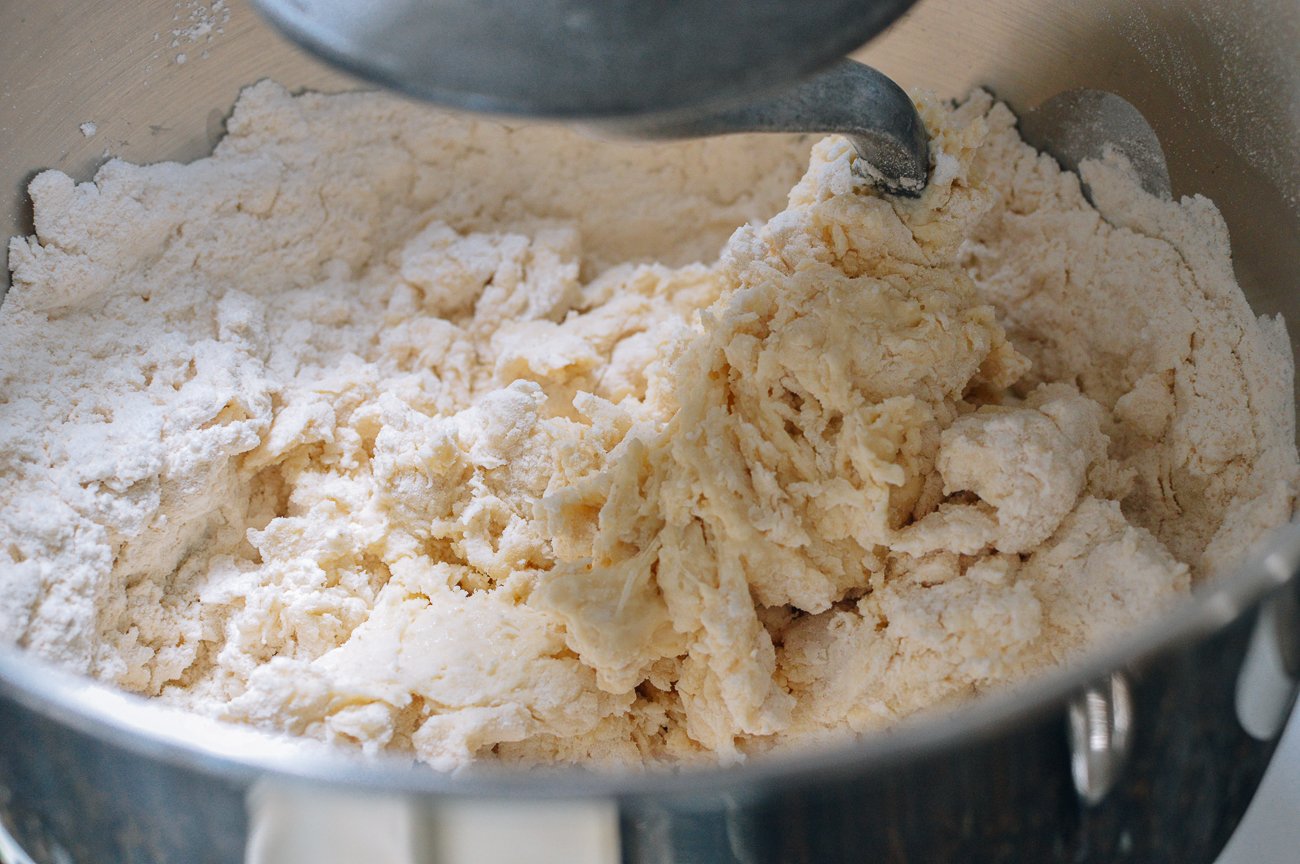
Use the dough hook attachment, and turn the mixer on to “stir.”
Let it go for 15 minutes, occasionally stopping the mixer to push the dough together. The dough should stick to the bottom of the bowl, but not the sides. If you’re in a humid climate and the dough is sticking to the sides of the mixing bowl, add a little more flour 1 tablespoon at a time until it comes together.
If you don’t have a mixer and are kneading by hand, extend the kneading time by 5-10 minutes.
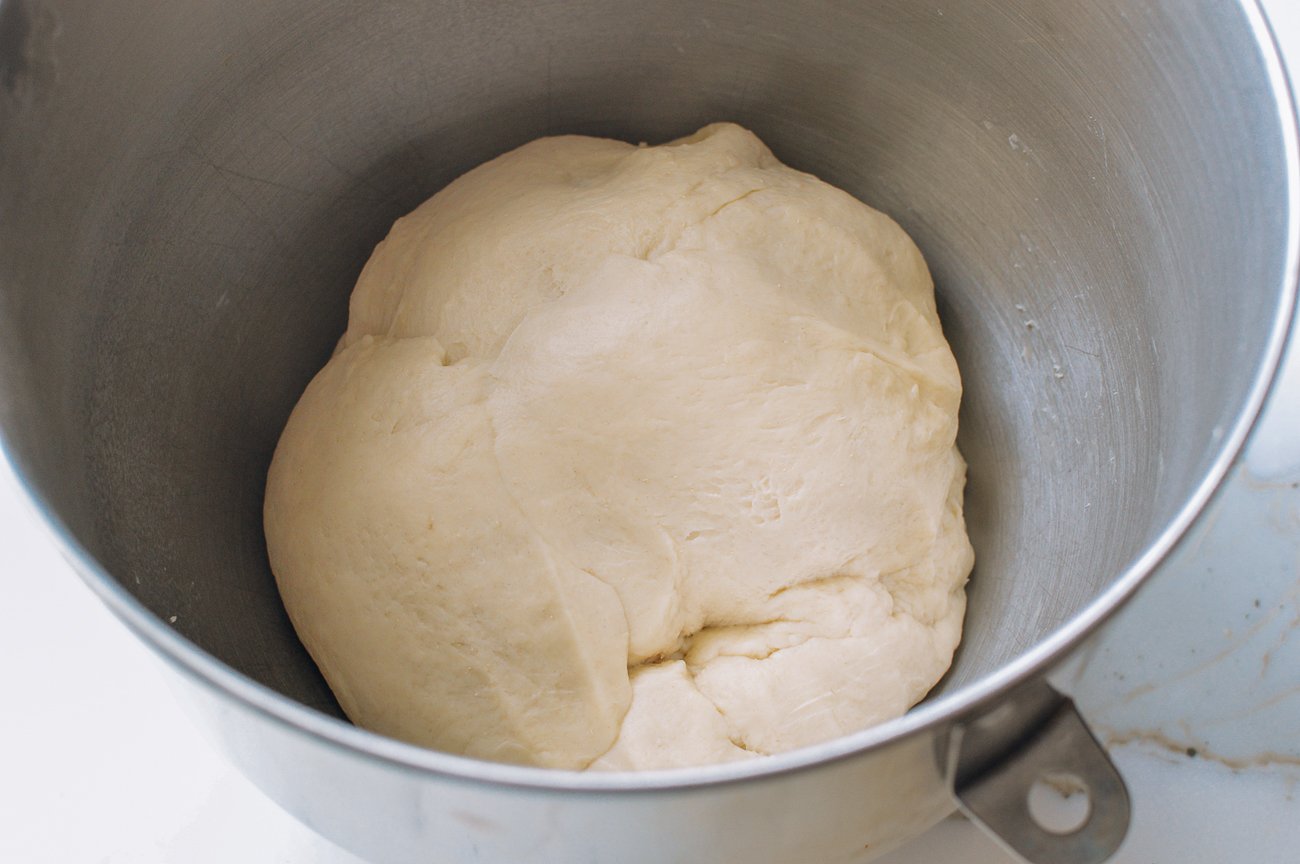
After 15 minutes of mixing, the dough is ready for proofing. Cover the bowl with a damp towel and place in a warm spot until the dough doubles in size (1-2 hours). A great way to do this is to put the dough in a closed microwave, with a mug of just-boiled water next to it.
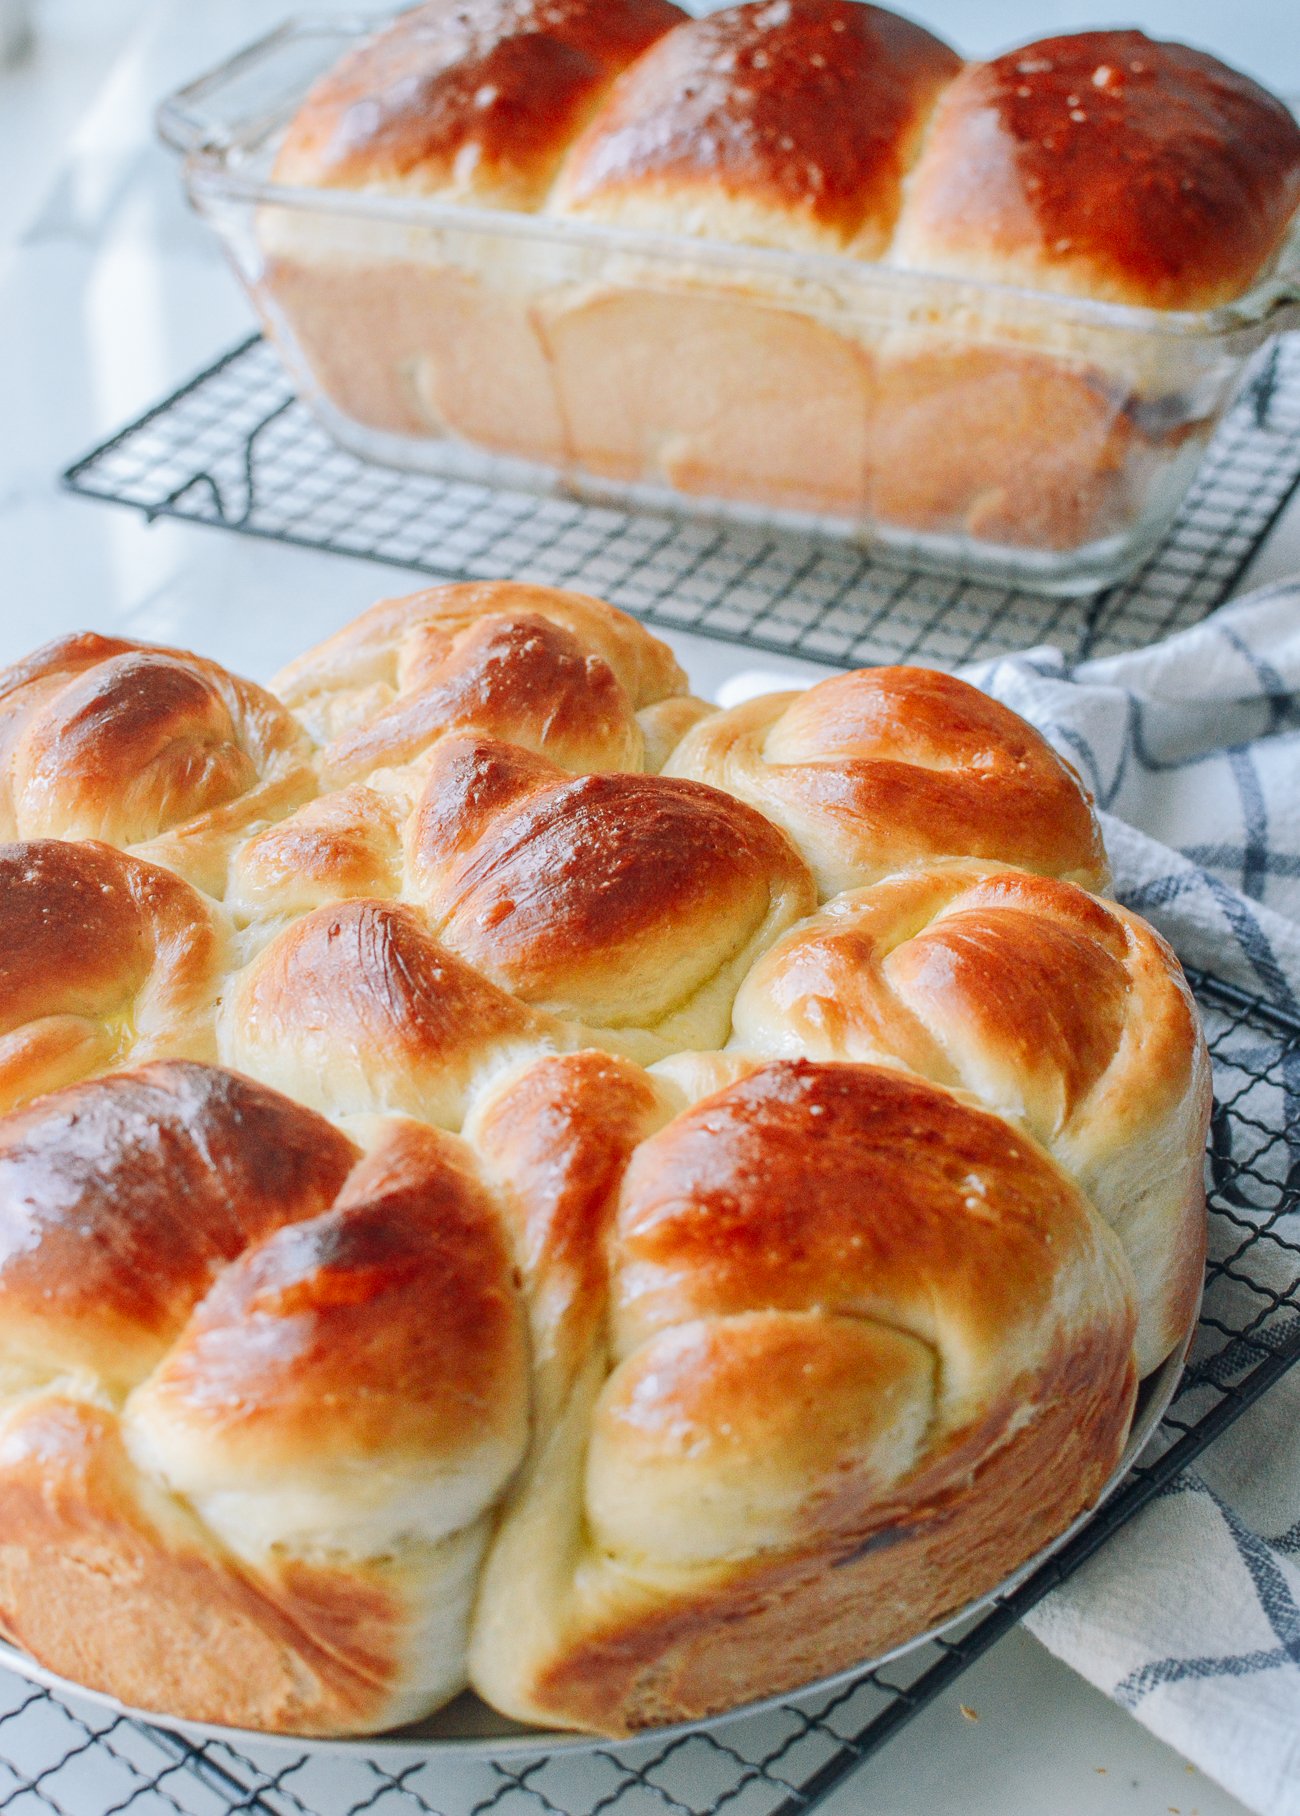
In the meantime, grease two baking vessels on all sides with butter. I used a standard loaf pan and a 9-inch round cake pan.
After the first proofing, put the dough back in the mixer. Stir for another 5 minutes to get rid of air bubbles. Dump the dough on a lightly floured surface, and cut it in half.
I made a loaf with one half of the dough and rolls with the other half.
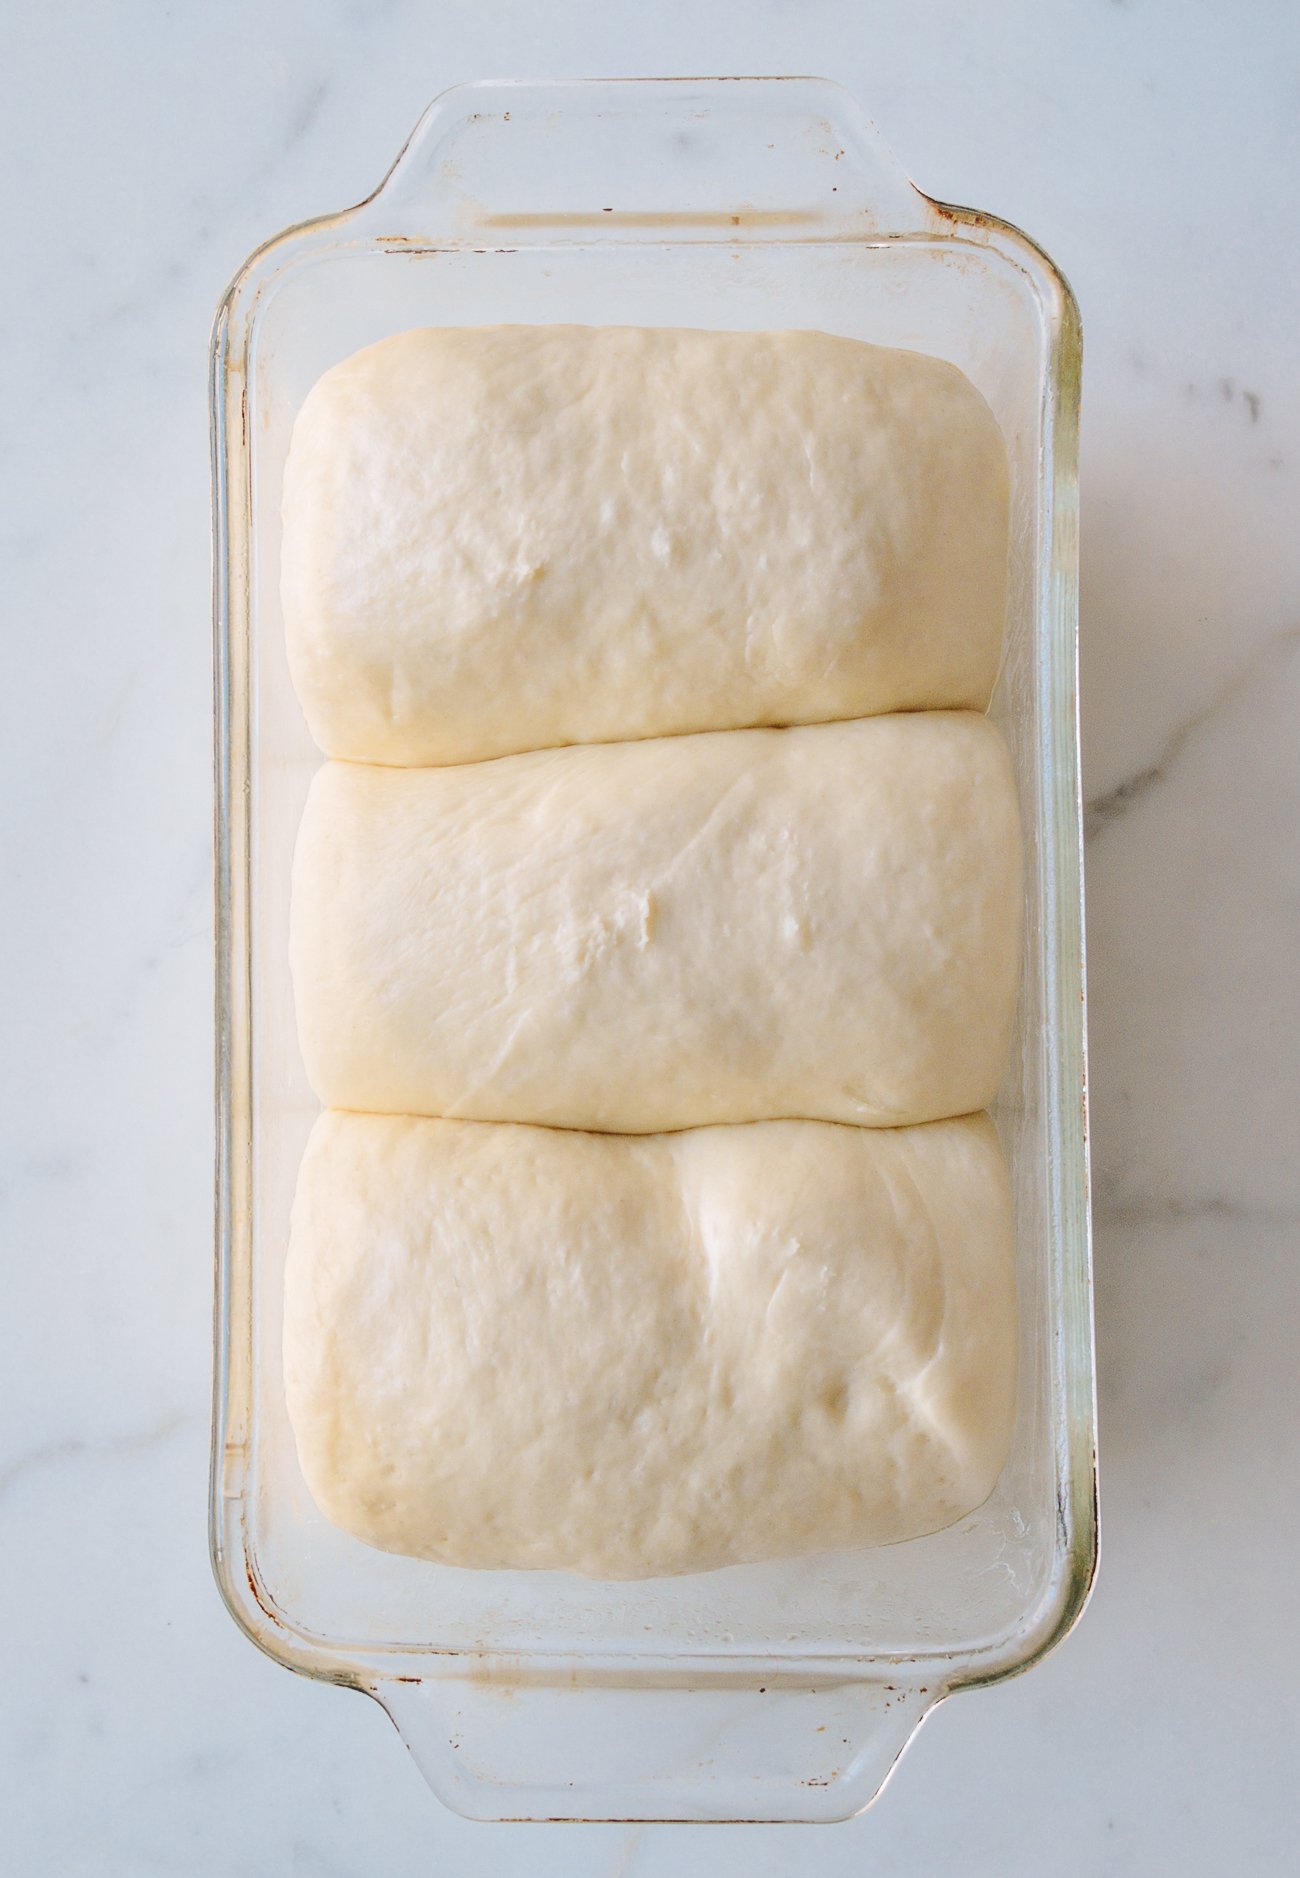
To make the loaf, shape the dough dough half into a rough rectangle. Cut it into 3 pieces, and place them in the loaf pan.

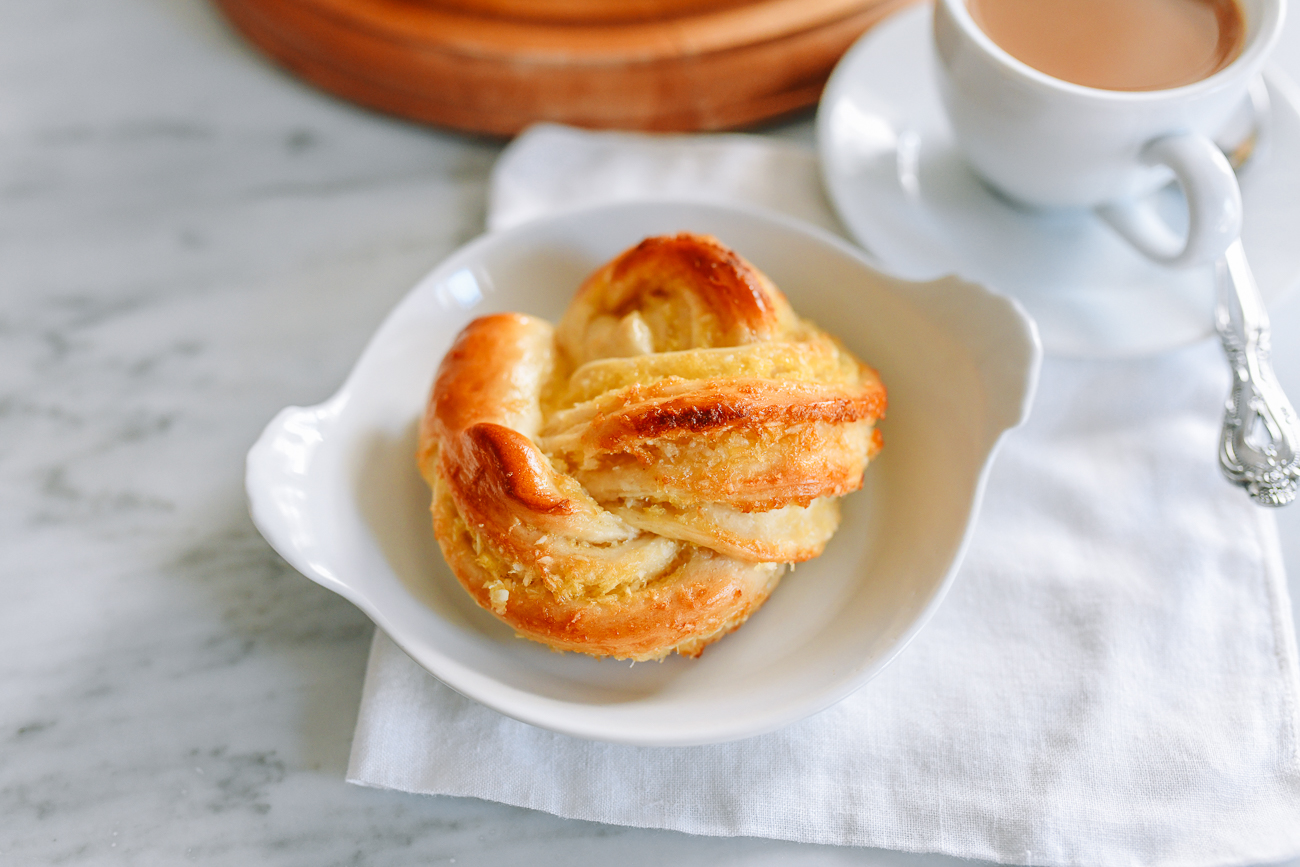
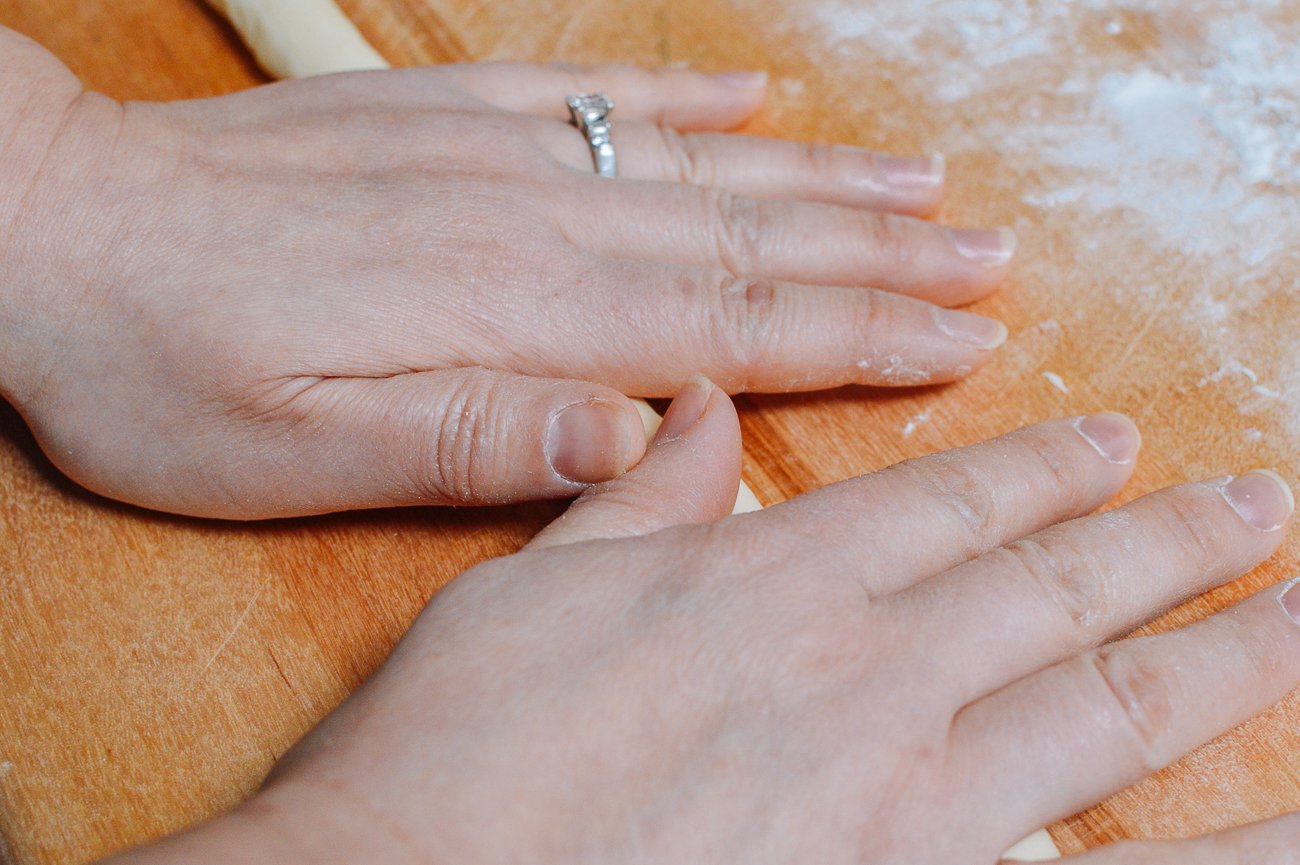
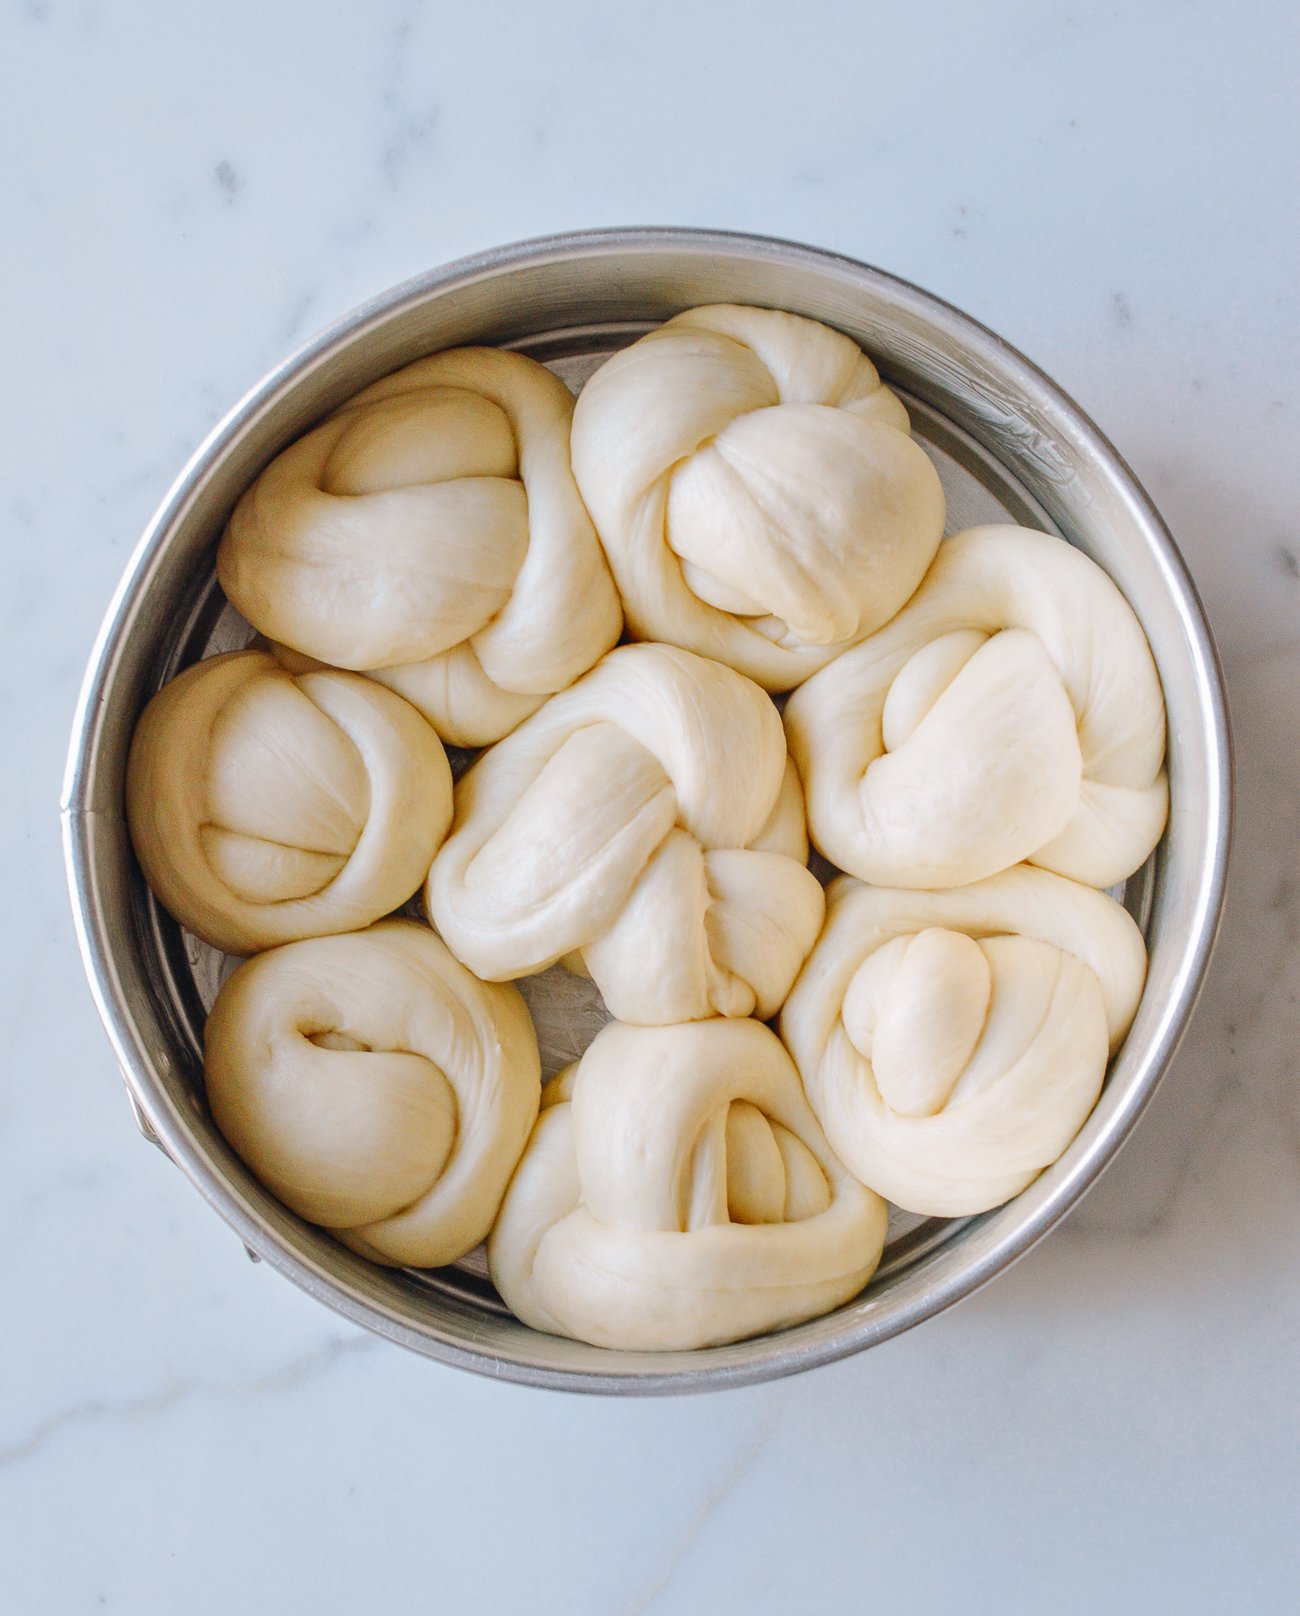
With the other half of the dough, I cut it into eight equal pieces. Then I rolled them with my hands into 8-inch long ropes.
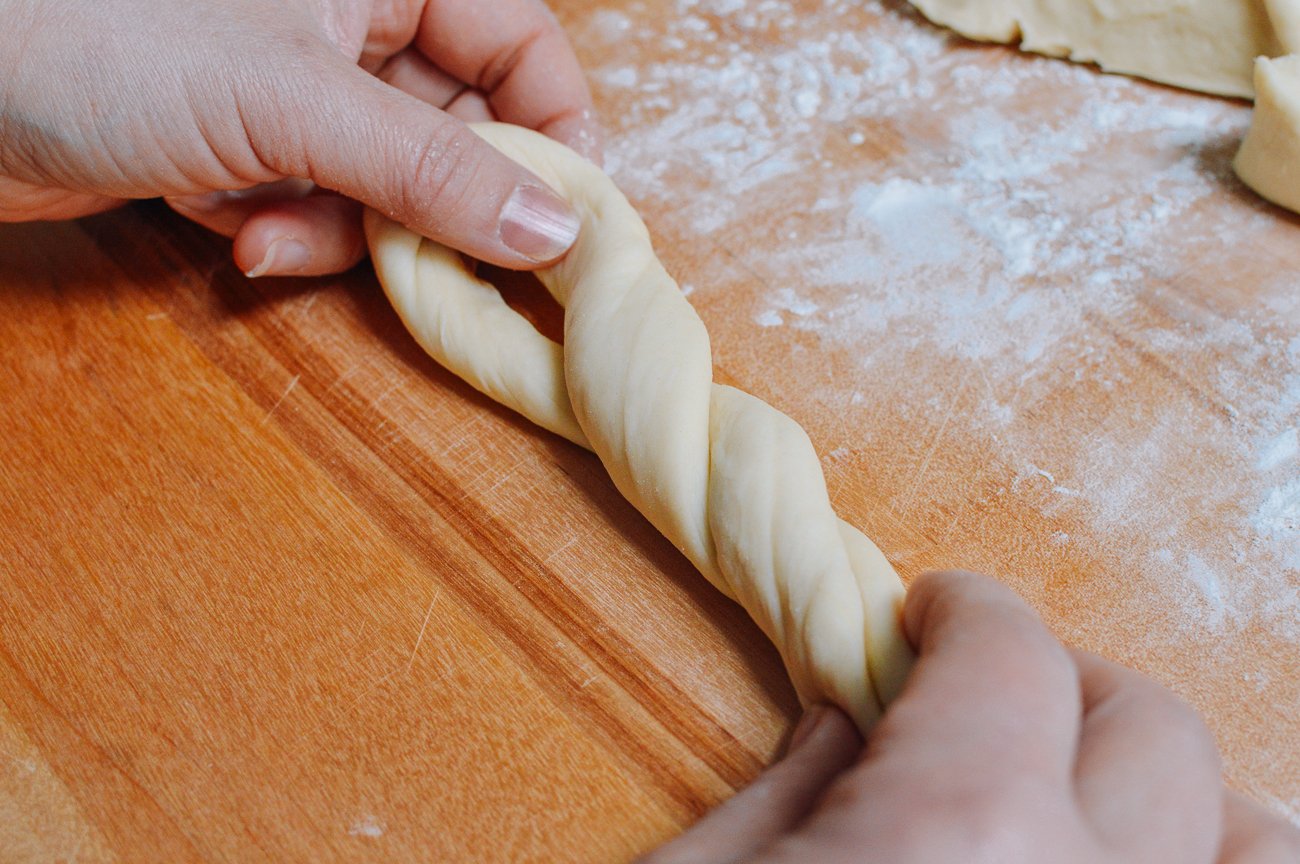
Fold each “rope” in half and twist it 3-4 times.
Then, twist the entire piece in on itself to make a knot.

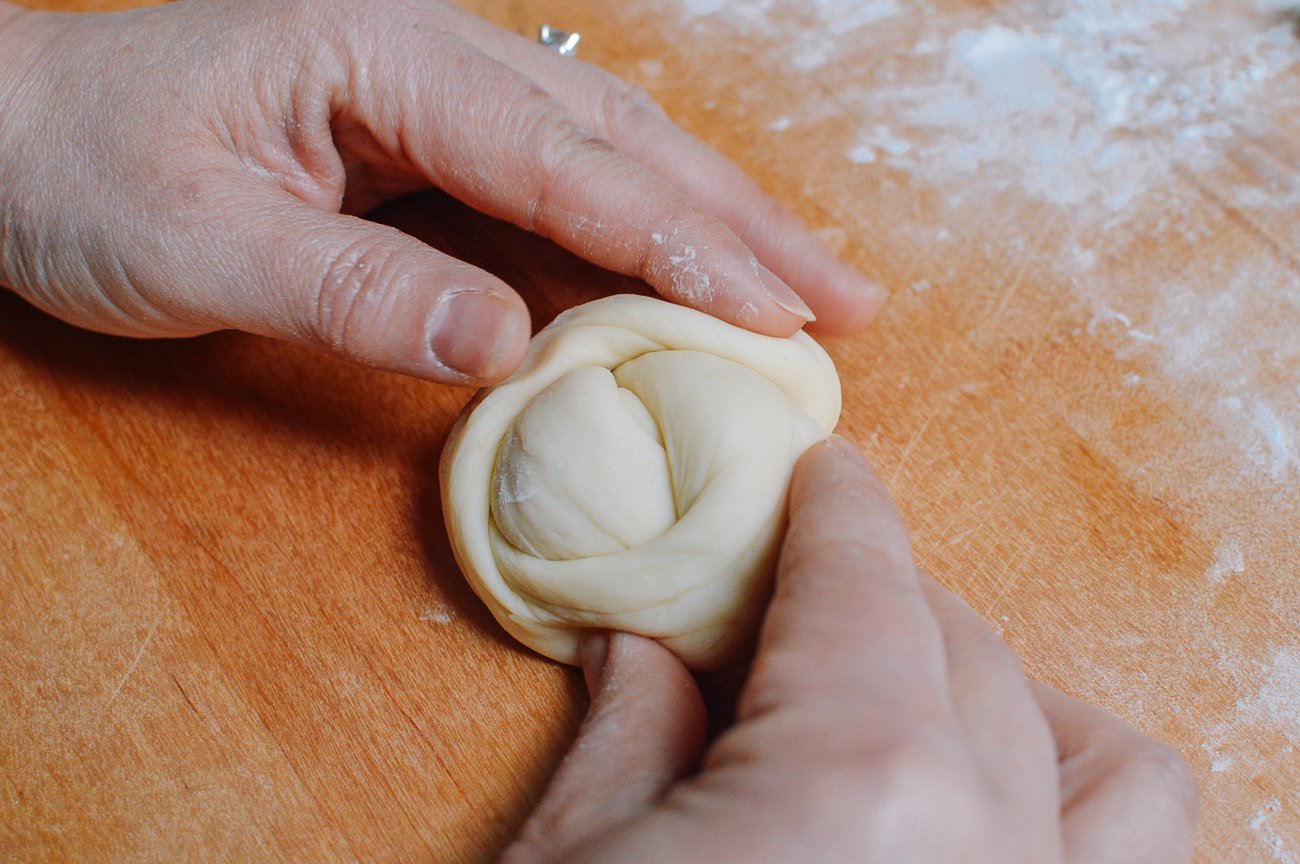
There’s no right or wrong way to achieve the knot. Just make sure that the dough gets twisted in on itself and the you’re not pulling ends through the knot. It’s should be round in shape with nothing poking out when you’re done. Then you can place them seam-side down in your greased round pan.
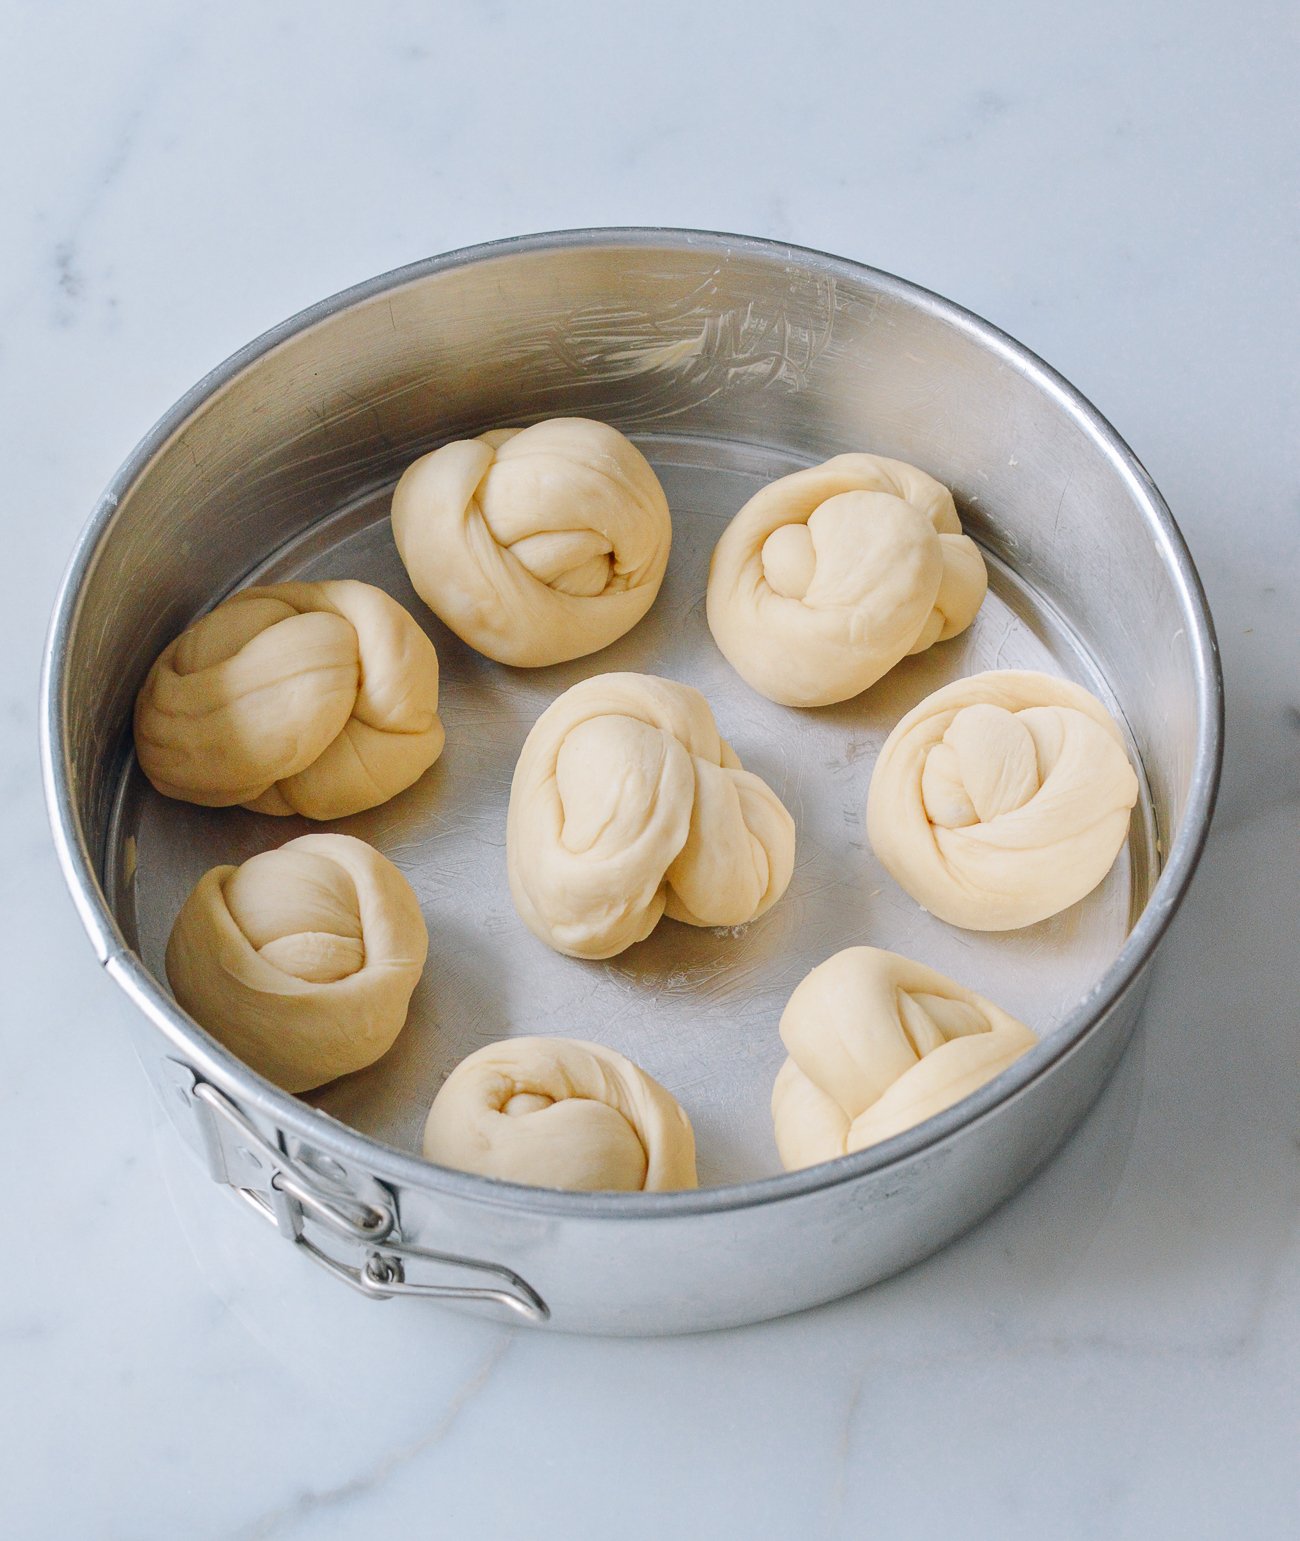
Once shaped, let the dough proof for another hour, covered.
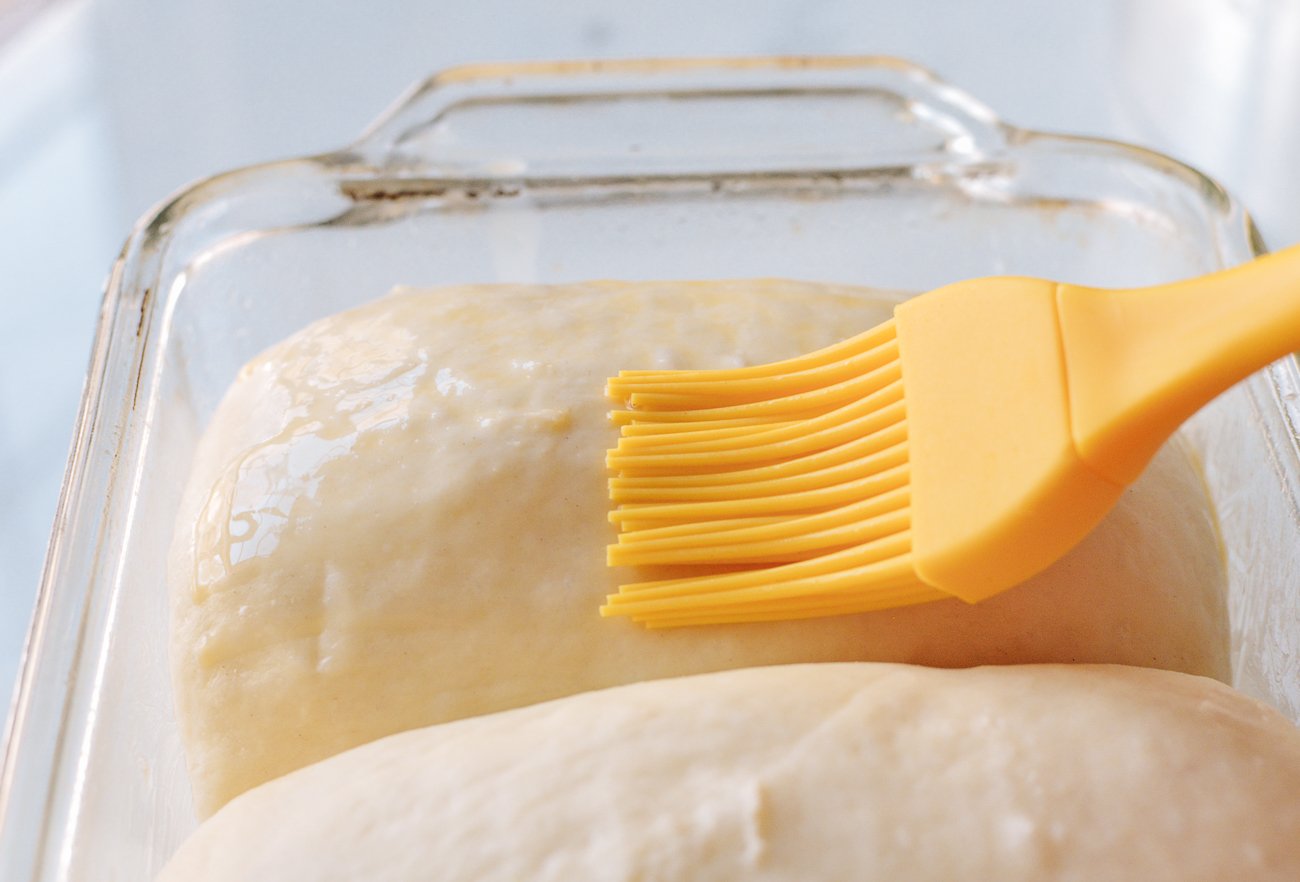
Position a rack in the middle of the oven, and preheat to 350° F/175°C. Brush the risen dough with egg wash. Bake for 23-25 minutes.
Remove from the oven to a cooling rack. Brush the buns with the sugar water/simple syrup to give them a really great shine, sweetness, and color.
To borrow a line from Ina Garten, “how easy was that?”
Looking for more authentic recipes? Subscribe to our email list and be sure to follow us on Pinterest, Facebook, Instagram, and Youtube!
Recipe

Milk Bread
Ingredients
- 2/3 cup heavy cream (at room temperature)
- 1 cup milk (plus 1 tablespoon, at room temperature; you can use whole, 1%, or 2% milk)
- 1 large egg (at room temperature)
- 1/3 cup sugar
- 4 cups all-purpose flour (you can also use 1/2 cup cake flour combined with 3 1/2 cups bread flour)
- 1 tablespoon active dry yeast (or instant yeast)
- 1 1/2 teaspoons salt
- Egg wash (beat 1 egg with 1 teaspoon water)
- Simple syrup (1 tablespoon sugar, dissolved in 1 tablespoon hot water)
Instructions
- In the bowl of a stand mixer fitted with a dough hook attachment, add the ingredients in the following order: heavy cream, milk, egg, sugar, all-purpose flour (or mixture of cake flour & bread flour, if using), yeast, and salt. Turn on the mixer to “stir,” and knead for 15 minutes, occasionally stopping the mixer to push the dough together. If the dough is sticking to the sides of the bowl, add a little more flour 1 tablespoon at a time until it pulls away from the sides (it should be sticking to the bottom of the mixing bowl, but not the sides). If kneading by hand, extend the kneading time by 5-10 minutes.
- Next, cover the dough with a damp towel, and place in a warm spot until the dough has doubled in size (1-2 hours). We proof our dough in a closed microwave with a mug of just-boiled water next to it.
- In the meantime, grease two baking vessels on all sides with butter. You can use two standard loaf pans, two 9-inch (23cm) round pans, or 1 loaf pan and 1 round pan.
- After the dough has doubled in size, put it back in the mixer, and stir for another 5 minutes to get rid of air bubbles. Dump the dough on a lightly floured surface, and cut it in half. To make loaves, shape each dough half into a rough rectangular shape, cut it cross-wise into three roughly equal pieces, and place in the loaf pan. Alternatively you can cut each dough half into 8 pieces, roll them into balls (or ropes that you can twist into buns), and put them in a round pan. You can also make 2 loaves, 16 rolls, or 1 loaf and 8 rolls. Once shaped, let the dough proof, covered, for another hour.
- Position a rack in the center of the oven, and preheat it to 350° F/175°C. Brush the risen dough with egg wash. Bake for 23-25 minutes, or until golden brown. Remove from the oven and brush the warm bread with sugar water to give it shine and sweetness.