Red bean bread. The holy grail. The originator. The classic. The veteran.
Okay, maybe I’m overstating, but something about the red bean bun inspires respect. It’s the old guard. The faithful standby when you don’t want some weirdo questionable scallion, ham, cheese concoction, or you’re just about fed up with dribbling pineapple crumb topping all over your shirt as you walk down the street.
And then, there’s also those impossibly pillowy soft milk bread loaves that are injected with magical swirls of delicious red bean goodness. It’s like the Chinese equivalent of cinnamon swirl bread; eating a slice feels like a delectable junk food special occasion.
So now we give you the moment you’ve all been waiting for. We FINALLY have a red bean bread recipe for you guys—a bun version AND a swirl loaf. We’ve tackled a lot of other Chinese bakery buns, but this was definitely one of the tougher ones to master.
Why, you ask?
Let’s talk paste.
All About Red Bean Paste
When a lot of you think of red bean paste, you’re probably conjuring images of dark red sticky sweet paste that you might find in a fried sesame ball or see on grocery store shelves in plastic sachets. This is NOT easy to achieve at home. Why? Well red beans actually cook up to more of a purple than red color. So unless you want to add some good old red 40, you’re out of luck there.
What’s more, we’ve found that disturbing amounts of sugar and fat are required to get a paste that even REMOTELY resembles those store-bought, mass produced red bean pastes. That said, we decided to go with a more natural red bean paste. It’s just as good, more natural tasting, healthier, and the flavor of the red bean really shines through.

Okay, so now for some real talk. To the casual observer, this recipe sounds straight up complicated. Truthfully though, it’s just a time commitment. The actual steps are not that difficult. You just need a decent chunk of time and a relaxing Sunday to make this recipe right.
If you want to make things easier, the red bean paste can be made in advance from the dried adzuki beans. Just heat it in a pot until it’s just warmed through. But I think that we’re all ready for red bean bun and red bean swirl bread mastery, so let’s get started!
Red Bean Bread: Recipe Instructions
First, make the red bean paste:
Start by washing and rinsing the dried adzuki beans prior to soaking. Soak the red beans overnight.
When you’re ready to start cooking the paste, transfer the red beans and about 1 1/2 cups (355 ml) of the water to a medium (2 qt.) pot. Ensure that the water level is about ¼” above the red beans.
Bring to a boil, then turn down the heat to simmer. Cook the beans until completely softened, stirring occasionally to prevent sticking. This should take about 40 minutes to 1 hour, but can vary widely depending on the age of the beans. Very old beans may never soften, so make sure to buy high quality beans.
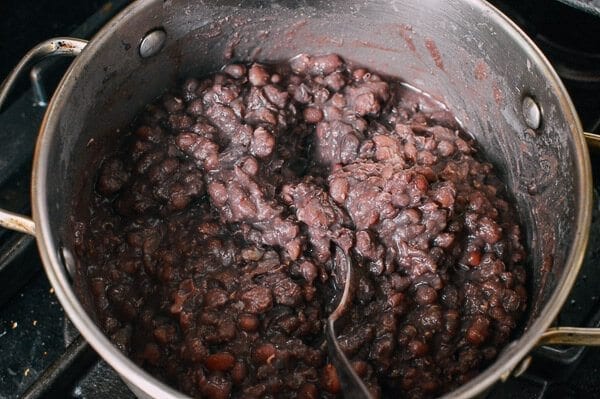
Remove the cover, and continue cooking the beans until the water is cooked off, and the beans are thick, stirring often. Be careful, because as more water cooks off, you can very easily burn the beans
(Since we are making a paste, you don’t want a lot of liquid in the beans. Most of the water should be cooked off and the beans should be very thick before you move forward.)
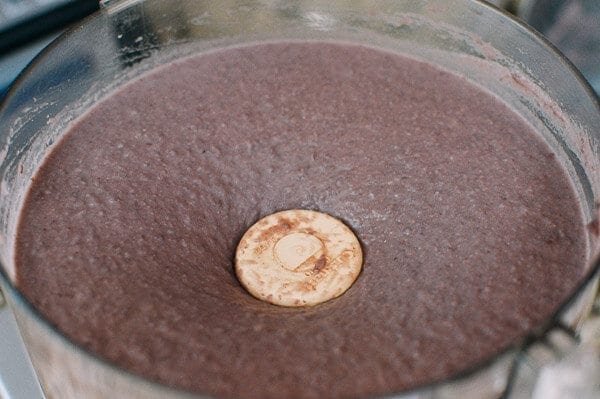
When the beans have a thick consistency, transfer to a food processor. Depending on the size of yours, you may need to process the bean mixture in batches. Process until the mixture is totally smooth. If you like your red bean paste chunky, skip this step or process to desired consistency.
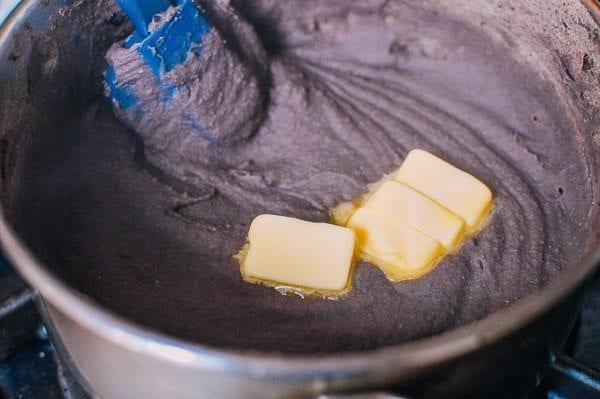
Transfer the red bean paste back to the pot, and place over medium-low heat. Add the sugar and stir to dissolve. Then add the butter. More butter means a richer paste. You can also use vegetable oil at this step, but butter adds a more pleasant flavor.
At this point, the paste will have the consistency of runny mashed potatoes.
Increase the heat to medium, and cook the paste for 20-30 more minutes, until it’s thick enough to hold it’s shape. Be sure to scrape the bottom and sides of the pot to prevent sticking.
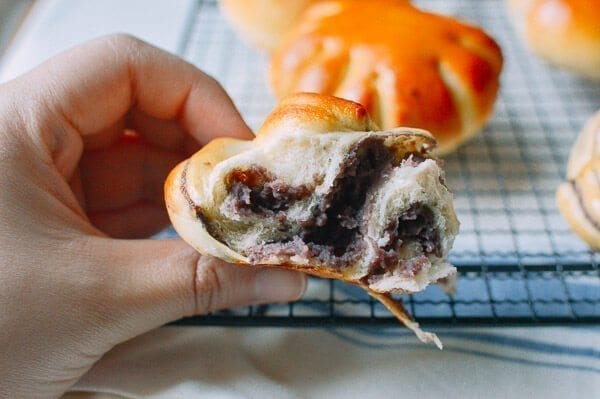
Quick disclaimer here: It won’t look like the packaged red bean paste you get at the store because those pastes have enormous amounts of sugar and oil added to make them sticky and dark. We’re going for a more natural Chinese bakery red bean paste here. If you like the store-bought red bean paste, feel free to take a shortcut and use that!
Set aside and let cool for an hour or so before using.
To make the milk bread dough:
In the bowl of a stand mixer, add the heavy cream, milk, egg, sugar, cake flour, bread flour, yeast, and salt.
Don’t Have Bread Flour or Cake Flour?
Feel free to substitute all-purpose flour for both! We have since extensively re-tested this recipe, and have not found that using 100% all-purpose flour in this recipe makes a meaningful difference to the result.
Use the dough hook attachment, and turn on the mixer to “stir.” Let it go for 15 minutes, occasionally stopping the mixer to push the dough together. If you’re in a humid climate and the dough is too sticky, feel free to add a little more flour 1/4 cup at a time until it comes together. The dough should be moist, but not so sticky that it sticks excessively to the bowl or dough hook. If you don’t have a mixer and would like to knead by hand, extend the kneading time by 5-10 minutes.
After 15 minutes of mixing, the dough is ready for proofing. Cover the bowl with a damp towel and place in a warm spot for 1 hour. The dough will grow to 1.5x its original size.
Assemble the red bean bread:
Grease one standard loaf pan on all sides with butter. Also, line a cookie sheet with parchment paper.
After the hour of proofing, put the dough back in the mixer and stir for another 5 minutes to get rid of air bubbles. Dump the dough on a lightly floured surface, and cut it in half. Set aside one half for a red bean swirl loaf, and cut the other half into 8 pieces for individual red bean buns.
We’ll start with the red bean buns. Here’s where the fun part comes in. For each bun, use about 2 tablespoons of red bean paste. For a standard red bean bun, just roll one piece of dough into a ball, flatten with your hand or roll out to half inch thickness and place the red bean filling in the center. Pinch the dough closed around the red bean and place on your cookie sheet, seam-side down.
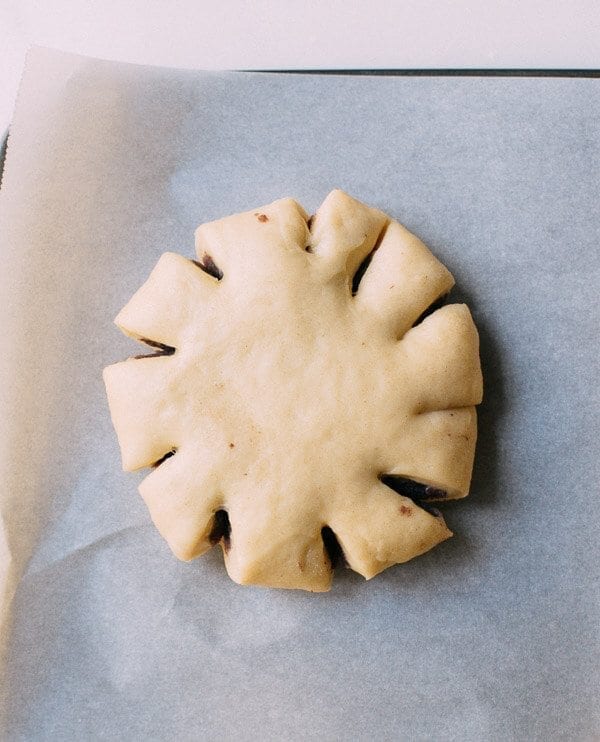
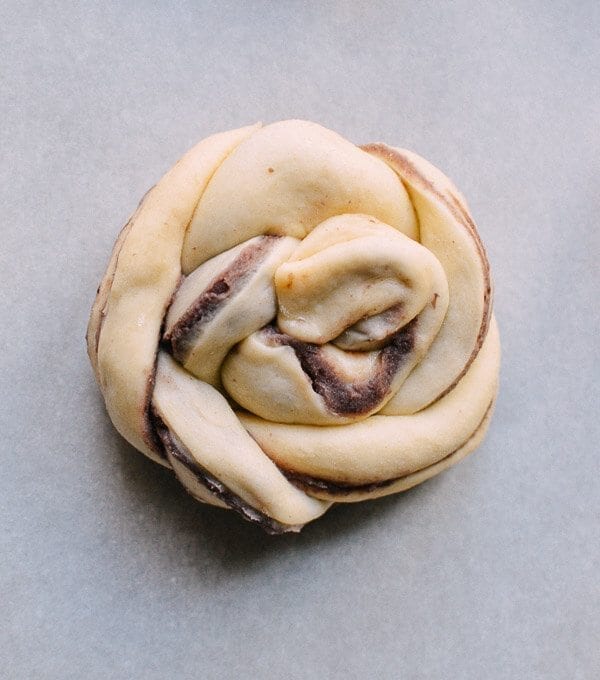
To make some slightly more interesting shapes, just follow along with the pictures! You can roll them like cinnamon buns, and then make strategic cuts with scissors to add a decorative flair.
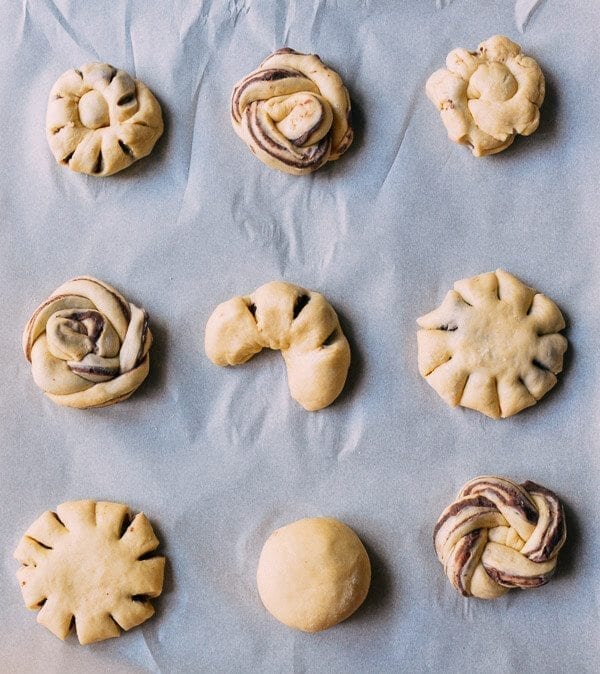
Check out this cinnamon raisin bun post to see how to make the pretty swirl shape shown here.
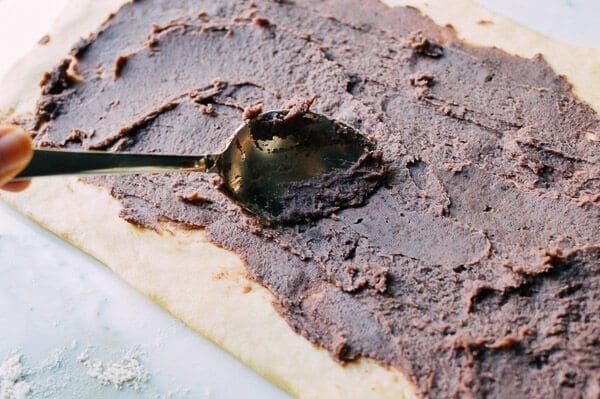
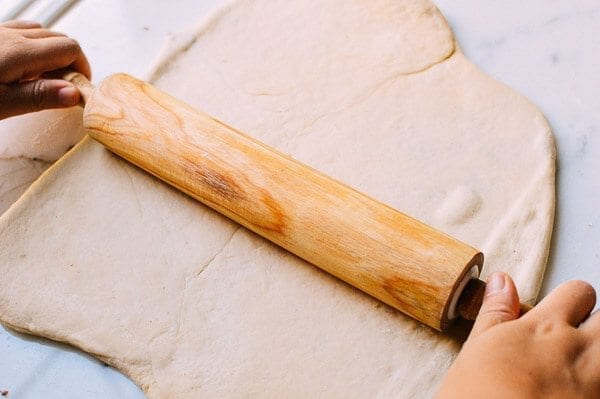
Okay, now for the red bean swirl loaf. Take the first half of dough and shape into a rectangle. Roll out to a little less than ¾-inch thickness with a floured rolling pin, maintaining a rectangle shape.
Now, take a few big dollops of red bean paste and spread over the center of the rectangle, leaving a few inches on either side of the rectangle and one inch along the top and bottom. The red bean paste should be spread to about 1/8-inch thickness.
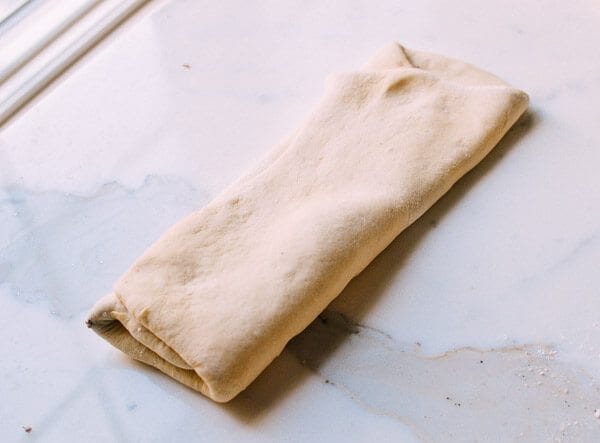
Fold over each side of the rectangle so a seam runs down the center of the dough. Pinch all the open edges closed so it looks like this:

Next, roll out the dough to flatten the seams and make the rectangle of dough roughly as large as it was when you started.
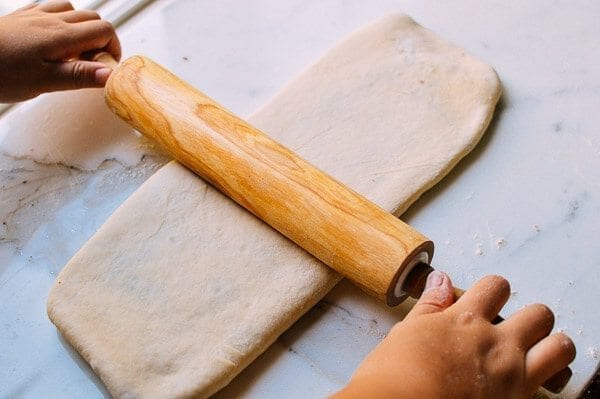
Then, fold the dough into thirds (like you would if you were folding a piece of paper to put into an envelope).
Roll it out into a rectangle once more. Add more flour to the dough/board if necessary.
Repeat the step of folding the dough into thirds, but this time, roll it out just so that the layers press together and the piece of dough is the length of the loaf pan. Make two lengthwise cuts in the dough so you have three segments.
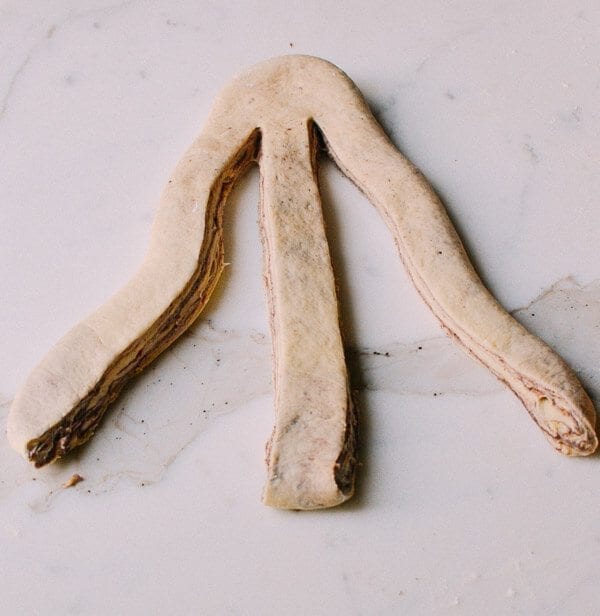
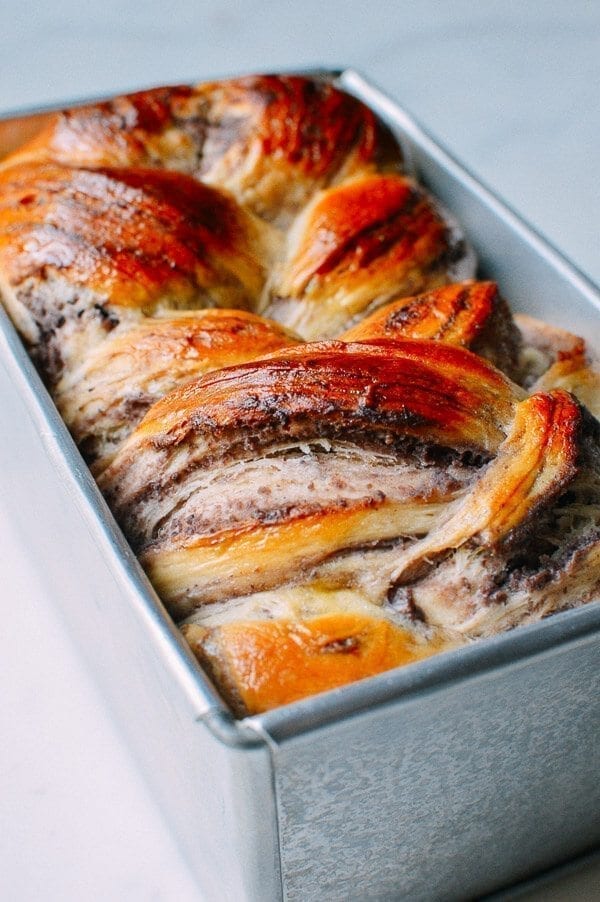
Braid the pieces with the layered sides facing up.
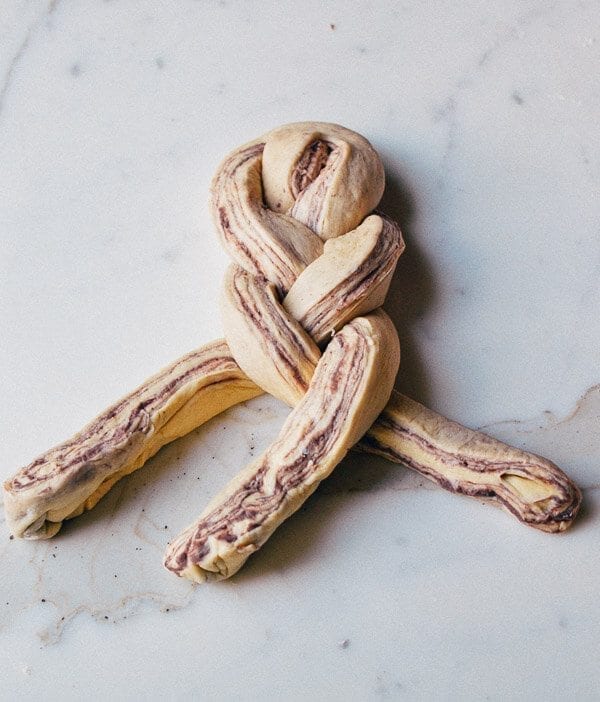
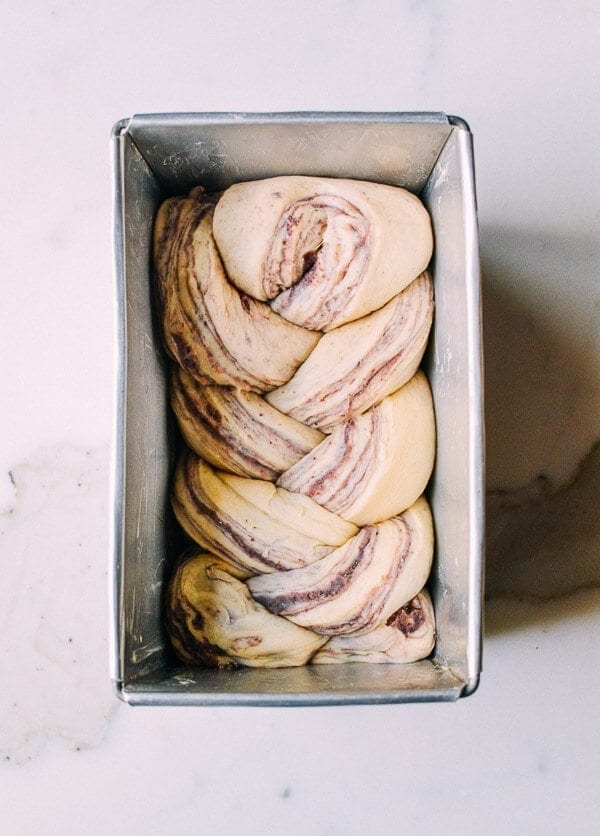
This will make for a really nice pattern when it bakes up. Pinch the ends of the braided dough together and gently place into your buttered loaf pan.

Let the red bean buns and the loaf proof for another hour. Preheat the oven to 350 degrees F. Brush the risen dough with egg wash.
Bake!
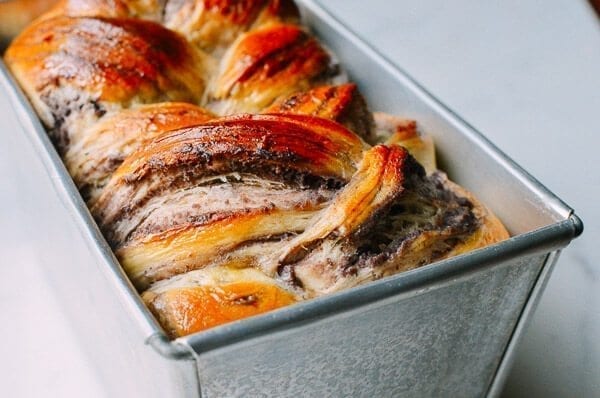
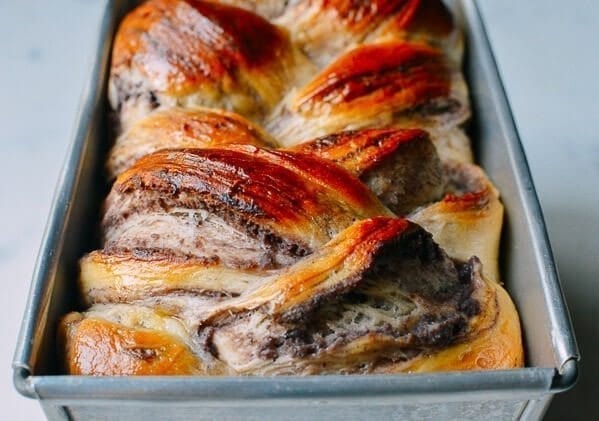
Bake the buns for 18-20 minutes and the loaf for 35-45 minutes. Remove from the oven and brush the bread with sugar water to give them a really great shine, sweetness, and color.

These don’t keep for too long, so if you don’t gobble them up right away, best to store them in the refrigerator and then heat them up in the microwave for 20 seconds. The red bean bread swirl loaf is excellent sliced, toasted, and served with a little butter.
If you have red bean paste left over, it keeps really well in a tupperware in the fridge. If you want to make another batch of red bean bread or buns, when the time comes, just warm up the paste ever so slightly in a small pot—just enough to make it easily spreadable.
Looking for more authentic recipes? Subscribe to our email list and be sure to follow us on Pinterest, Facebook, Instagram, and Youtube!
Recipe

Red Bean Bread
Ingredients
For the red bean paste (can also substitute store-bought red bean paste):
- 8 ounces dried adzuki beans (225g)
- ¾ cup sugar (150g)
- 6 tablespoons butter (85g)
For the bread dough:
- 2/3 cup heavy cream (160 ml, at room temperature)
- 1 cup milk (plus 1 tablespoon, at room temperature; total 250 ml)
- 1 large egg (at room temperature)
- 1/3 cup sugar (75g)
- 1/2 cup cake flour (70g)
- 3 1/2 cups bread flour (500g)
- 1 tablespoon active dry yeast (11g)
- 1 1/2 teaspoons salt (7g)
- Egg wash (whisk together 1 egg with 1 teaspoon water)
- simple syrup (optional: 8g/2 teaspoons of sugar dissolved in 2 teaspoons hot water)
Instructions
First, make the red bean paste:
- Start by washing and rinsing the red beans prior to soaking. Soak the red beans overnight. When you're ready to start cooking the paste, transfer the red beans and about 1 1/2 cups (355 ml) of the water to a medium (2 qt.) pot. Ensure that the water level is about ¼" above the red beans. Bring to a boil, then turn down the heat to simmer. Cook the beans until completely softened, stirring occasionally to prevent sticking. This should take about 40 minutes to 1 hour, but can vary widely depending on the age of the beans. Very old beans may never soften, so make sure to buy high quality beans.
- Remove the cover, and continue cooking the beans until the water has cooked off, and the beans have a thick texture. Since we are making a paste, you don't want a lot of liquid in the beans. Be careful, because as more water cooks off, burning the beans is very easy to do.
- When the beans have a thick consistency, transfer to a food processor. Depending on the size of yours, you may need to process the bean mixture in batches. Process until the mixture is totally smooth. If you like your red bean paste chunky, skip this step or process to desired consistency. Transfer the paste back to the pot.
- Heat the paste over medium-low heat. Add the sugar and stir to dissolve. Then add the butter. More butter means a richer paste. You can also use vegetable oil at this step, but butter adds a more pleasant flavor. Cook the paste for an additional 20-30 minutes, scraping the bottom and sides of the pot to prevent burning/sticking, until the paste is thick enough to hold its shape.
- Quick disclaimer here: It won’t look like the packaged red bean paste you get at the store because those pastes have enormous amounts of sugar and oil added to make them sticky and dark. We’re going for a more natural Chinese bakery red bean paste here. If you like the store-bought red bean paste, feel free to take a shortcut and use that!
- Set aside and let cool for an hour or so before using.
To make the milk bread dough:
- To save time, make the milk bread dough while the red bean paste is cooking. In the bowl of a mixer, add the heavy cream, milk, egg, sugar, cake flour, bread flour, yeast, and salt. Use the dough hook attachment, and turn on the mixer to “stir.” Let it go for 15 minutes, occasionally stopping the mixer to push the dough together. If you’re in a humid climate and the dough is too sticky, feel free to add a little more flour 1/4 cup at a time until it comes together. The dough should be moist, but not so sticky that it sticks excessively to the bowl or dough hook. If you don’t have a mixer and would like to knead by hand, extend the kneading time by 5-10 minutes.
- After 15 minutes of mixing, the dough is ready for proofing. Cover the bowl with a damp towel and place in a warm spot for 1 hour. The dough will grow to 1.5X its original size.
Assemble the red bean bread:
- Grease one standard loaf pan on all sides with butter. Also, line a cookie sheet with parchment paper.
- After the hour of proofing, put the dough back in the mixer and stir for another 5 minutes to get rid of air bubbles. Dump the dough on a lightly floured surface, and cut it in half. Set aside one half for a red bean swirl loaf, and cut the other half into 8 pieces for individual red bean buns.
- We’ll start with the buns. Here’s where the fun part comes in. For each bun, use about 2 tablespoons of red bean paste. For a standard red bean bun, just roll one piece of dough into a ball, flatten with your hand or roll out to half inch thickness and place the red bean filling in the center. Pinch the dough closed around the red bean and place on your cookie sheet, seam-side down.
- To make some slightly more interesting shapes, just follow along with the pictures! You can roll them like cinnamon buns, and then make strategic cuts with scissors to add a decorative flair. Check out this post to see how to make the pretty swirl shape shown here.
- Okay, now for the red bean swirl loaf. Take the first half of dough and shape into a rectangle. Roll out to a little less than ¾-inch thickness with a floured rolling pin, maintaining a rectangle shape. Now, take a few big dollops of red bean paste and spread over the center of the rectangle, leaving a few inches on either side of the rectangle and one inch along the top and bottom. The paste should be spread to about 1/8-inch thickness.
- Fold over each side of the rectangle so a seam runs down the center of the dough. Pinch all the open edges closed.
- Next, roll out the dough to flatten the seams and make the rectangle of dough roughly as large as it was when you started. Then, fold the dough into thirds (like you would if you were folding a piece of paper to put into an envelope). Roll it out into a rectangle once more. Add more flour to the dough/board if necessary.
- Repeat the step of folding the dough into thirds, but this time, roll it out just so that the layers press together and the piece of dough is the length of the loaf pan. Make two lengthwise cuts in the dough so you have three segments. Braid the pieces with the layered sides facing up. This will make for a really nice pattern when it bakes up. Pinch the ends of the braided dough together and gently place into your buttered loaf pan.
- Let the buns and the loaf proof for another hour. Preheat the oven to 350 degrees F. Brush the risen dough with egg wash. Bake the buns for 18-20 minutes and the loaf for 35-45 minutes. Remove from the oven and brush the bread with sugar water to give them a really great shine, sweetness, and color.
- These don’t keep for too long, so if you don’t gobble them up right away, best to store them in the refrigerator and then heat them up in the microwave for 20 seconds. The red bean swirl loaf is excellent sliced, toasted, and served with a little butter.
- If you have red bean paste left over, it keeps really well in a tupperware in the fridge. If you want to make another batch of these buns, when the time comes, just warm up the paste ever so slightly in a small pot—just enough to make it easily spreadable.